
A short guide on how to Repair Nikkor-Q 135mm f3.5 Lens.
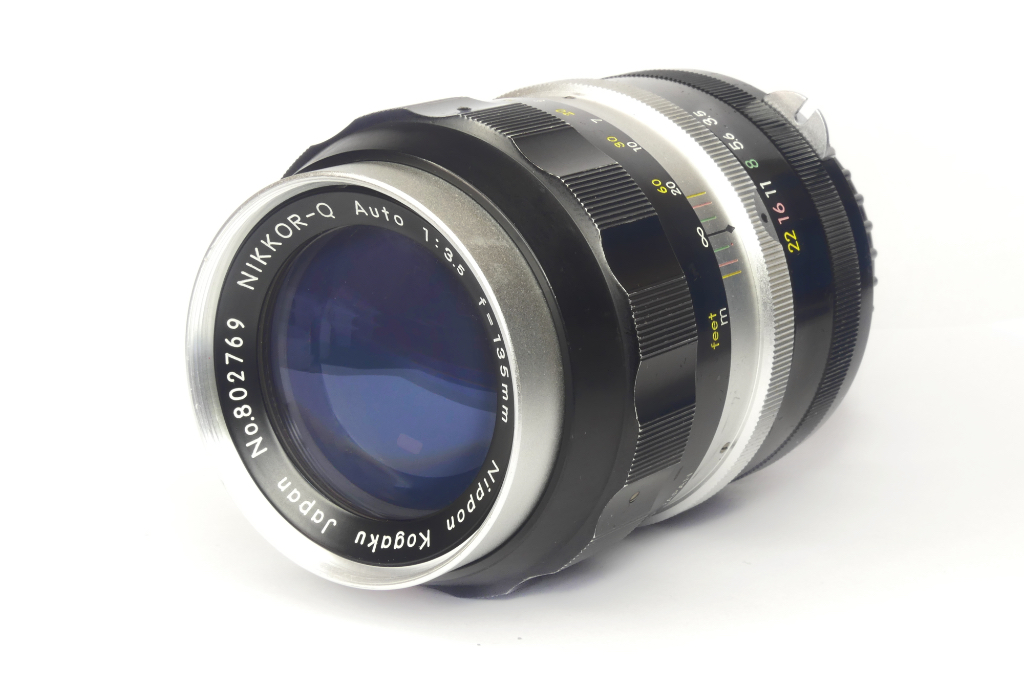
Nikon has been making the 135mm f3.5 lens since around 1959. The first version was around from 1959 to 1969 and was called the Nikkor-Q. The original lens had 4 elements in 3 groups and is easily recognised as its focal length on the beauty ring is in cm rather than mm and reads 13.5cm. The mount type was Nikon F Non-AI.
The slightly revised version ran from 1969 to 1979 using the same 4 elements in 3 groups design and is easily identified by its focal length being in mm as shown on its beauty ring. Mount types for these was Nikon F and non-AI but some versions would have been converted to AI either by the factory or aftermarket technicians.
Nikon produced many different versions of this lens but across its lifespan there were only 3 optical variations although coating techniques were improved over time and the lens was produced with two different diaphragm mechanisms – one with 6 blades (this one) and a later version with 7 blades. This guide covers and early version believed to be from the 1959-1969 version as it carried the Nippon Kogaku name rather than Nikon but all early versions will be nearly identical. Nikon dropped the NK name around 1966 but some lenses continued to be badges as NK as late as 1970.
It should be noted that Nikon struggled with 35mm SLR lenses in the early period and lenses from this era can show a lot of internal messing about with additional holes, slots and scriber markings all done by the factory as Nikon tried to get to grips with the design and production issues.
This lens was acquired is very poor condition and had a very loose focus due to the focus helicoils having dried out, vaporised grease in parts its shouldn’t be and a poor feel to its aperture control ring which was spongy and lacking in ‘click’.
NOTES ON WORKING ON THE NIKKOR-Q 135mm f3.5
The Nikkor-Q 135mm is a relatively easy lens to work on for the most part but like many vintage lenses it has its foibles. It is absolutely critical with this lens that you mark the helicoils for infinity focus and separation points. Failure to do so will result in a lot of issues during reassembly.
The internal construction is very solid but it does have its oddities compared to some other manufacturers evidence of the struggle Nikon were having adapting to 35mm SLRs.
You will absolutely need a good set of screwdrivers for this lens that are correctly sized. Attempting this repair with amateur tools will result in problems. I would recommend the pro-set of screw drivers from Polar Bear Camera together with the special Nikon driver for removing Nikon slotted screws on the lens mount if the lens has slotted screws.
Screws on Nikon lenses are typically hard to deal with, Nikon used a lot of thread lock and lacquer on the screws. You will need Isoprop and Acetone to remove these or use the tip of a soldering iron to head the screw head which will weaken the thread lock.
Be careful when tightening screws. Much of the lens is composed of a light alloy and threads can be stripped easily. You should apply no more than hand tight when holding the screwdriver between thumb and forefinger.
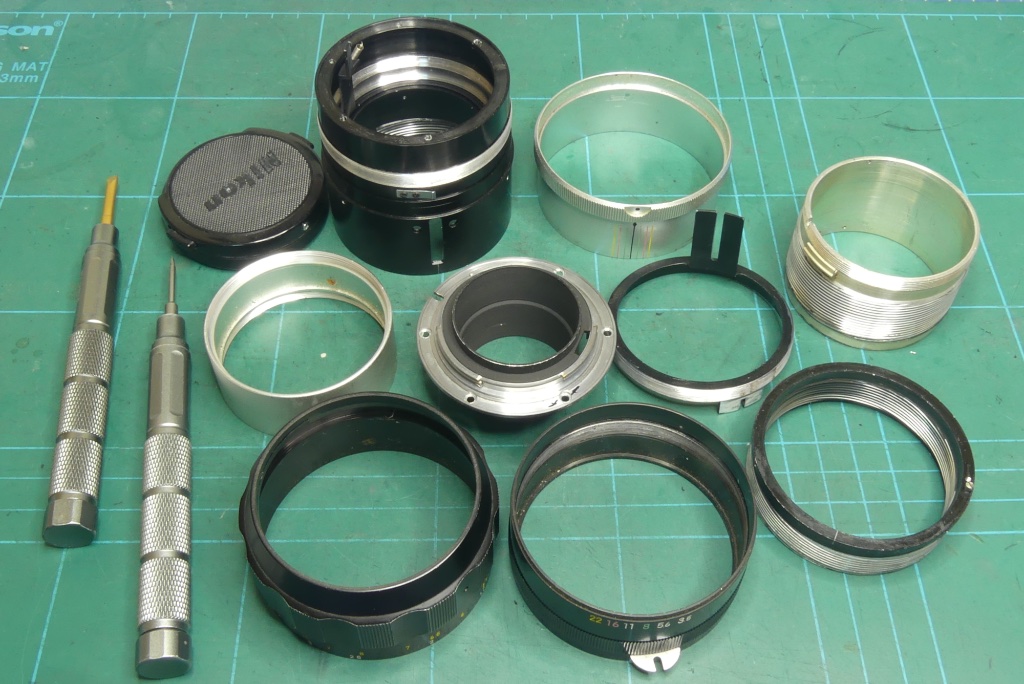
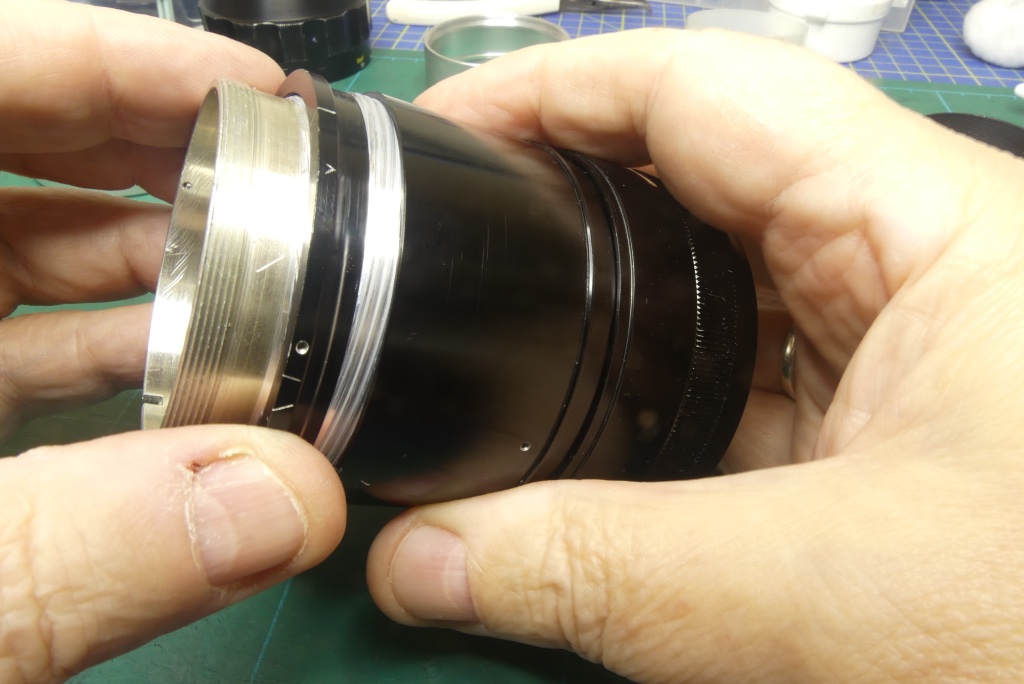
Nikkor-Q 135mm f3.5 NAI Lens – Stripping Down

Set the lens to infinity. As you work on the lens at the initial stages make sure that the infinity position is retained. Like many old lenses you will most likely find the lens comes to infinity just at the start of the infinity mark and focuses slightly past infinity.
This is quite common as the manufacturers built in an allowance for glass expansion.

Remove the 3 small screws from around the lens focus barrel. These can be very well stuck down. Try to avoid using acetone for these as it will remove the painted finish. Dab with Isoprop and give the Isoprop at least 15 minutes to get to work.
A correctly sized screwdriver will help you avoid damaging the screw heads. With the screws removed simply pull the focus barrel free.
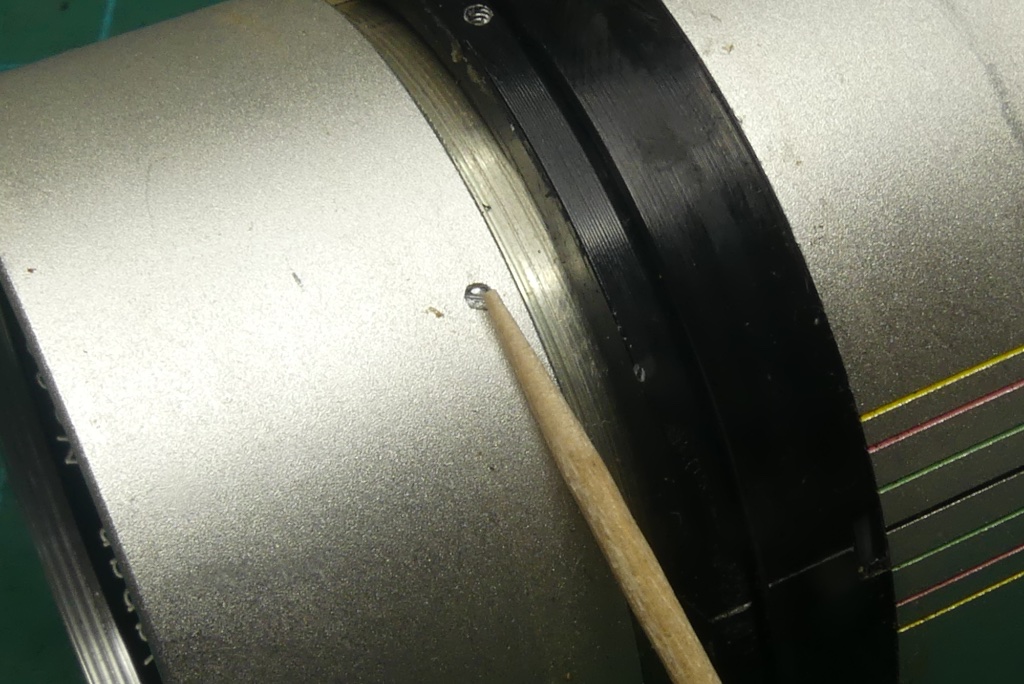
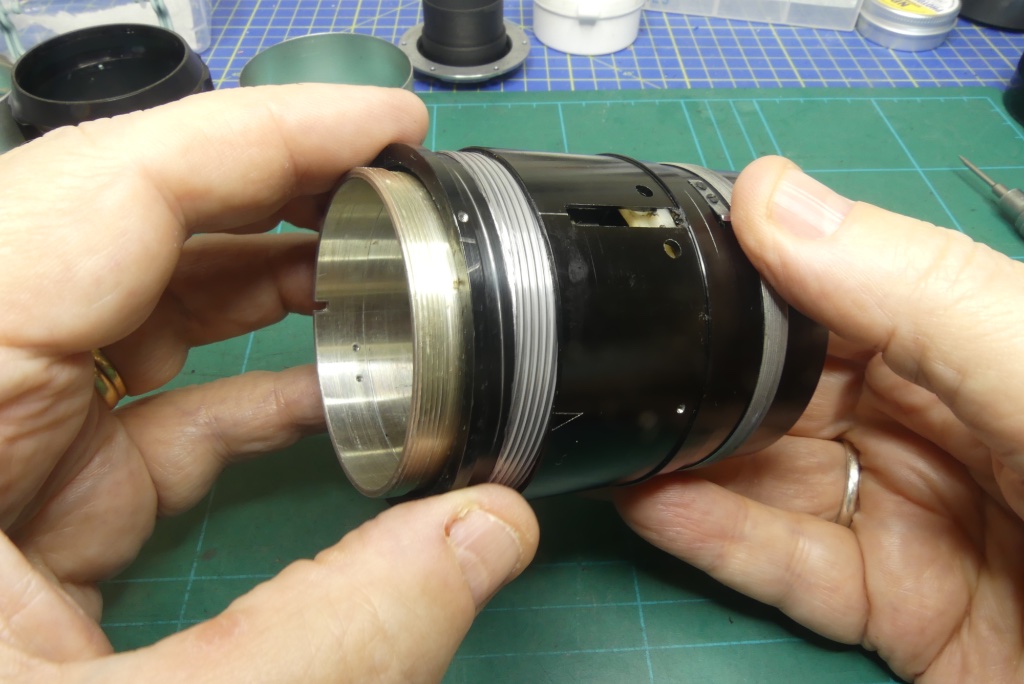
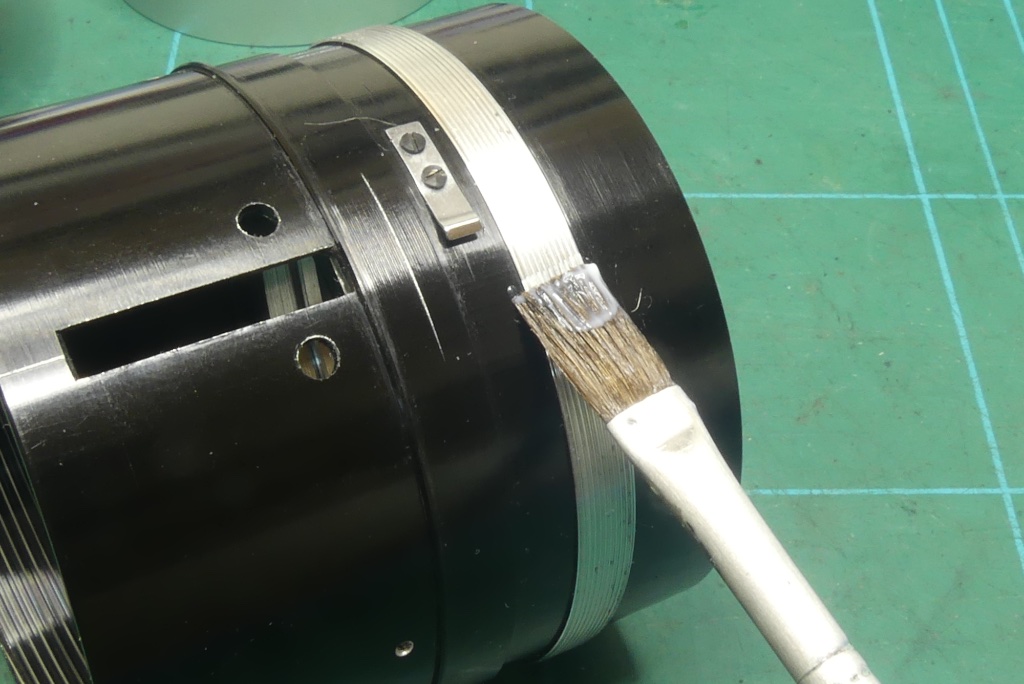
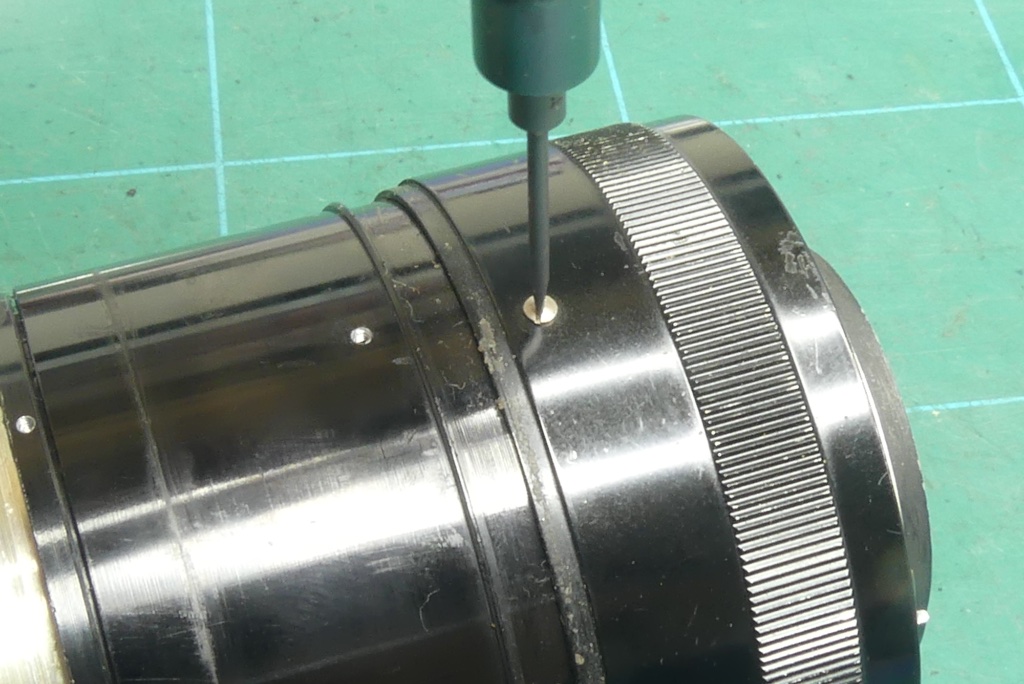
Remove the small grub screw from the filter ring and then unscrew the filter ring.
With the filter ring removed note the small hole that the grub screw fitted into. This is critical on this lens as the only thing holding all of the optical assembly in place is the filter ring which in turn is reliant on this grub screw.
Some versions of the lens will have two additional screws which retain the optical assembly which need to be removed. They were not present on this version.
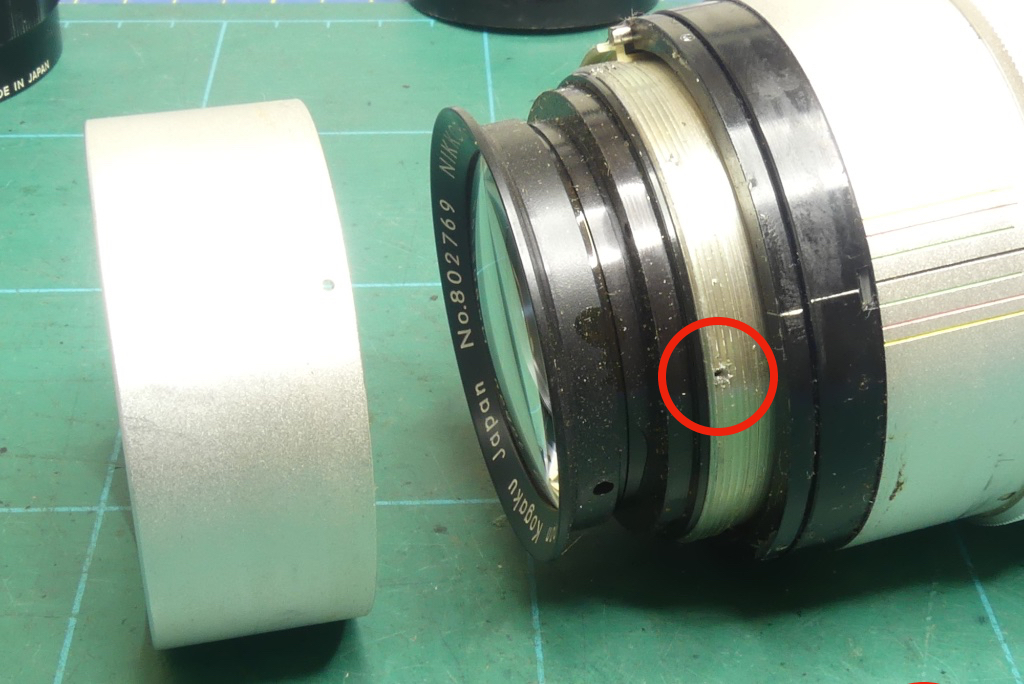
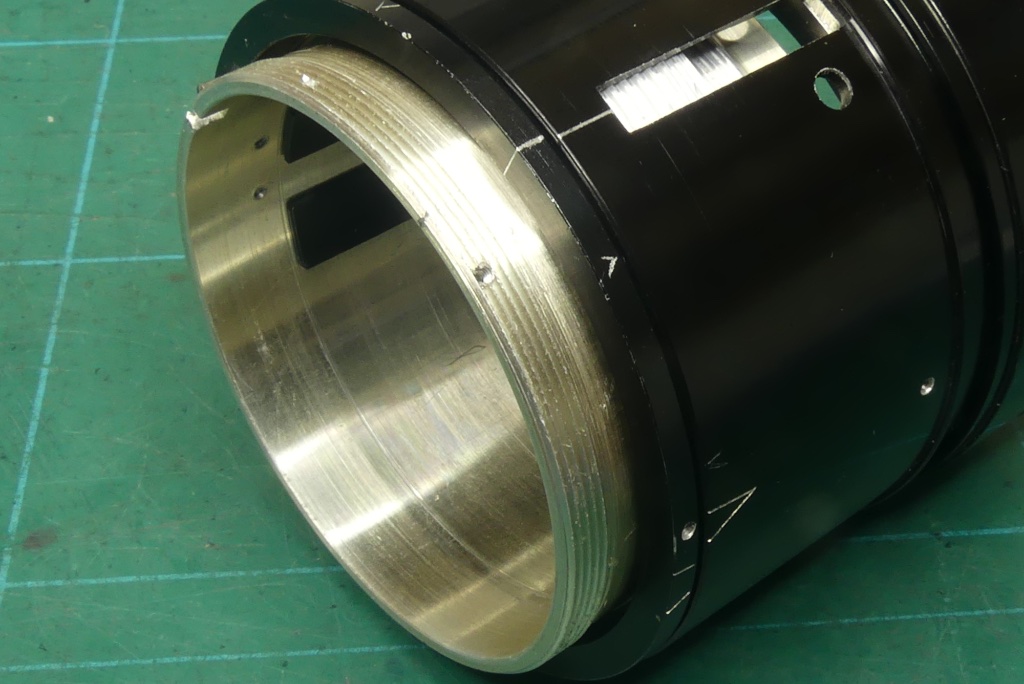
This was taken as the optical assembly was removed – you can see the helicoils have been marked for their infinity position with a scribe mark.
On lenses of this vintage this is absolutely critical and is generally good practice with any lens.

With the filter ring removed, and the two small retaining screws if present, removed the entire optical assembly will now pull free from the lens body.

The ‘core’ of the lens is the optical assembly which includes both front and rear optical blocks plus the diaphragm mechanism. On this lens the core element was dirty on the outside only – internally the optics were pristine with no dirt or fungus present.
Its never smart to start messing with optics that are already perfect so this will just have an external wipe down to remove dust and dirt.

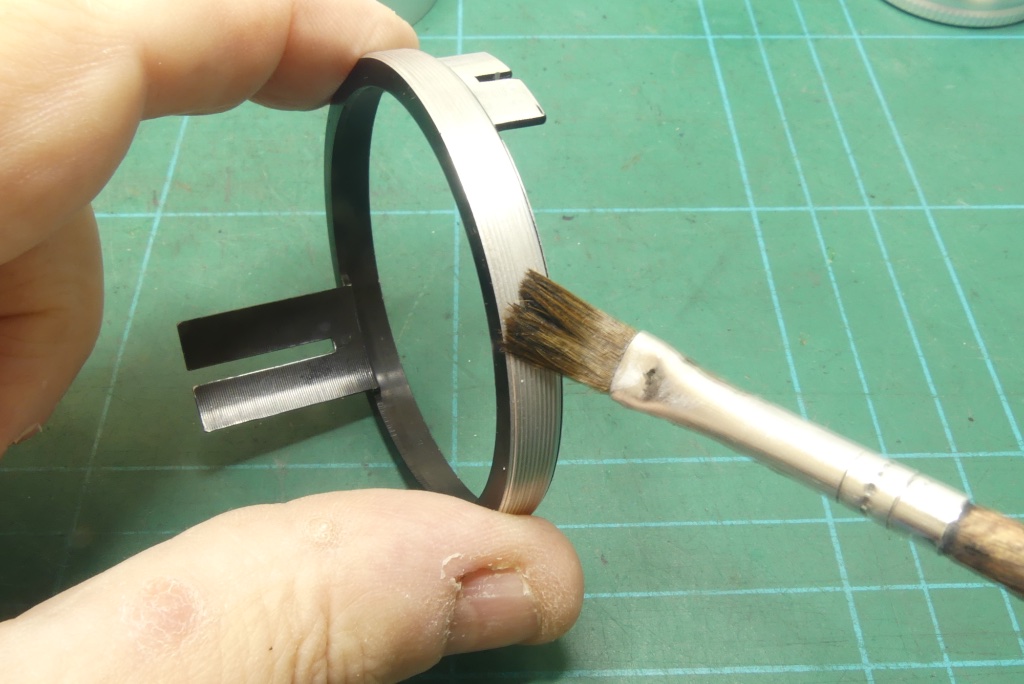
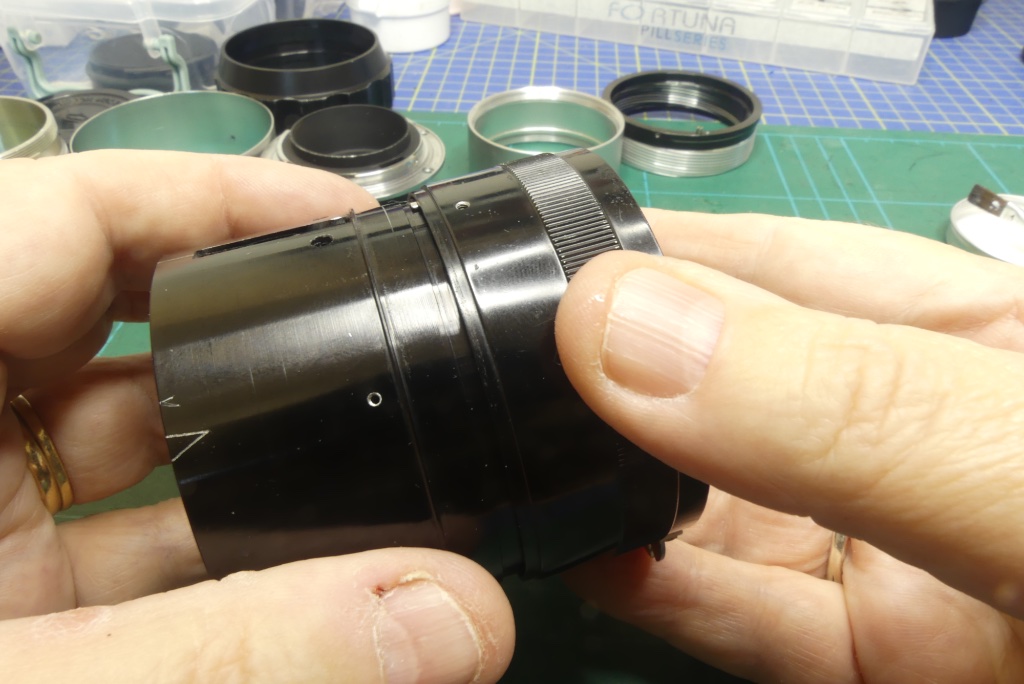
Remove the three sleeve retaining screws around the sleeve.
Slip the sleeve off of the lens body.

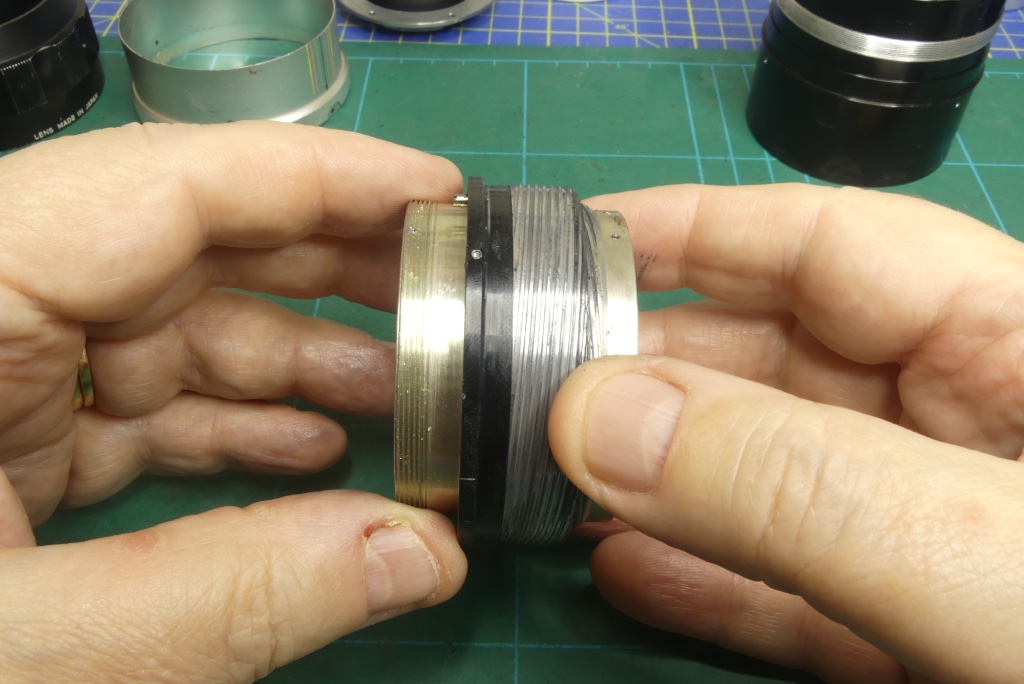
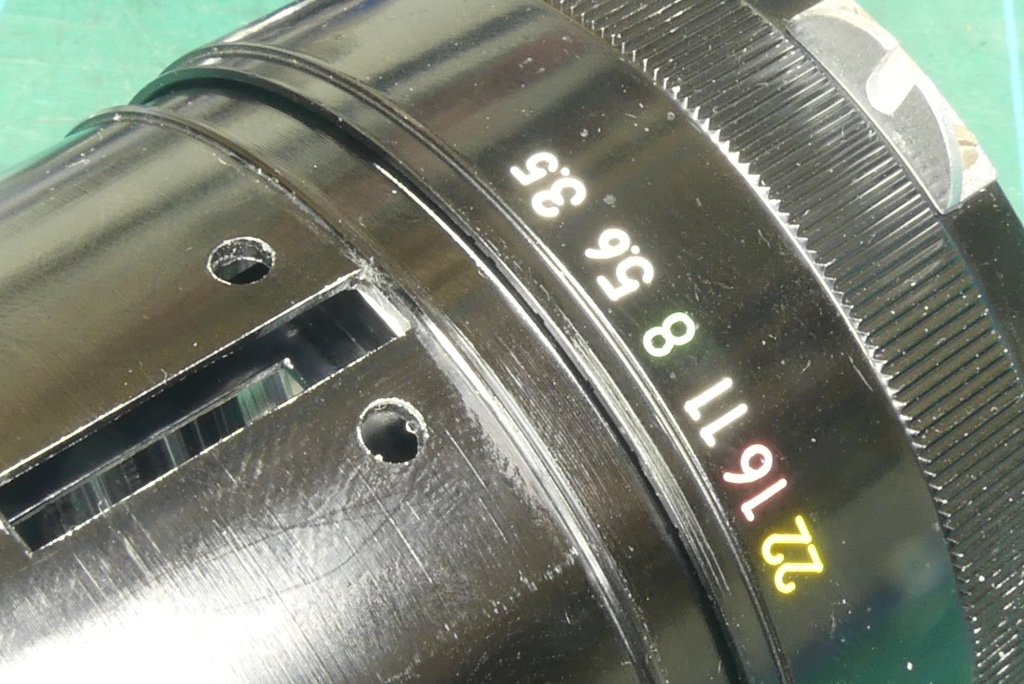
Scribe a line where the aperture ring ends – this will aid in re-assembly later. Then remove the aperture ring screw.
This screw activates the inner aperture control ring which you will see later.

Unscrew the aperture ring.
You can see in this picture the scribe mark indicating where the ring fitted.

Remove the screws securing the mount ring. For dealing with Nikon screws apply either some Isoprop or Acetone to soften the thread-lock OR use the tip of a soldering iron to heat the screws up.
The special Nikon driver bit sold by Polar Bear Camera will make this a lot easier and avoid chewing the screw heads.

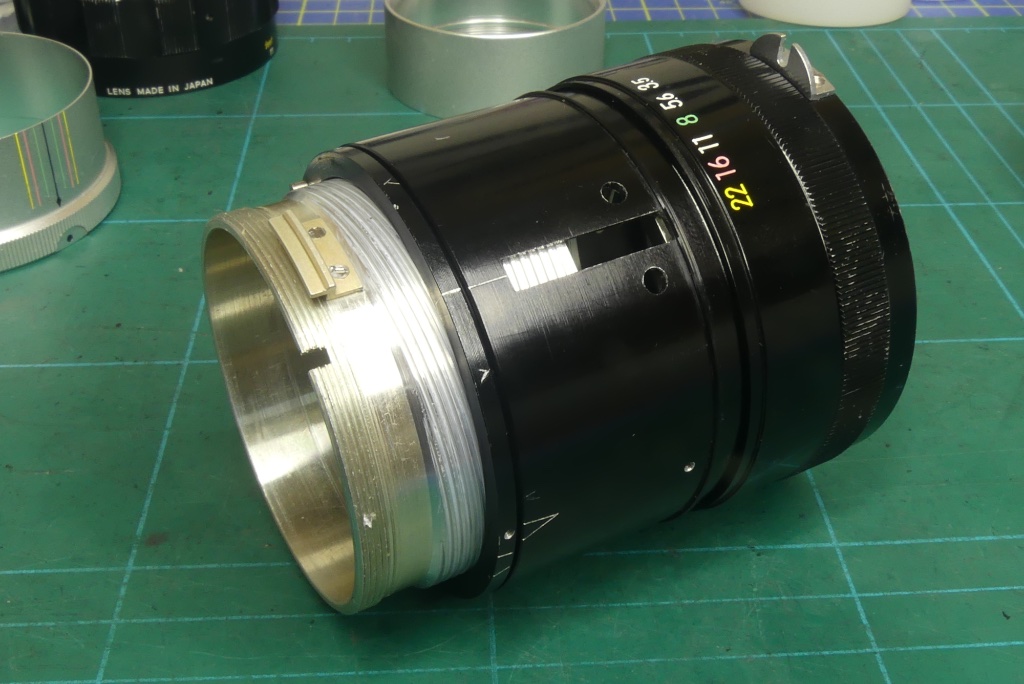
The mount plate simply lifts off. There are no mechanics to it at all as all of the aperture functions are controlled by the lens body and the core assembly. Note though the slot for the aperture stop down lever.
From this point on exercise mindfulness – its very easy to sit the lens down on its base and apply pressure and break the aperture stop down lever.

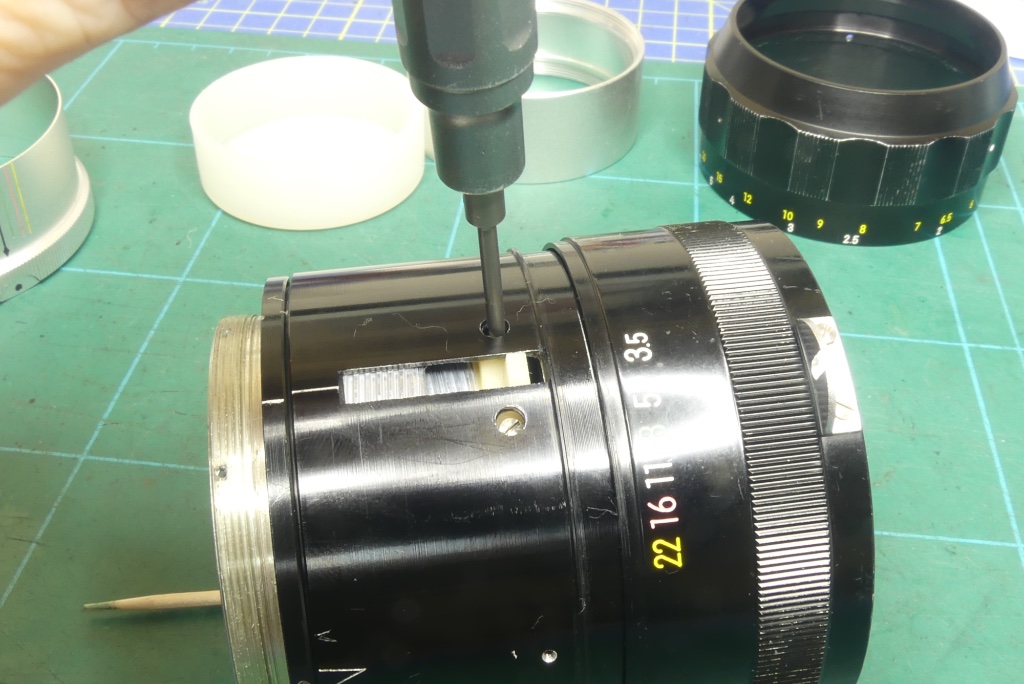
Due to the heavy oil contamination inside the lens body the interior of this lens will need a lot of cleaning so I am going to take out the aperture control ring.
To make this easier I will remove this small spring for the stop down lever. The spring is tricky to remove and even tricker to get back on so be warned.

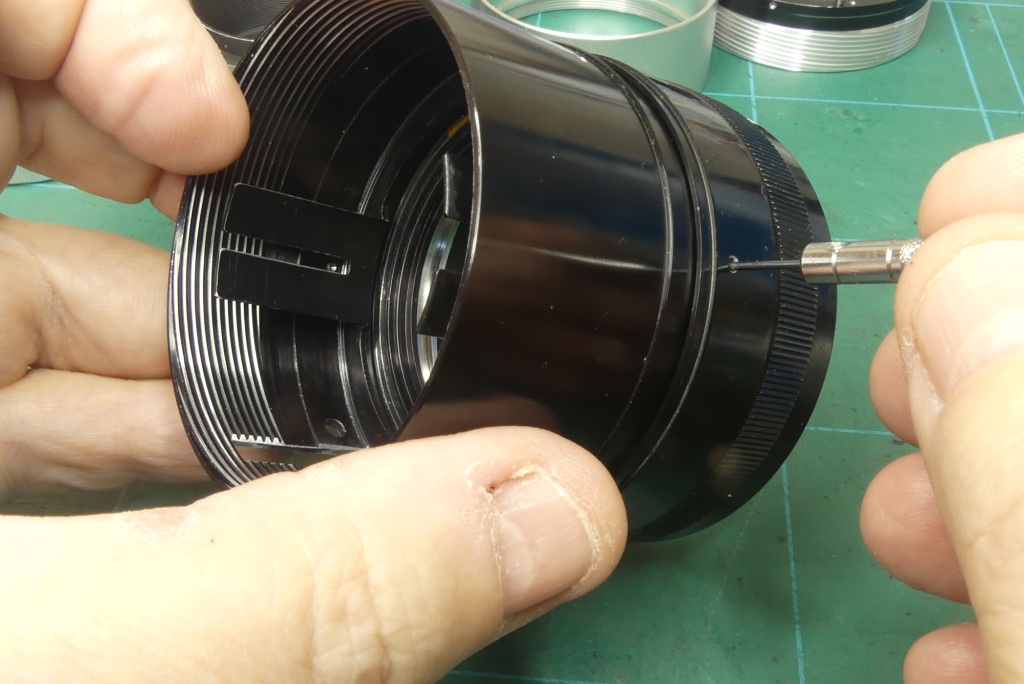
To release the helicoils you need to remove the helicoil key. This is secured by two screws. These are often thread-locked so you will need to use some heat or Isoprop. The key itself is plastic so be careful with heat and avoid Acetone.
Make a note of the helicoil key orientation they are sometimes different. The 135mm is opposite to the 35mm in one of the other guides.
With the helicoil key out the outer helicoil can now be slowly turned out of the lens body.
The helicoil key can be recovered once you have some space with the helicoils wound out.
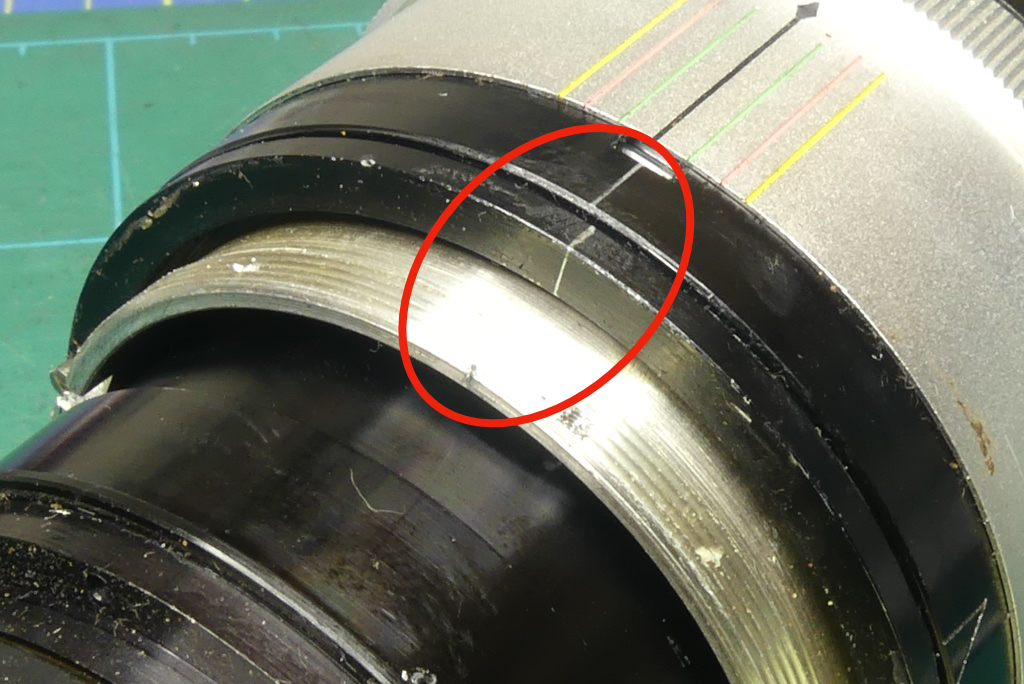
It is absolutely critical you mark the separation point so you can find the correct thread entry point later.
Now remove the inner helicoil and make sure you mark the separation point. In some ways on this lens it was easier to know the thread entry point.
With the correct thread entry point the lens stop block would meet the stop screw at infinity if the thread entry point was correct but its always wiser to mark the helicoils.
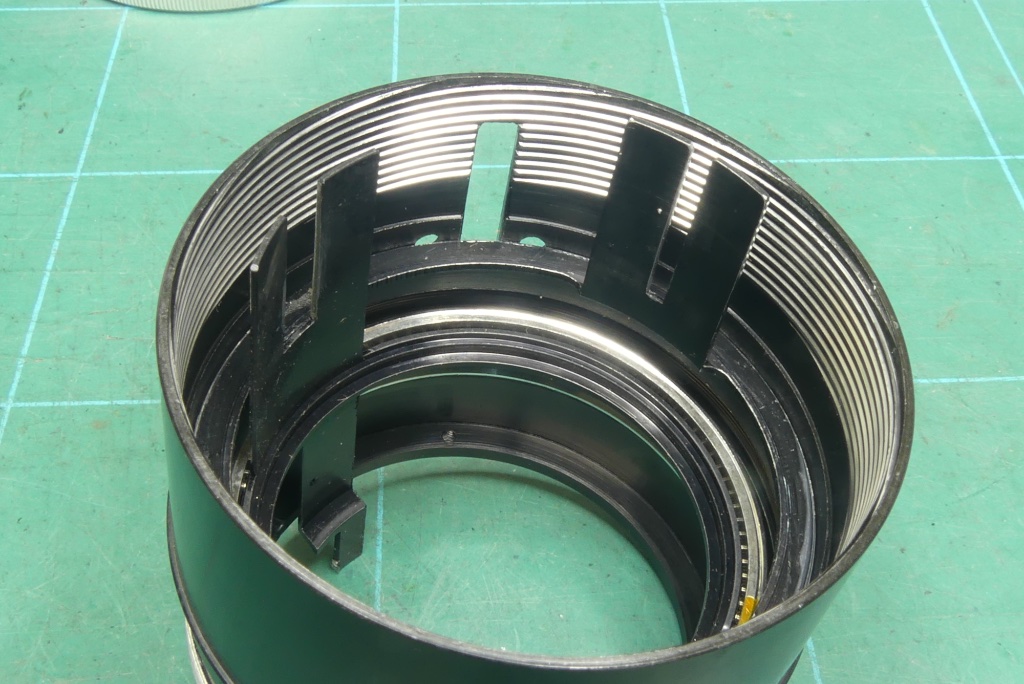
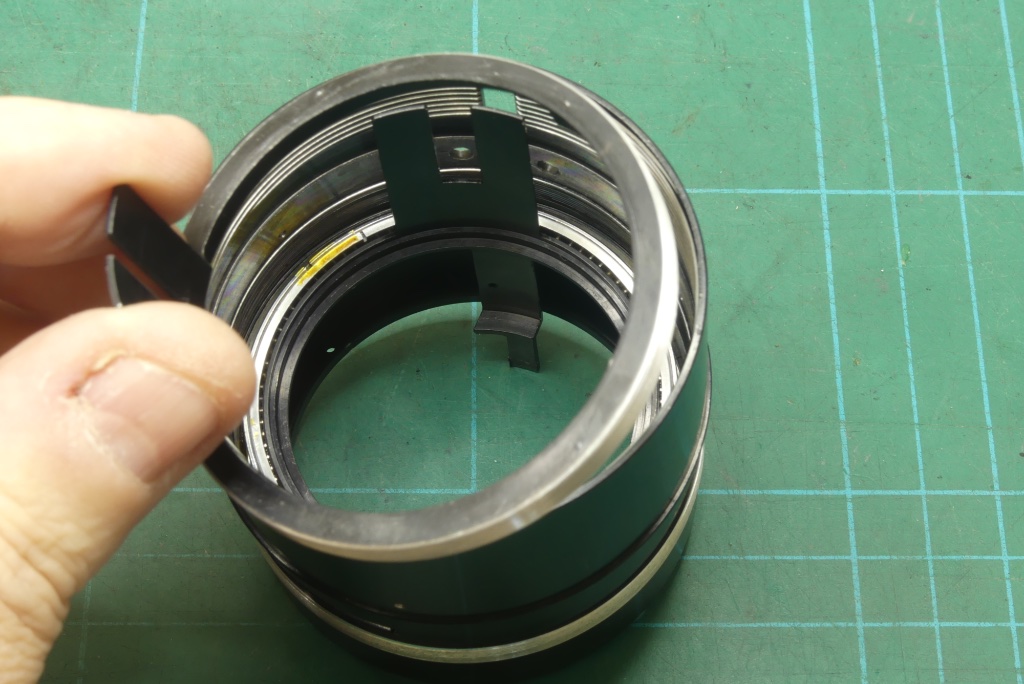
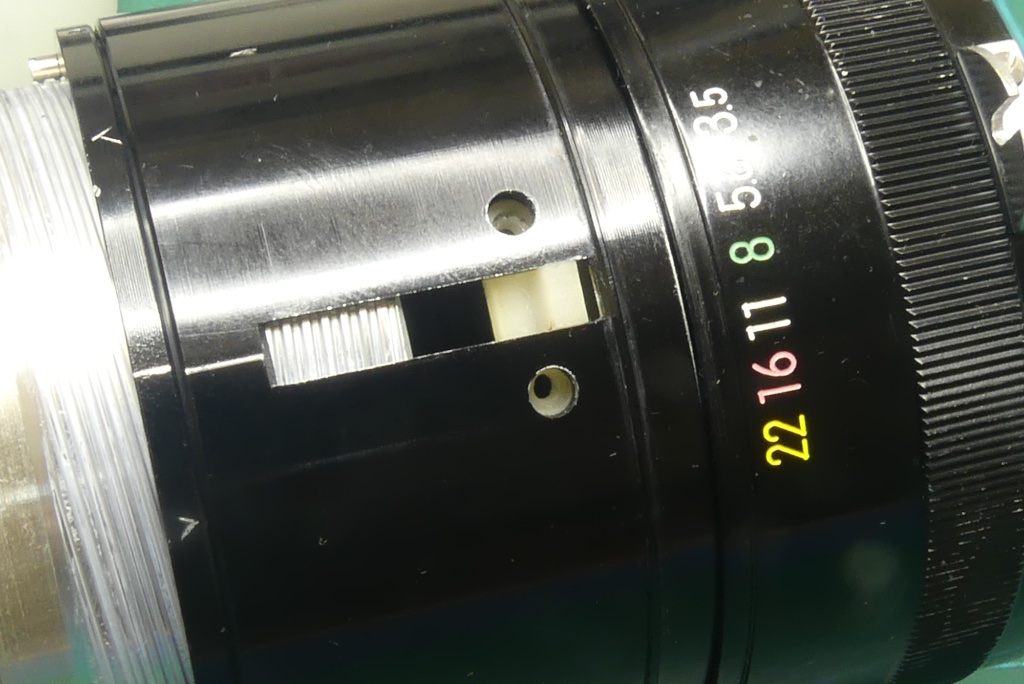
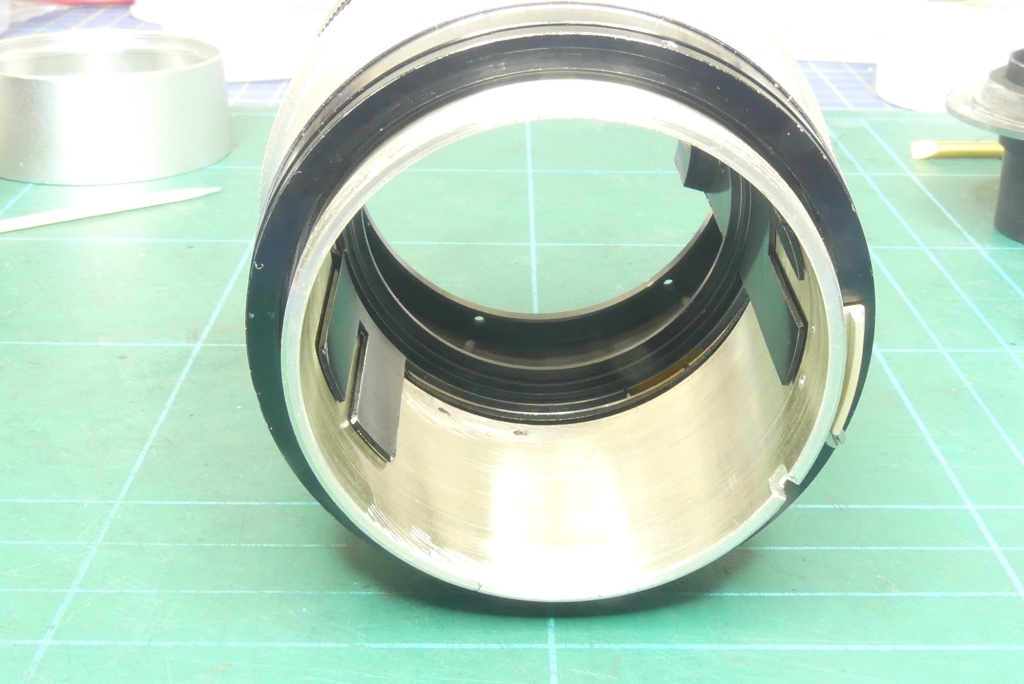
Inside the lens body you will see the two aperture control forks. The one with the larger gap is the stop down lever, the one with the smaller gap is the aperture control lever.
The aperture control lever has a small tab on its base with a slot for the screw you removed from the aperture ring earlier. Examine the aperture control fork and note its relationship to the slot on the lens body.
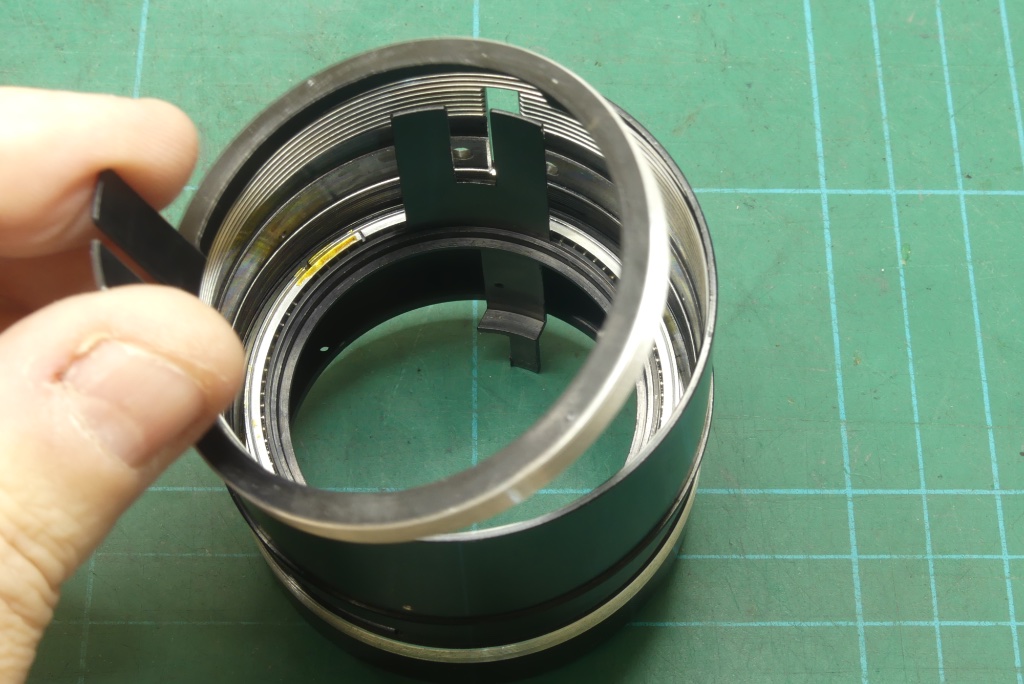
Make a note or mark up where the aperture control ring and fork are and then this can be unscrewed from inside the lens.
This is tricky to replace but on this lens the dried grease inside left no choice but to remove it for cleaning.
Nikkor-Q 135mm f3.5 NAI Lens – Cleaning
With the lens mechanics disassembled its time to clean all of the barrel parts. For this lens the optics were as clean as they could be so there was little point disassembling the optics. Richard Haws has a guide if you want to go that far into the lens. Generally unless you have fungus or issues to deal with its best to leave sealed optical assemblies alone.
For cleaning you will need a soft toothbrush, cotton wool balls and Isopropyl Alcohol (IPA) and a lot of patience. I generally clean down with hot soapy water first and then soak the helicoils in IPA for a few hours before wiping down with cotton wool. The threads on the helicoils are extremely fine and the smallest piece of grit or dried grease will cause problems later on. Usually the threads are chased out with a fine needle and/or a cocktail stick before cleaning again.
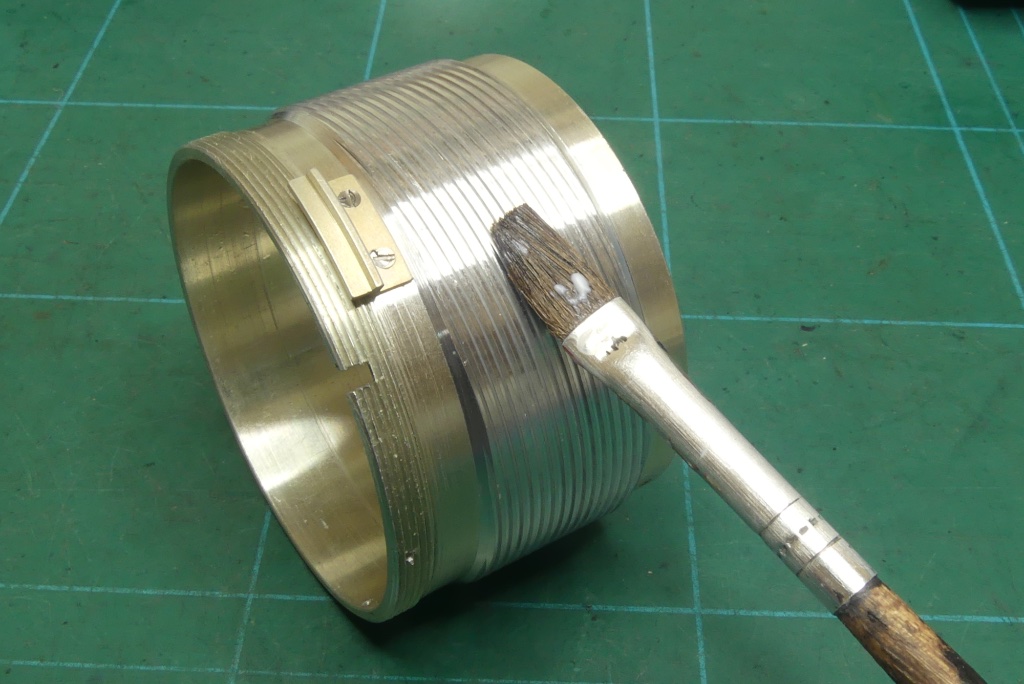
The aperture stop down ring in this lens is semi sealed into the lens body. There is no real reason to remove it. It contains a great many ball bearings and is awkward to get out. To clean the grease out I simply immersed the whole body unit in hot soapy water, scrubbed out the threads for the inner aperture control ring and then flushed the whole assembly with clean water and then used a hairdryer to dry it. The threads for the aperture control ring, filter ring and aperture ring were brushed clean with isoprop, a soft toothbrush and cotton wool until no old grease was seen.
All threaded parts were similarly cleaned and the silver anodised rings cleaned with some ‘Bar Keepers Friend’ which is excellent for removing small scratches, staines etc but be careful on painted surfaces it is quite acidic and somewhat abrasive. The dirty lettering was cleaned with a soft toothbrush and toothpaste to get the lettering nice and bright.
My own view on cleaning is to get the parts absolutely spotless prior to reassembly to give the lens the longest life before any further servicing is needed.
Normally when I rebuild a lens I will strip and clean EVERYTHING – it makes sense to get everything as perfect as possible to avoid future issues.
General note on lubrication: Normally on lenses I use Helimax XP as a general purpose helicoil grease. Helimax XP is readily available and works well for most lenses. On this lens though I am using Polar Bear BC-13A which is a substitute for Nikons own grease which is no longer available. Getting the dosing right for lenses is often hit and miss so you are advised to get a feel as you re-assemble the lens at each step. To get a feel you really need the focus barrel back in place and this can be readily refitted when the helicoils are assembled to check for feel. Too much grease will make the lens focus throw very stiff. Too little with make the lens focus throw feel too light.
Nikkor-Q 135mm f3.5 NAI Lens – Replacing the Aperture Ring Assembly
The inner aperture ring is given a light lubrication using Polar Bear Camera Grease Type BC-13A.
Lubrication needs to be very light here.
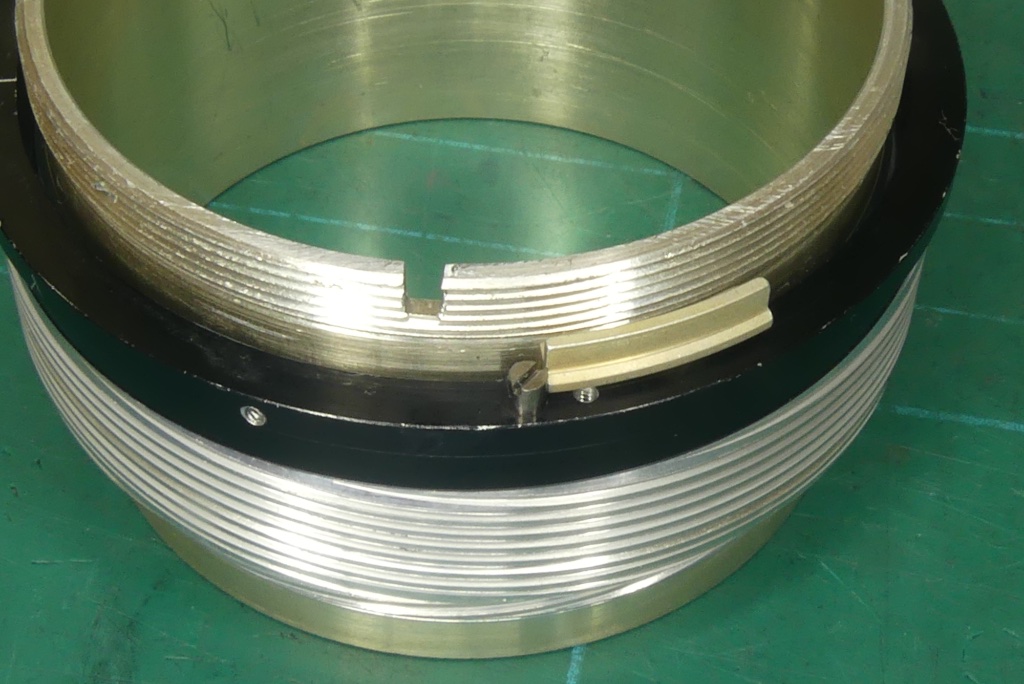
Note the small tab on the ring with the slot in it. The slot is for the outer aperture control ring screw.
And now the internal aperture control ring is replaced. Positioning of this ring is critical and the following images will show you how this needs to be aligned.
This can be tricky to get back in place but its easier with the small spring removed from the stop down lever. Be careful not to cross thread this – the threads are very fine.
The inner aperture control ring needs to be aligned such that the slot on the small tab comes into view through the slot in the lens body. This is what the outer aperture control ring screw fits into.
Centre the slot in the aperture ring as shown.
Make a note of where the forks of the aperture control ring are located inside the barrel.
Lightly grease the aperture ring threads on the lens body using the BC-13A grease. And apply a light dose also to the aperture ring threads.
The small metal tab that provides the aperture click stops can be slightly bent upwards to provide a firmer click to the aperture ring if need be.
The aperture ring can now be threaded back on to the lens body. You will need to press the smal metal tab down a little to get the aperture ring on.
It’s easiest to start the thread with the aperture ring detents opposite the the metal tab – otherwise the sprung tab will interfere with finding the thread entry points for the aperture ring.
Screw the aperture ring down to the scribe mark you made during the strip down. This will position the aperture ring to its original position.
You can see the scribe mark on the lens barrel in the picture.
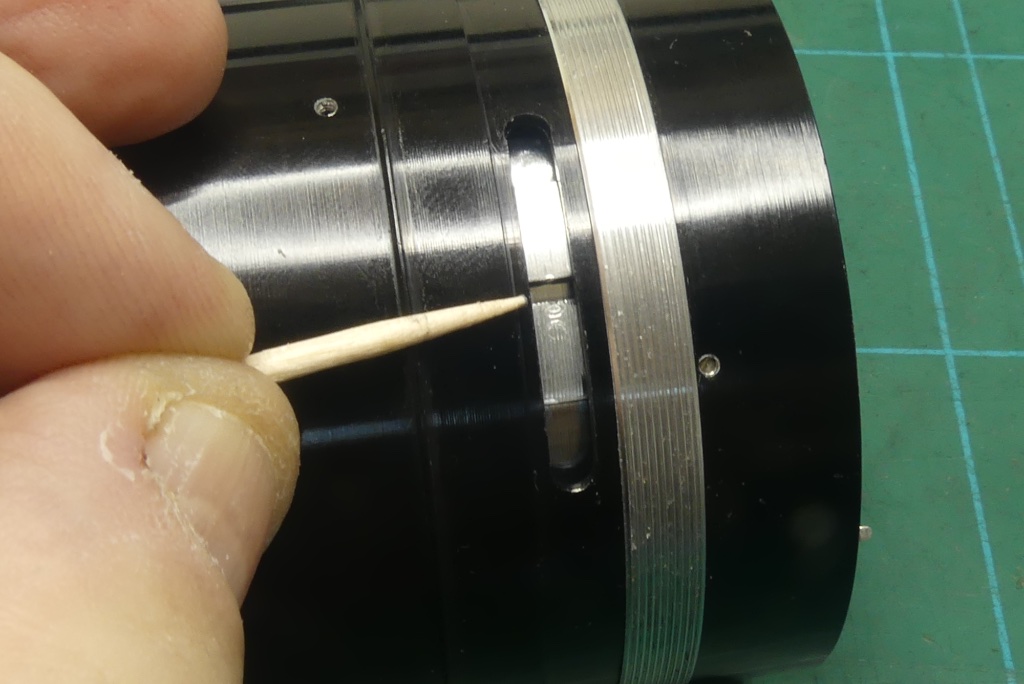
With the aperture ring in place its quite impossible to see the slot on the inner aperture ring tab. If you marked this up earlier is should align roughly to the middle f stop but I have found the orientation can shift slightly.
I use a thin probe to feel for the slot on the inner tab in order to orientate the aperture ring screw position.
Once the slot on the inner aperture ring is located correctly replace the aperture ring screw and then test that all is well by moving the aperture ring back and forth and checking that the inner aperture ring is moving correctly both backwards and forwards.
Once you are happy remove the screw and replace with a small dab of thread-lock.
Replace the stop down lever spring. This can be very awkward to exercise patience here.
Nikkor-Q 135mm f3.5 NAI Lens – Replacing the Focus Helicoils
Apply BC-13A grease to the inner helicoil and also to the outer helicoils inner threads, Wipe off any excess.

Using the thread entry point marks you made when removing the inner helicoil replace the inner helicoil into the outer helicoil. You can be sure that the inner helicoil is correct when the inner helicoil is blocked by the stop block (see next picture) with the two marks for infinity on the inner and outer helicoil aligned.
You can see in the picture the infinity mark for both helicoils is aligned.
The inner helicoil will be correct when the stop block on the helicoil is blocked by the set screw on the outer helicoil.
The inner helicoil will only fit on one thread entry point where this is possible.
Apply BC-13A grease to the outer helicoil and also with its recieving thread on the lens body.
The inner helicoil is now replaced using the same approach as the outer helicoil – eg using the thread entry point marks and a mark to indicate infinity. These dont show well in this picture.
You can see here that the outer helicoil, using the prevuiously marked thread entry point is back to its infinity marks.
On this lens it will be obvious if it is correct. If the wrong thread entry points have been selected the gap between the outer helicoil and the body will be either too large or impossible to achieve
Now unwind the helicoils enough so that you can insert the helicol locking key.
So long as both helicoils are aligned for their respective infinity points you cannot misalign them one to the other.
Insert the helicoil locking key.
Be careful of its orientation. On this lens the ledge is towards the back of the lens.
With the key inserted wind both helicoils back to their infinity position which will trap the key in place.
If all is aligned correctly at infinity the fixing holes for the key will be perfectly positioned.
Fix the locking key in place using the two screws. Be careful not to over-tighten. The inner helicoil threads are in quite a soft alloy which can strip easily if too much force is applied.
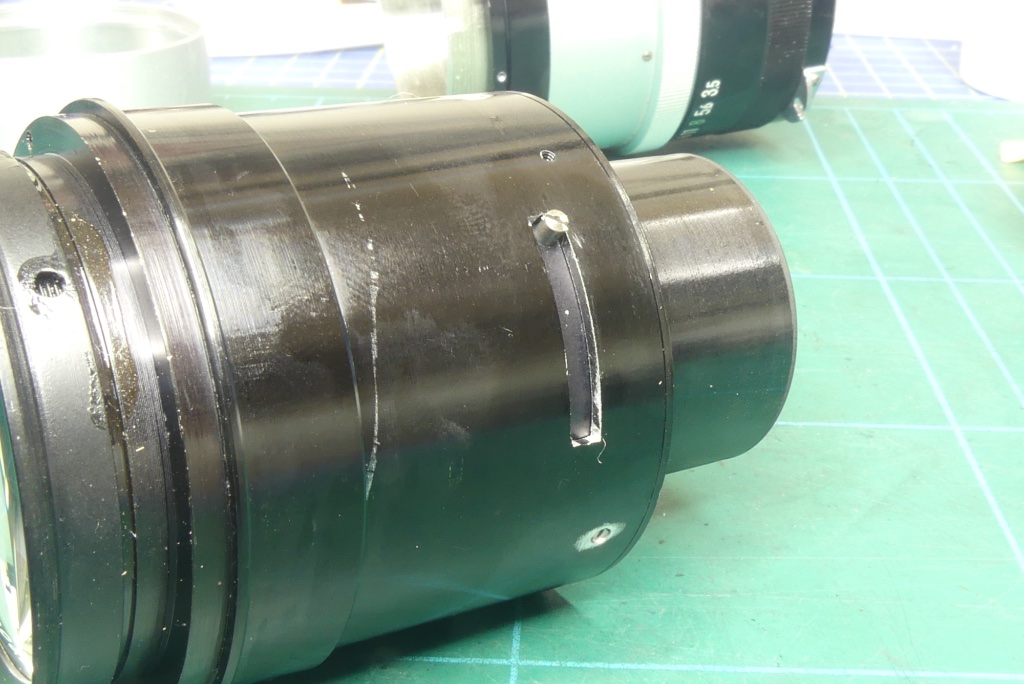
Nikkor-Q 135mm f3.5 NAI Lens – Replacing the Lens Sleeve

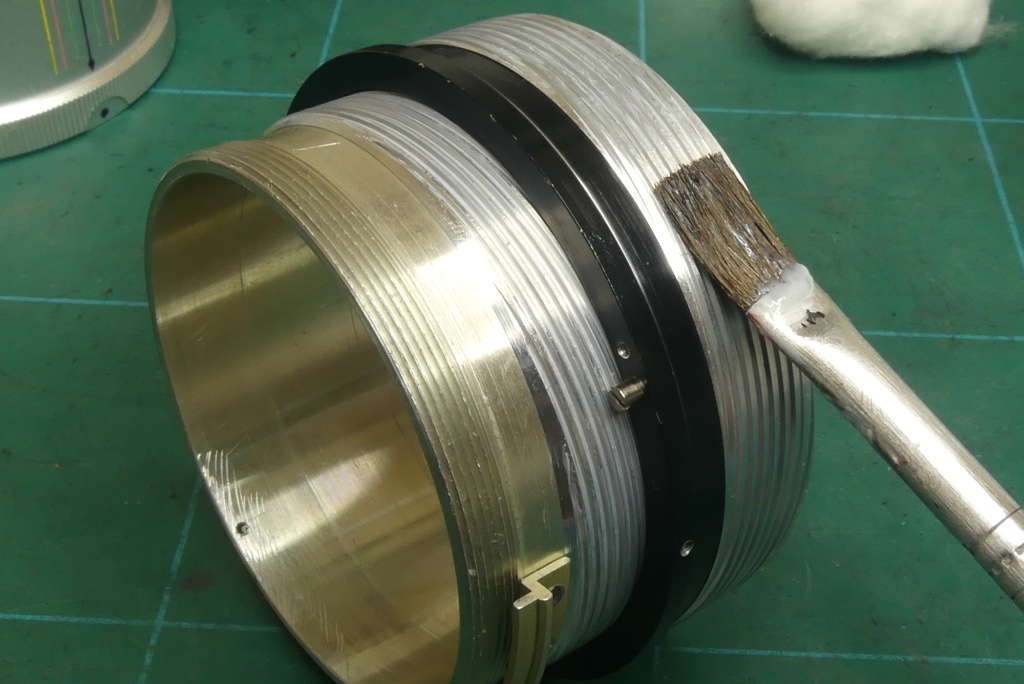
Replace the sleeve onto the lens body making sure it aligns with the aperture ring f stop markings.

Fix the sleeve in position with the three small screws around it. I usually use a medium strength thread-lock for these.
Nikkor-Q 135mm f3.5 NAI Lens – Replacing the Optical/Diaphragm Assembly
Looking down the lens you will observe the two aperture control forks. The stop down fork has a wide slot. The aperture ring fork has a narrow slot…
The optical assembly has a small screw which must locate between the narrow slot of the aperture ring fork.

The tab on the opposite side of the optical assembly must locate into the stop down fork slot.

Looking from the back of the lens will help you locate the positioning to ensure both of the aperture control levers are correctly aligned but it still relies on a fair amount of ‘poke and hope’ as visibility is not great. You should be able to feel for when the optical assembly is correctly located though.

Once the aperture control forks are correct you may need to twist the optical unit slightly to get its locating lug to fit into the slot on the inner helicoil.

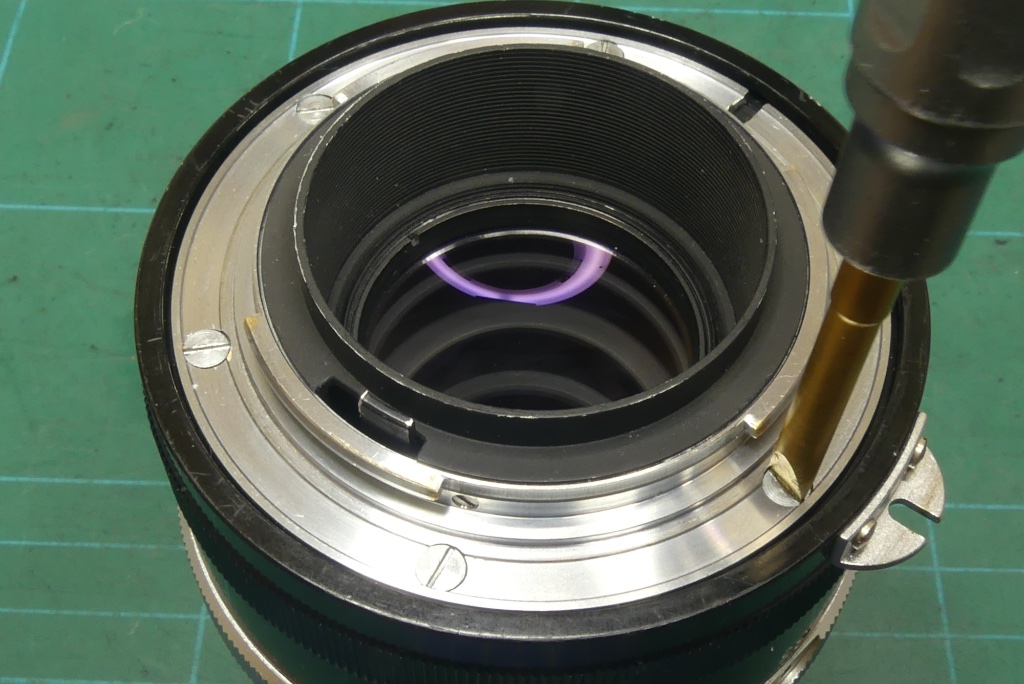
With the optical unit in place you need to fix the filter ring in position. It’s the filter ring which retains the optical assembly and its threaded into the inner helicoil.
You need to tighten the filter ring down until the small holes for the grub screw aligns with the indent on the inner helicoil. This may be quite a tight fit

Replace the small grub screw with a dab of thread-lock.
Nikkor-Q 135mm f3.5 NAI Lens – Replacing the Focus Ring and Lens Mount
Align the infinity point on the focus barrel and replace the barrel into the lens. Locate the three screw-holes and replace the three small fixing screws.
I normally only apply a single screw until I am happy the lens is working as expected. Once happy replace all screws with a small dab of thread-lock.
Replace the lens mount and its screws.
Mount the lens on a camera and check the infinity focus is correct and that the aperture control and stop down function as expected.
Check all external screws are replaced and use a small dab of thread-lock on each screw before refitting.
Nikkor-Q 135mm f3.5 NAI Lens – Outcome
After rebuilding the lens operated perfectly well. The aperture click was somewhat softer than I had hoped. I generally prefer a very ‘clicky’ feel but many older Nikon lenses do suffer a softer than normal click due to wear. The lens is perfectly usable and now able to return to actual use with me for use on my own Nikon F.
This particular version of the lens is well regarded by Nikon users despite its relatively humble specification and I will be looking forward to using it in the near future.
I hope you will find this article of use in your own lens repair and servicing.

Mel is one of the driving forces behind High 5 Cameras and writes all our articles.
Starting serious photography back in 1972. Over the years she got to shoot film with most of the major brands in 35mm and large format as both a studio photographer and content provider for websites in the early life of the web. These days she is rediscovering photography and has become the GOTO person for knowledge on camera repair advice.