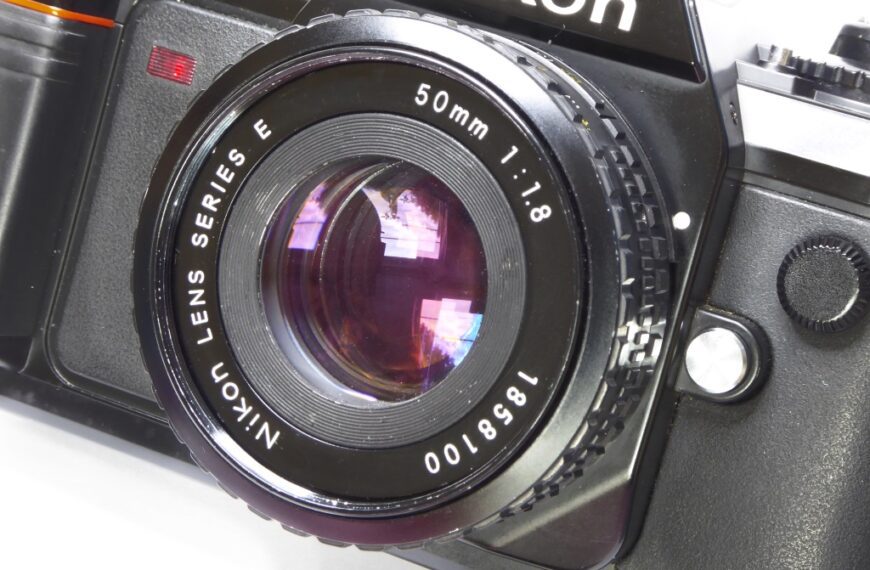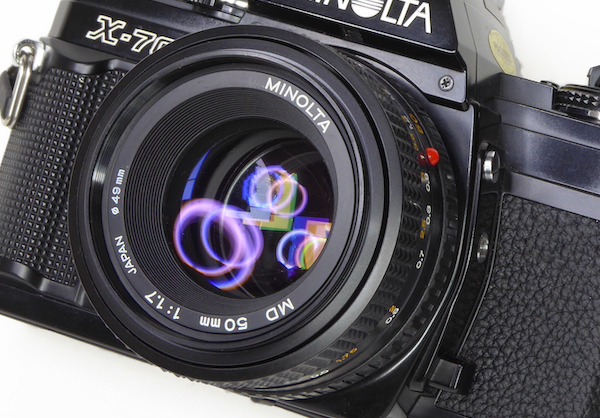
A step by step guide to repairing the underated Minolta 50mm f1.7 This Minolta MD Lens Repair Guide can also be used for many other short focal length MD series lenses such as the 50mm f2 (which is identical in construction) and the 28mm, 35mm and 45mm MD types. Most short focal length Rokkors share a very similar construction and while there may be minor differences the essentials will be almost identical.
This is NOT true of long focal length and zoom MD lenses which will be very different in design and construction.
The guide covers the late model MDIII series but the earlier MD series with 49mm filter threads will be identical. The earliest MD type with 55mm filter threads is somewhat different.
Copyright 2021 High5Cameras,
Free to use, copy and distribute so long as no charge is made for use,
distribution or access and authorship and web address is freely acknowledged.
NOTES BEFORE YOU START
The Minolta MD 50mm f1.7 is a relatively easy lens to work on but does have some small challenges – please bear in mind that this is a Minolta MD Lens Repair Guide, you may well face challenges inside the lens that you will need to work out. These can include stripped screws, deformed parts etc.
Read through the entire guide before you start to make sure you understand the basics and are aware of hat you may need in the way of tools and are prepared for any possible problems that may arise.
When working on one side of the lens (eg the front) always be mindful about what’s happening at the other side (eg the back). I always keep caps on as much as possible to prevent any accidents. The classic mistake is for people to press on the lens while it is on a workbench and break things on the downside of the lens like the aperture lever.
There is no such thing as luck in repairing optical equipment, if you do it right, using skill and patience you will be rewarded with a perfectly operating lens. A rushed or bodged job will result in the lens being devalued, unpleasant to use and possibly unusable so…..take your time, get the right tools and materials, don’t take shortcuts or advice from people who know less than you (check out my camera history here).
There are no prizes for fastest or almost working in the world of lens repair so read the Minolta MD Lens Repair Guide from end to end before starting to familiarise yourself with the process.
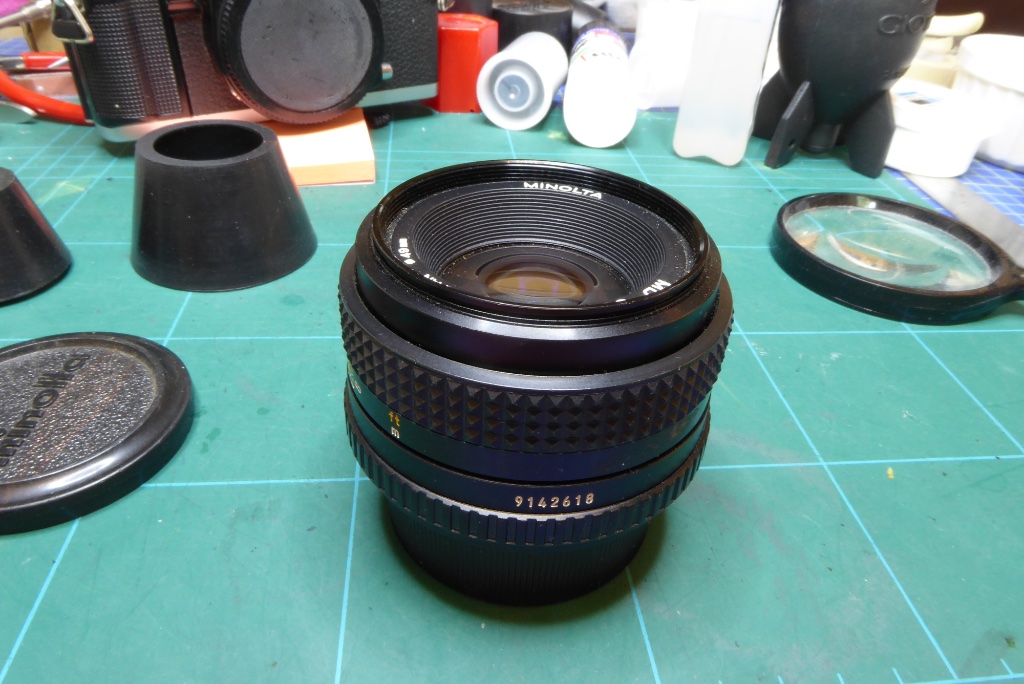
Start by putting a rear lens cap on while you work on the front part of the lens.
The quality of any repair is down to your skills, your tools, patience and most of all mindfulness.
Good servicing is taking your time, there are no prizes for the fastest lens strip down and rebuild.
| Phase 1 Minolta MD Lens Repair Guide |
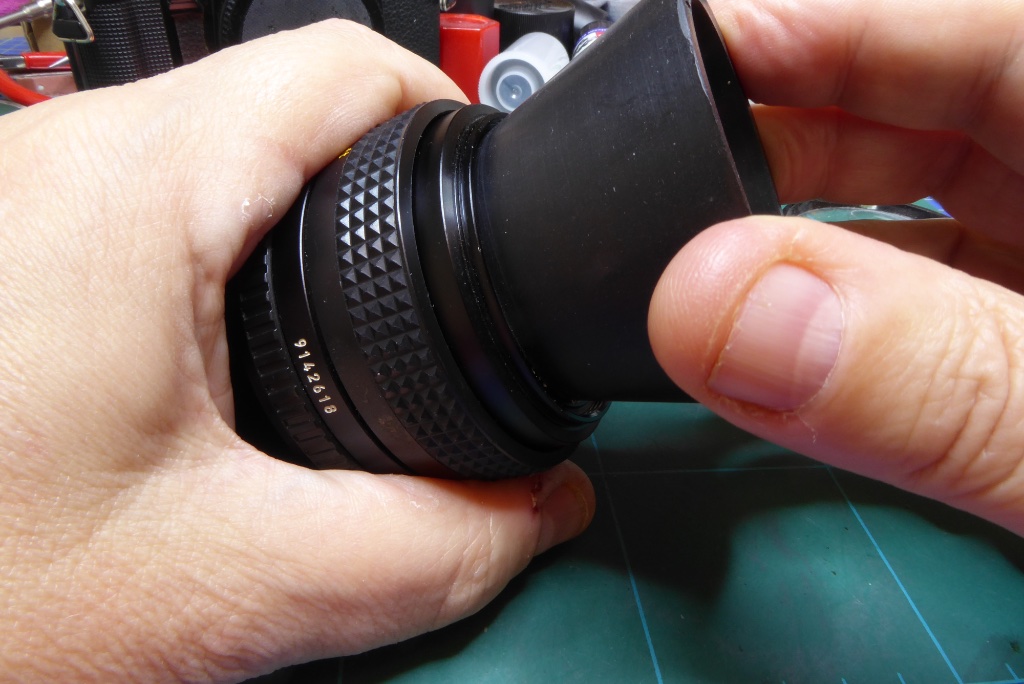
Remove the lens beauty ring. This will require a rubber cup as there are no spanner slots on the beauty rings of most MD series lenses.
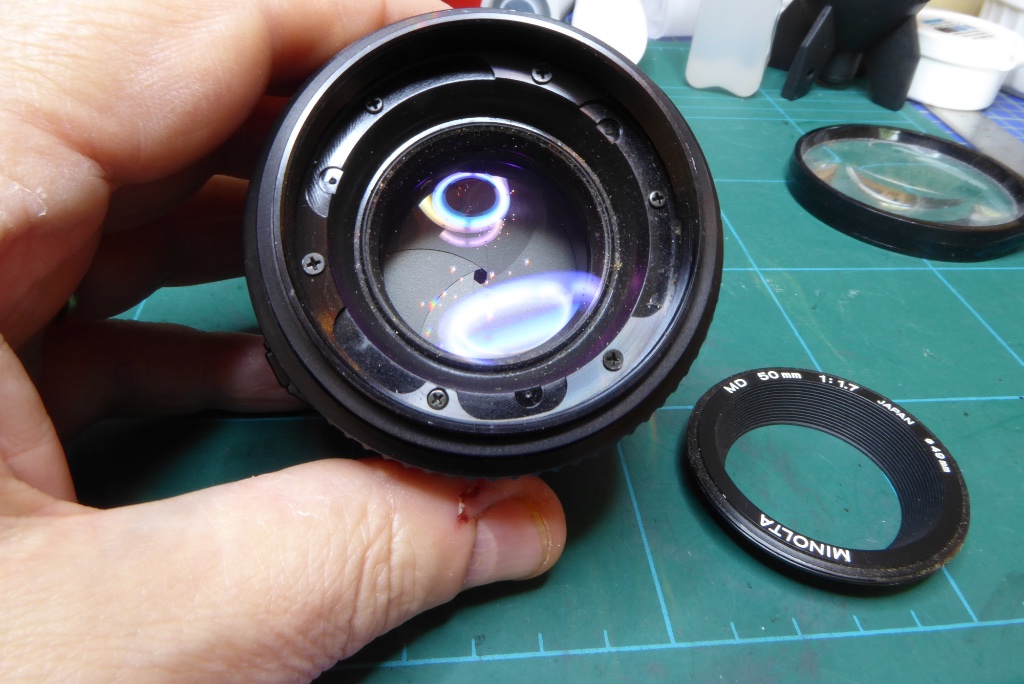
With the beauty ring removed all of the essential screws and fittings for the front part of the lens are exposed.
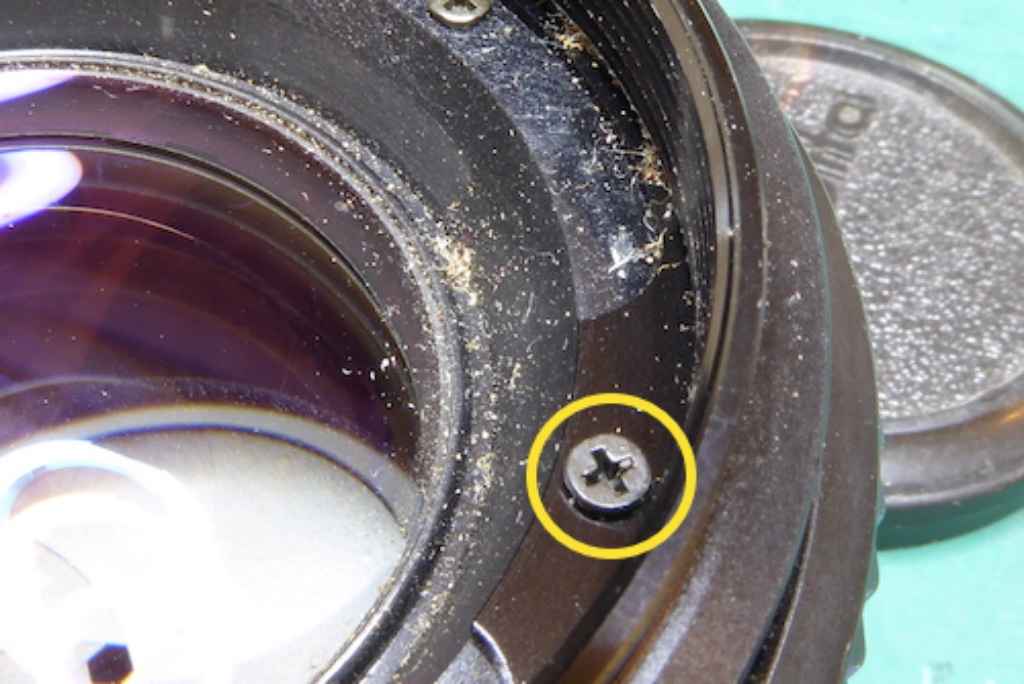
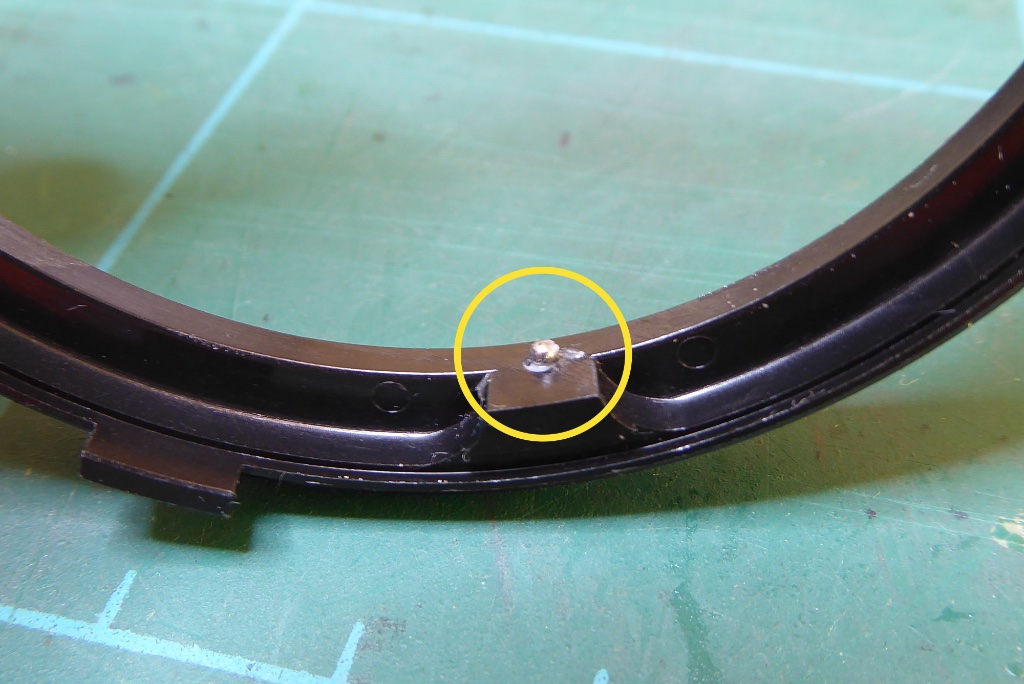
Start by removing the filter ring retaining screws using a JIS screwdriver.
There are three of these around the filter ring. One of these is indicated in the picture.
Filter ring fittings differ between various versions of the lens. Some have three tabs, some have a fourth tab which sits over and around one of the optical element retainer screws.
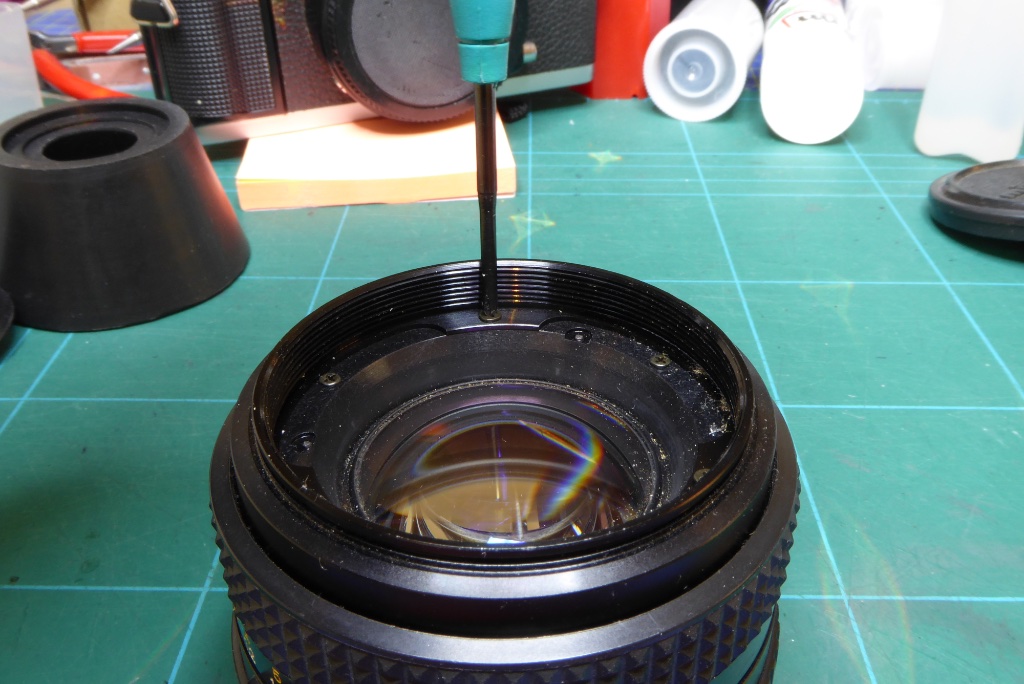
Remove the three screws retaining the filter ring. Keep these separate as they are sometimes a different size to the optical element screws which will be removed next.
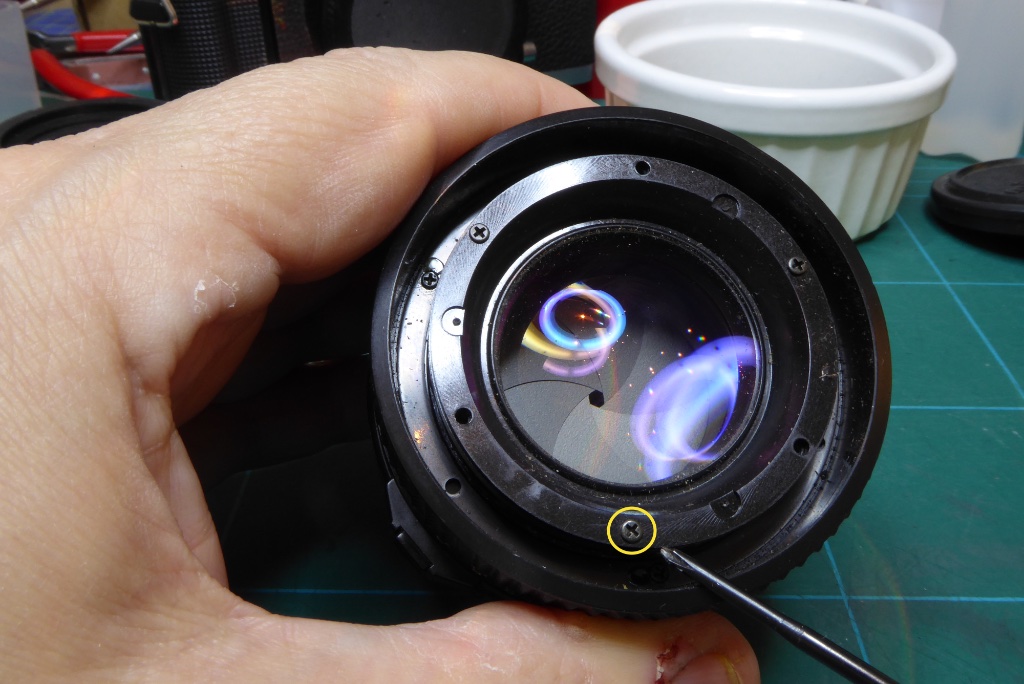
Remove the three screws retaining the front optical group. One of these is indicated in the picture.
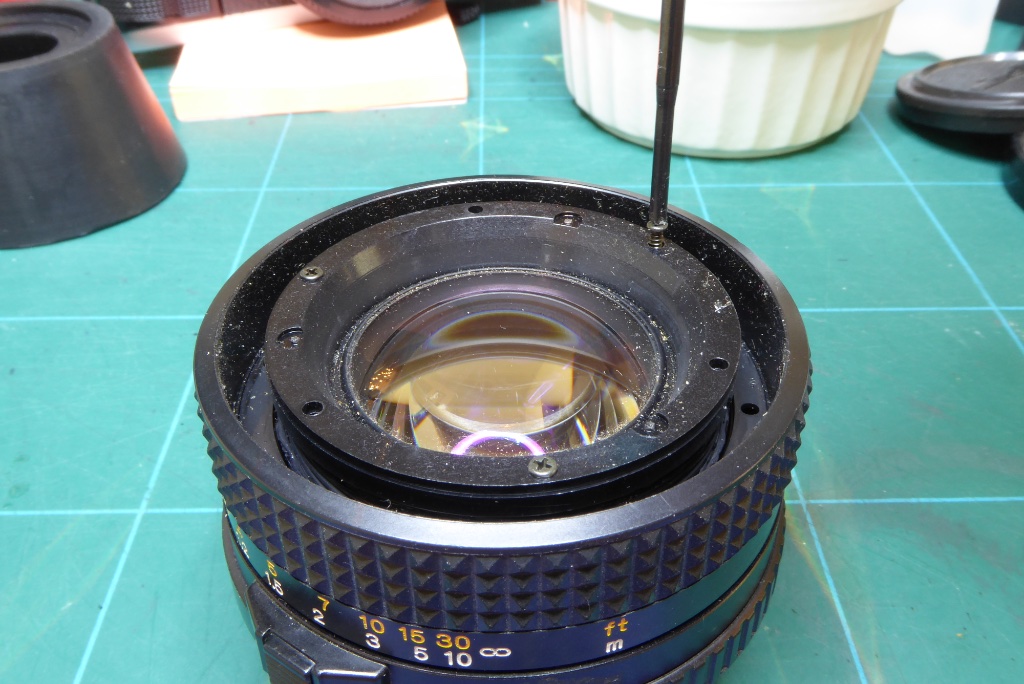
Remove the three screws and keep these separate from other parts.
Exercise caution as these screws are tight, a slip with a screwdriver here can impact the lens.
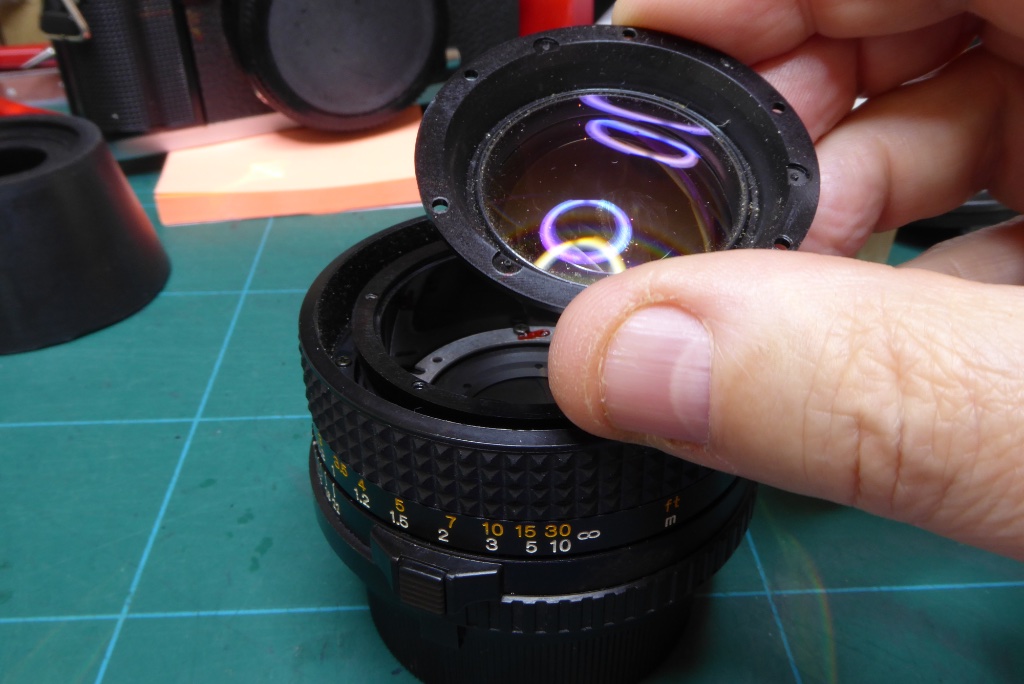
The front optical unit can now simply be pulled free. Its very common for vaporised grease to have gotten behind this and it may cause the unit to stick. It can be gently pried up using a fine screwdriver or cocktail stick gently under its edge.
Store the front optical unit safely.
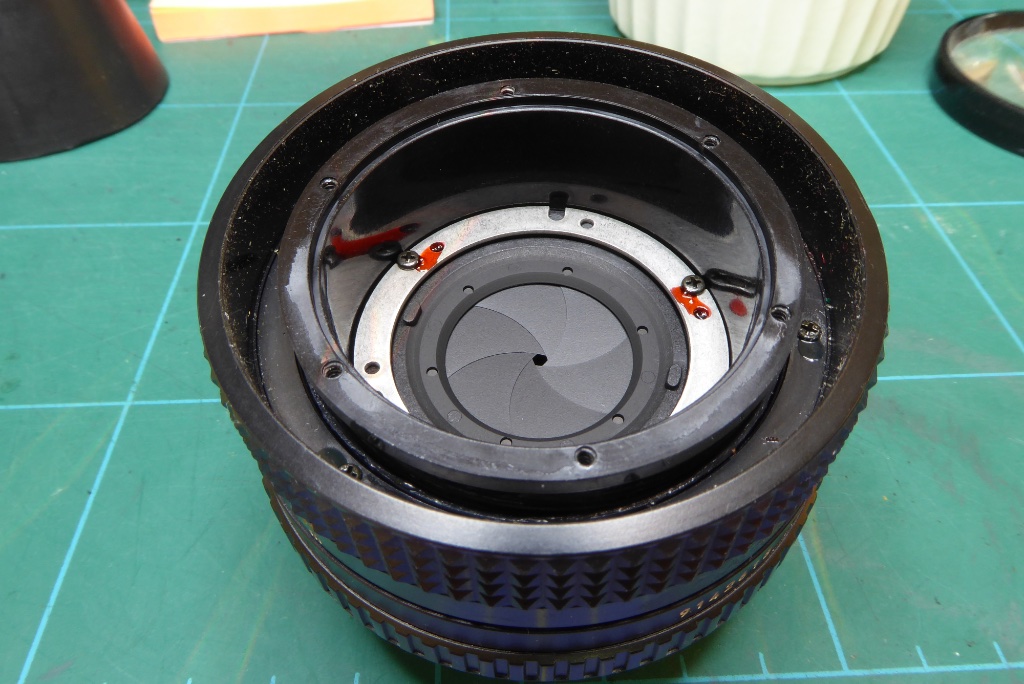
With the front optical unit removed the aperture diaphragm blades are exposed. In an MD series these are very thin and very fragile. It’s best to open the diaphragm to maximum to reduce any risks to the diaphragm blades as you move forward.
| Phase 2 Minolta MD Lens Repair Guide |
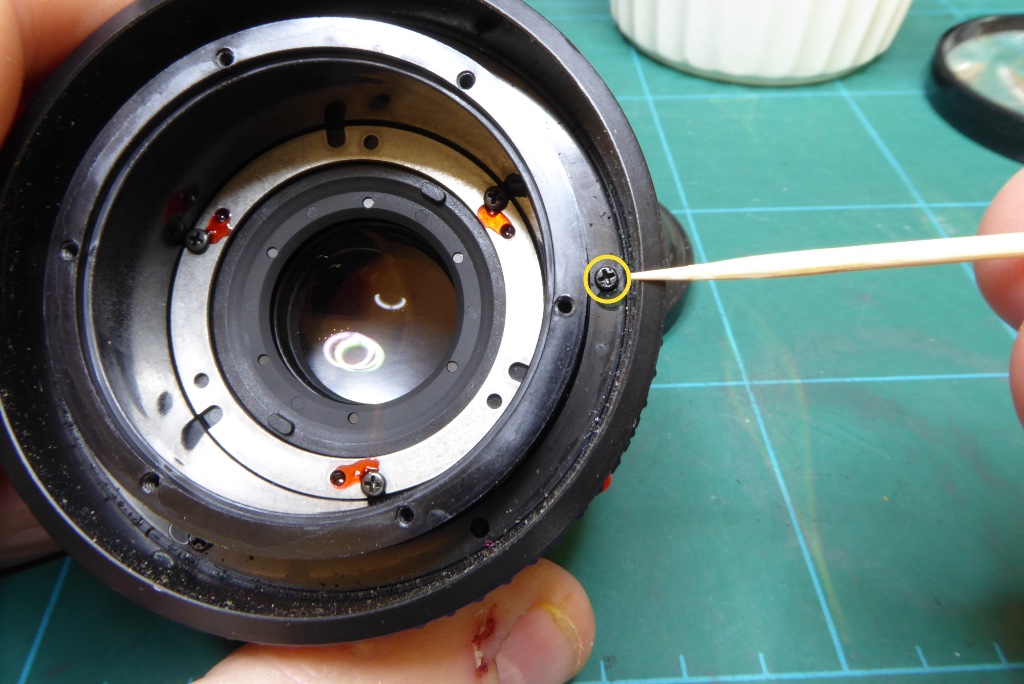
You now need to remove the focus barrel. This is retained by three screws around its front edge. These hold in place a brass ring which in turn holds the focus barrel by a ridge around its circumference.
Set the lens at infinity BEFORE removing these screws.
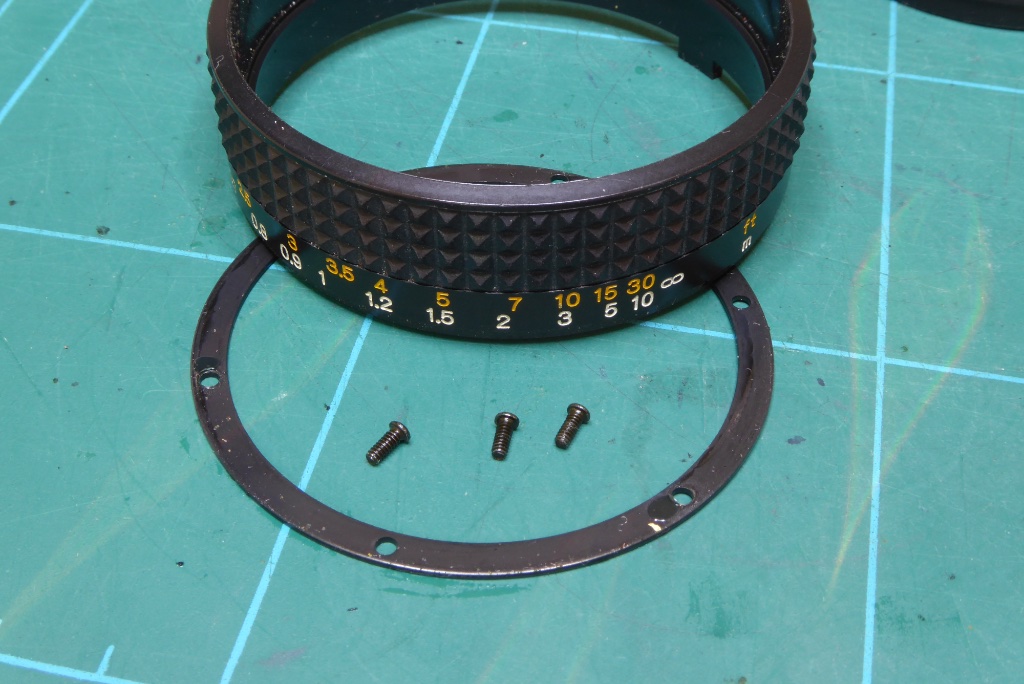
Here’s the brass ring and screws removed. Once these are removed the focus barrel simply slips off of the lens.
The brass ring is sometimes made of thin steel. Keep this safe as it is easily damaged. Before removing the screws set the lens to infinity focus. It’s assumed the lens worked ok at infinity focus prior to strip down, if not the process at the end of this guide will set infinity for the lens.
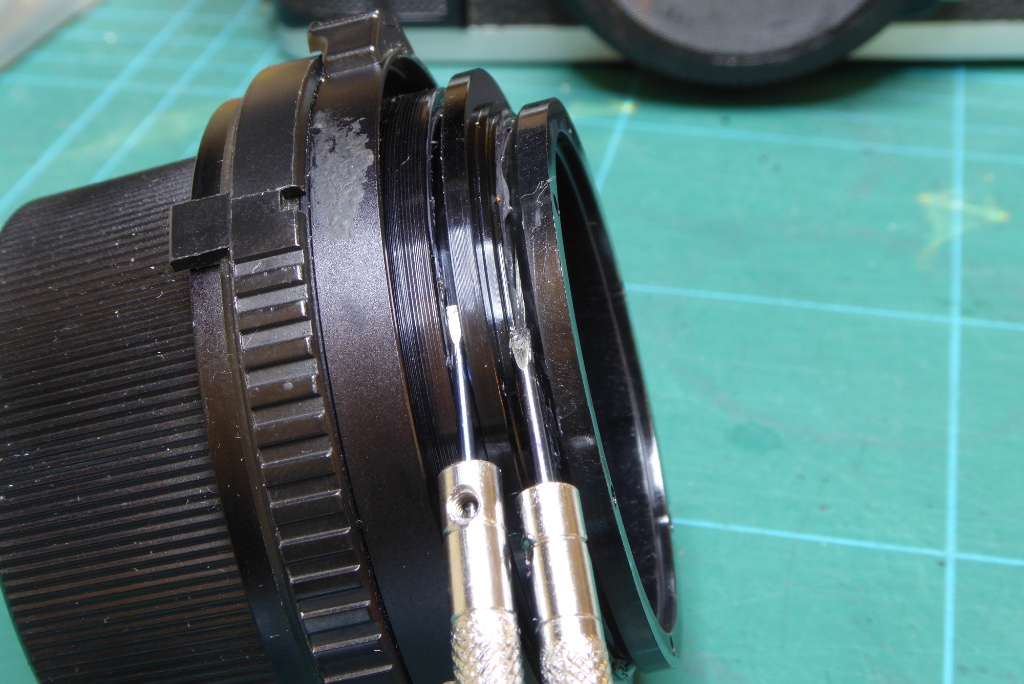
Measure the gaps between the slots of the two helicoils and make notes as to the gap sizes. In this picture the outer helicoil is to the left and the inner helicoil to the right. I normally use some jewellers screwdrivers to gauge the distance. Its not super critical but it will help with reassembly to know the measurements.
| Phase 3 Minolta MD Lens Repair Guide |
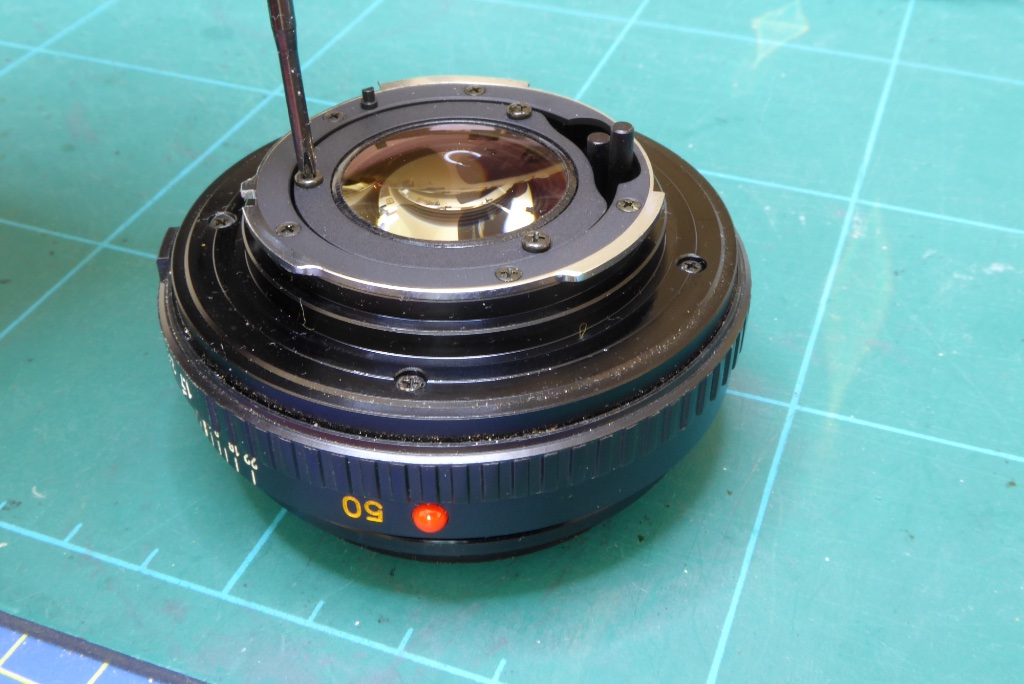
Turn the lens over and remove the three screws surrounding the rear optical unit with a JIS driver. Exercise caution, these can be tight and you don’t want a screwdriver skating across the rear lens surface.
These screws are usually quite long.
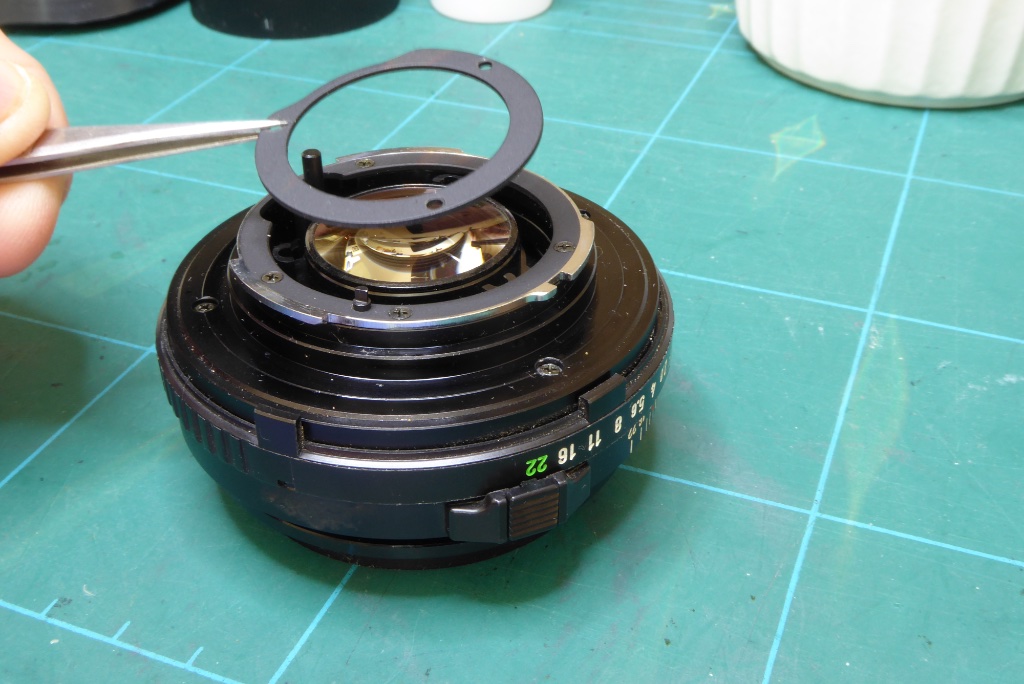
With the three screws removed the small black plate can simply be removed. Note it has a flat side near the aperture control lever.
SPECIAL NOTE: Some very early versions of the MDIII lens do not have this plate. They have shorter screws that fasten directly to the rear optical unit.
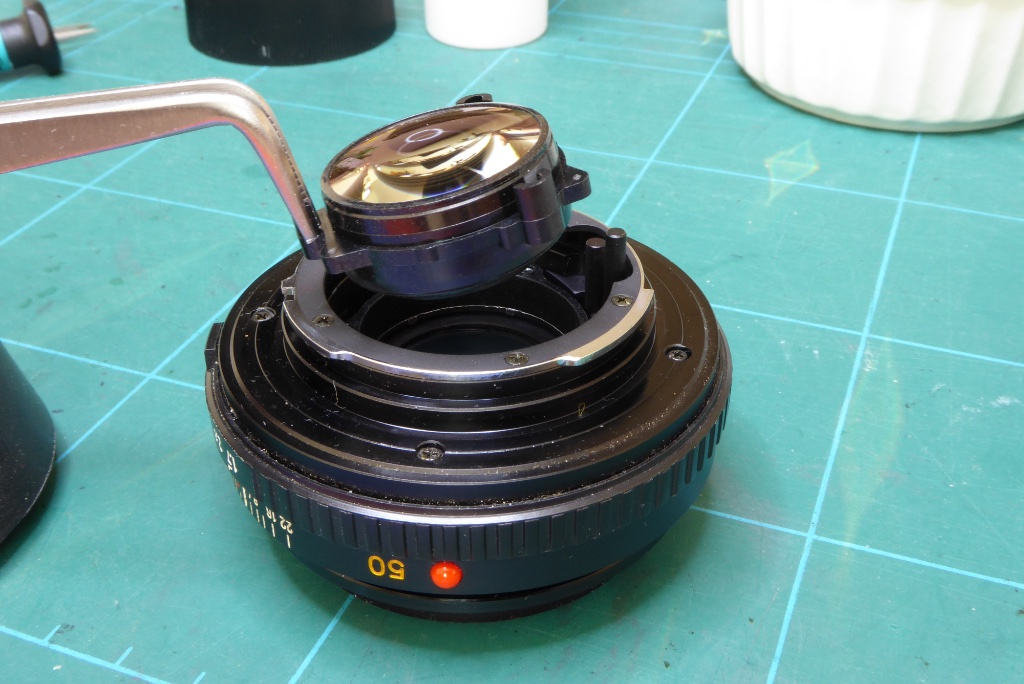
With the rear plate removed the rear optical unit will simply be free. I normally use some angled tweezers to grab it by its fitting lugs and extract it.
Store the unit safely.
| Phase 4 Minolta MD Lens Repair Guide |
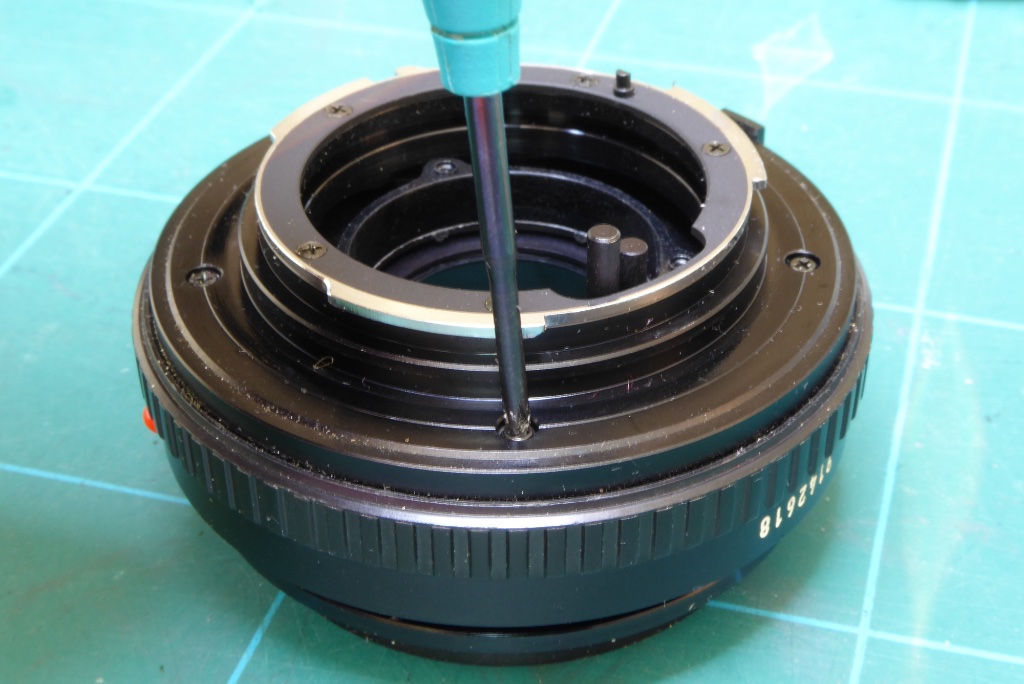
Remove the 4 screws around lens mount and store separately.
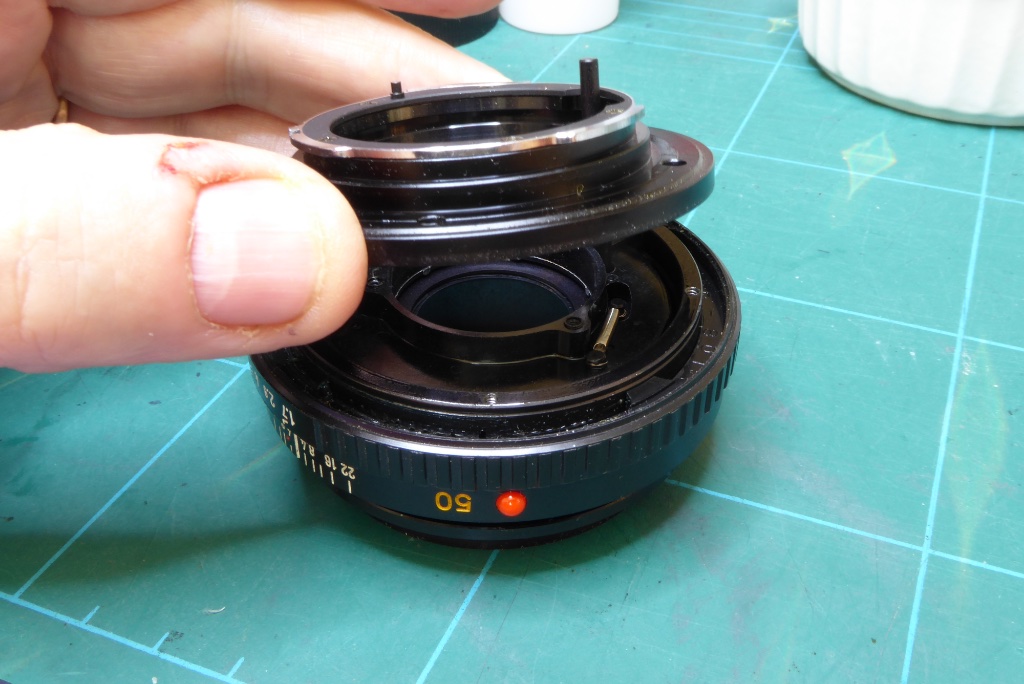
Once the screws are removed you can simply pull the lens mount free. It’s a good idea to hold onto the aperture ring and keep it pressed down while you do this to avoid any risk that the aperture ring comes off at this point which can result in the loss of the small ball bearing.
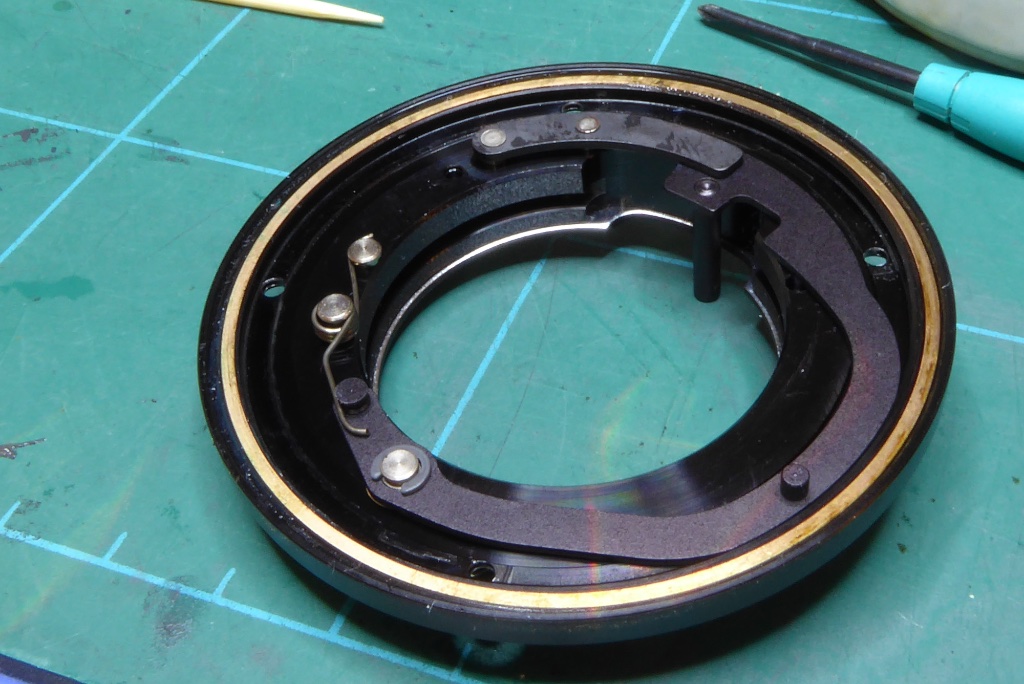
Observe the rear of the lens mount assembly. Note the cut out which engages with the diaphragm actuating lever.
Also note the brass liner which runs around the base. Be very careful as the brass liner is not attached, it will normally be held on by grease but can come free very easily. Its is extremely thin and very easily damaged so clean this very carefully with a cotton bud dipped in IPA.
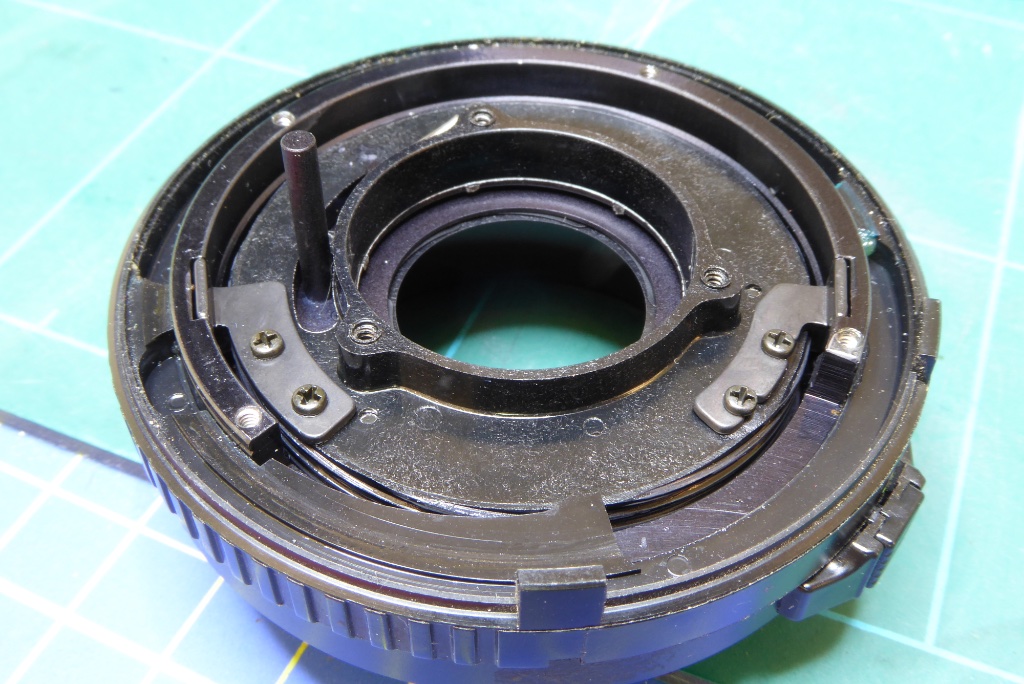
With the lens mount removed you can now see the lens focus lock tabs. Note that one has open sided holes for its fitting while the other has closed holes
Be careful from here on with the strip down. The aperture mechanism in an MD is mostly plastic and the aperture lever is very fragile.
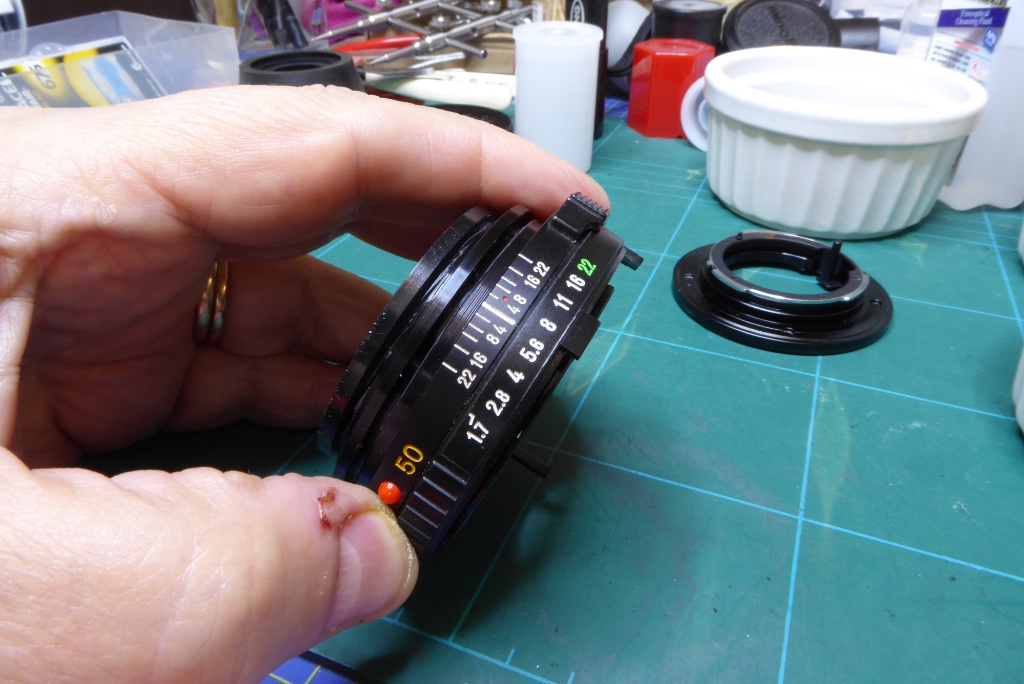
While holding the aperture ring to the lens very carefully set it to about a mid position. This will make it easier to remove in the next step.
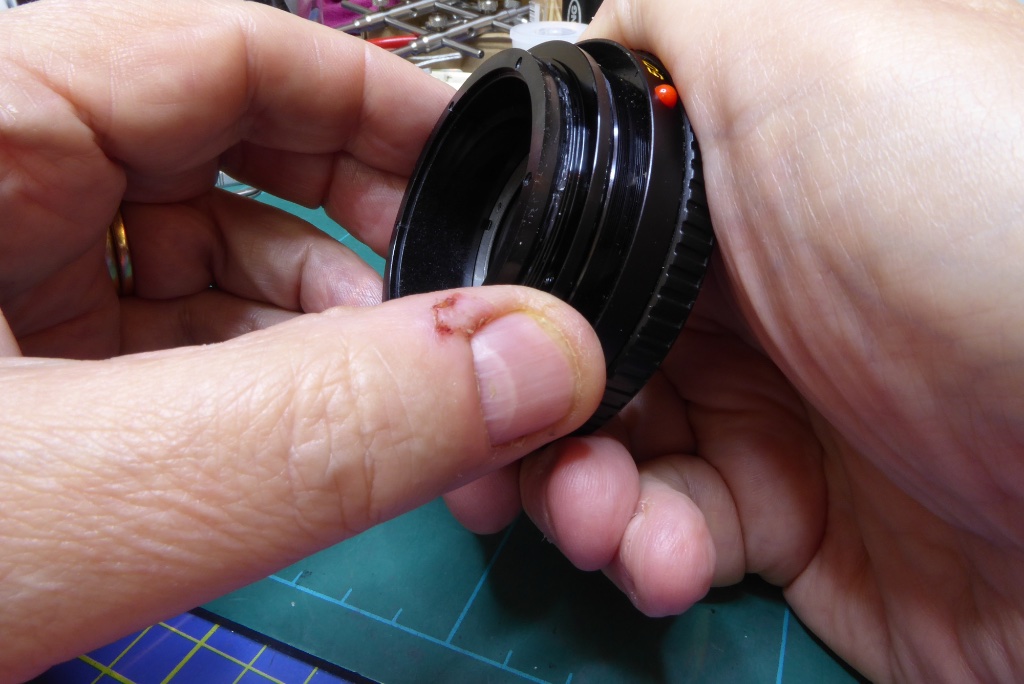
Cup the rear of the lens in your hand, preferably inside a Tupperware box or clear bag and gently pull the aperture ring free. Inside the ring there is a tiny spring and ball bearing and these can easily fly out and be lost.
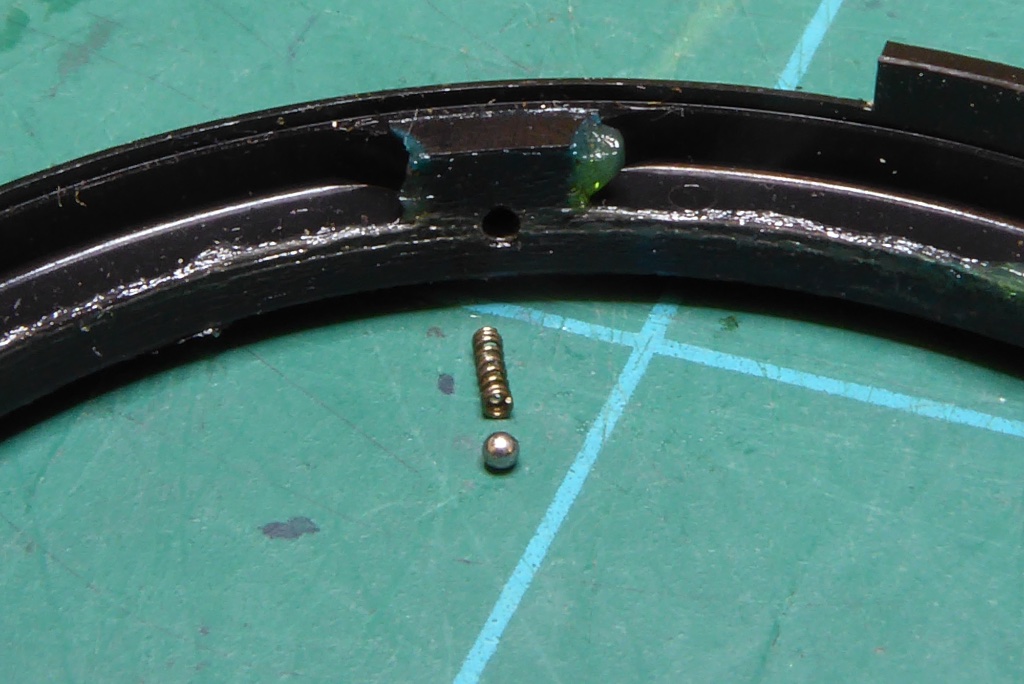
Sometimes the bearing will stay with the lens, sometimes it will fall into your hand. Sometimes it will simply vanish – take this step easy. If you don’t see the ball bearing examine your hands carefully. It’s so small it may be stuck to your hand.
The pic shows how small the bearing and its pusher spring are. The bearing is 1.2mm in most MD lenses.
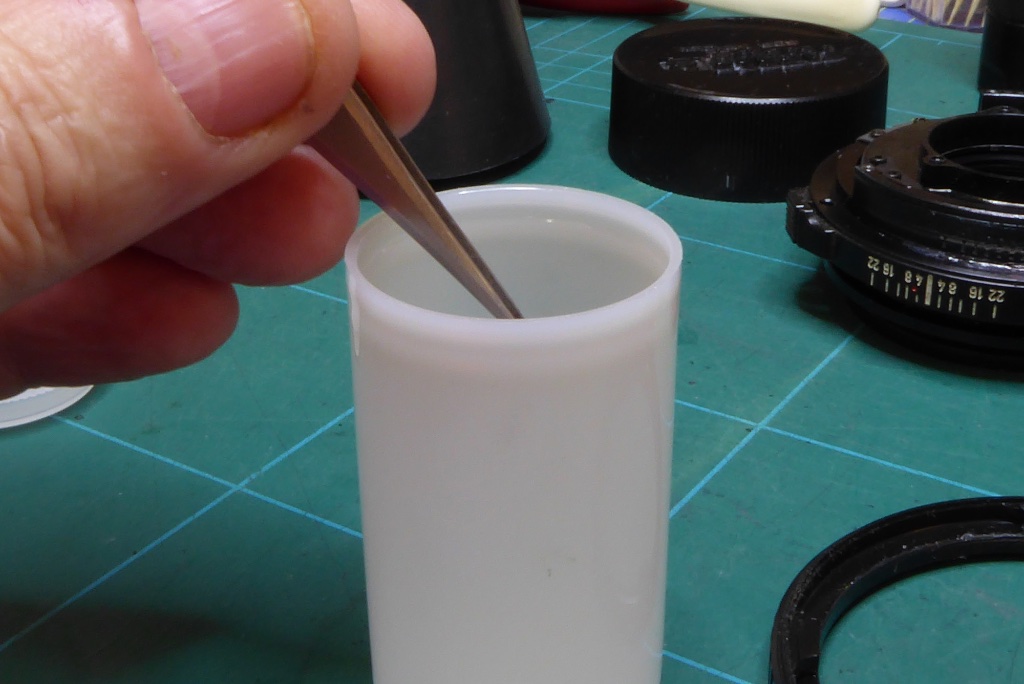
This is why I generally remove the aperture ring inside a large clean bucket or Tupperware box. It minimises the risk of a loss.
The spring will most normally stay stuck inside the aperture ring but to be sure it is not lost I normally extract it using a cocktail stick to ease it free and store the spring with the bearing inside a secure container.
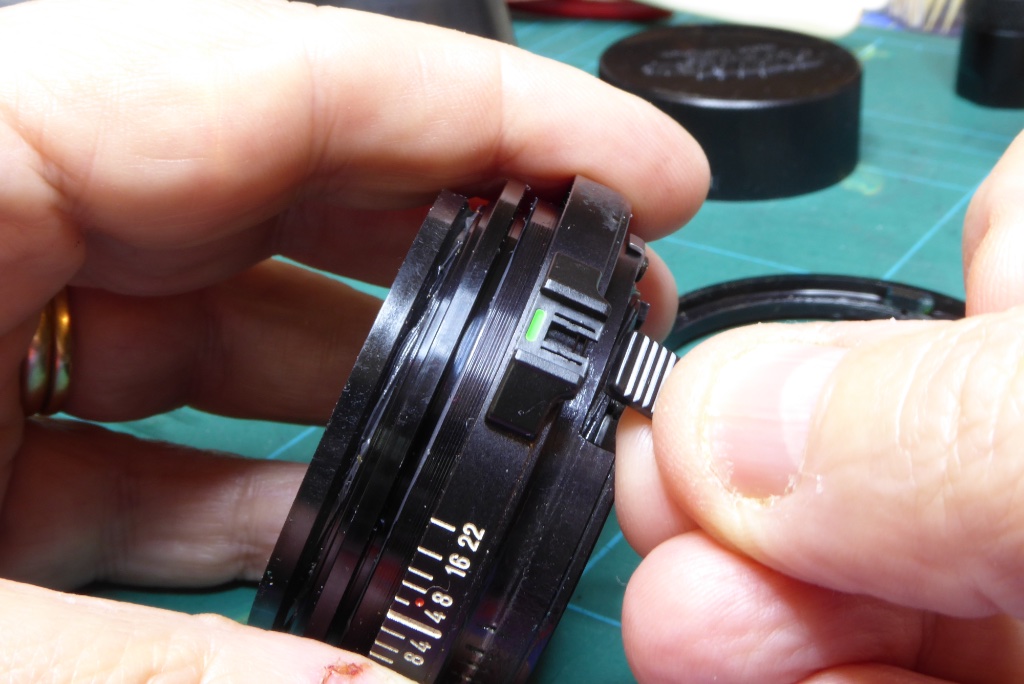
When I clean/refurbish a lens EVERYTHING gets cleaned, to avoid loss of small parts everything is removed. This is the aperture locking tab being removed.
With the aperture ring removed this will simply push out. It’s ‘keyed’ so will only fit one way on reassembly.
| Phase 5 Minolta MD Lens Repair Guide |
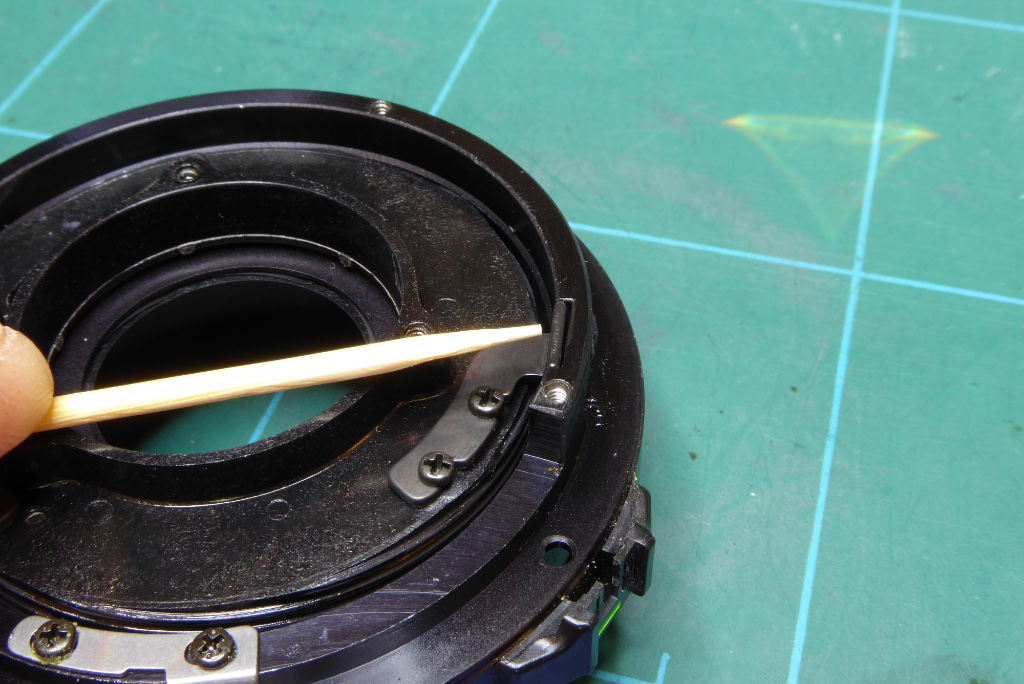
Before removing the focus helicoil locking tabs note how they are fitted.
They do not press too hard against the side of the helicoil. If these are replaced to tightly they will cause the lens focus to be stiff.
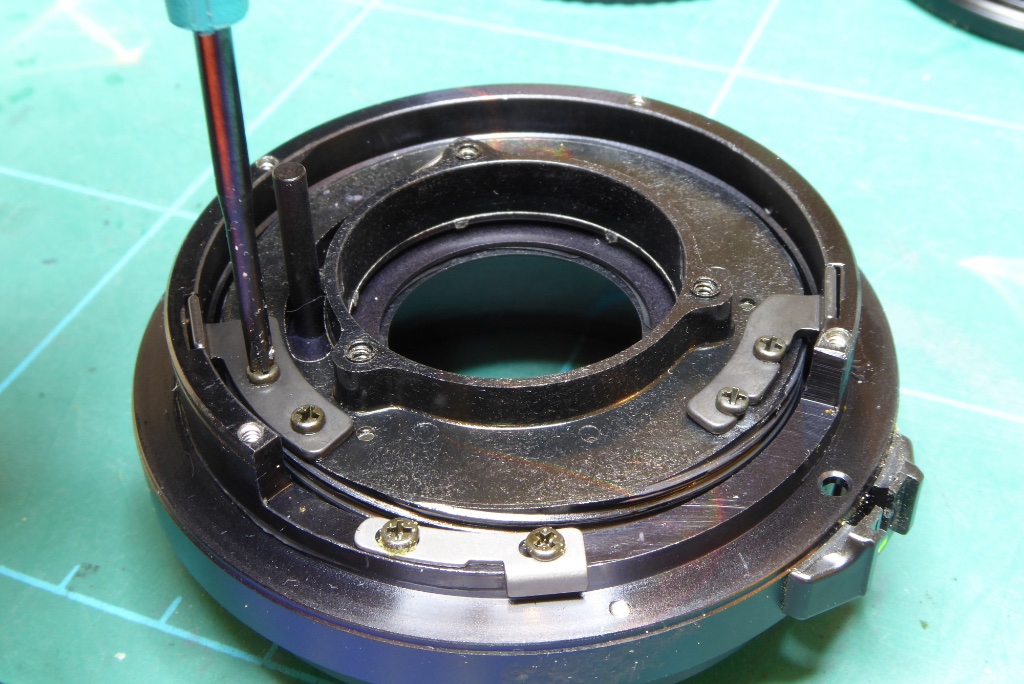
Remove the helicoil locking tabs with a JIS driver making a note of how they are arranged.
The open sided one is away from the aperture lever.
If you are going to face a headache in an MD series lens this will be it. The lock tab retaining screws can be tough to extract.
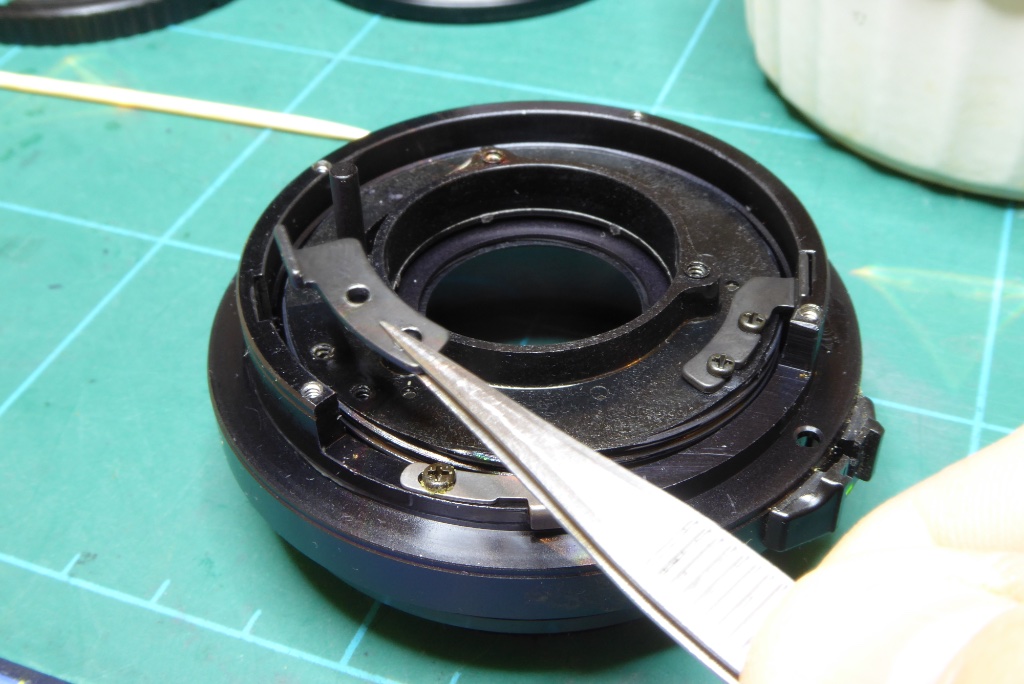
Chemicals are not an option here except sparingly as they can easily leak into the diaphragm. A Good set of JIS drivers is the only real option for safe extraction of these screws.
Heres one of the lock tabs being extracted.
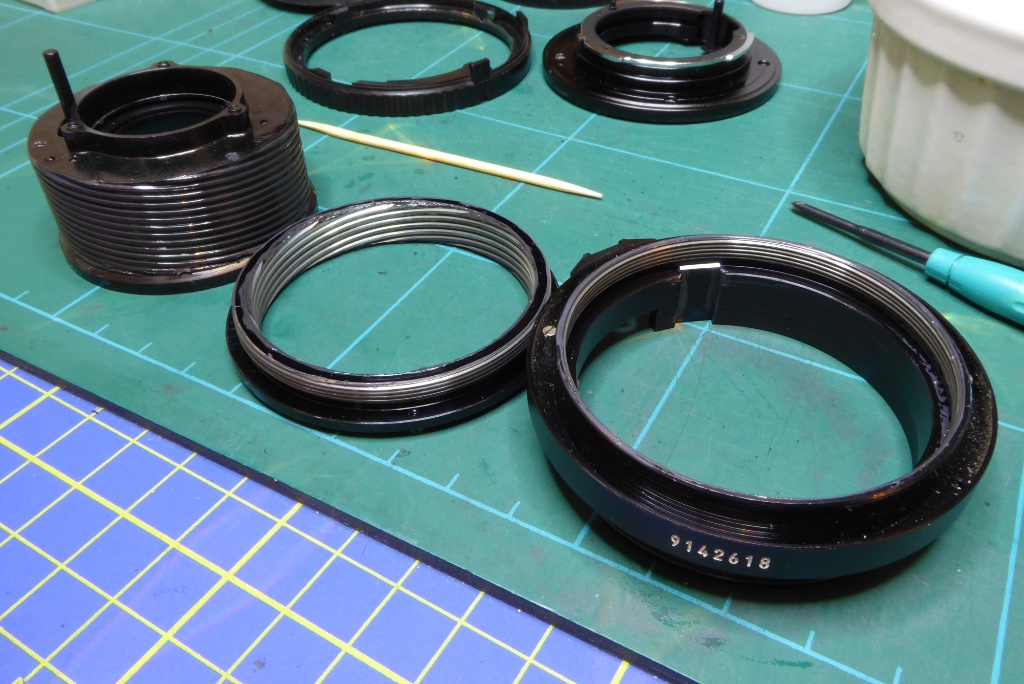
With both lock tabs extracted the inner and outer helicoils can simply be unscrewed from each other.
The picture shows L-R the inner helicoil, outer helicoil, lens body.
This completes the strip down of the lens.
MECHANICAL CLEANING
All components APART FROM the inner helicoil are now cleaned with hot soapy water and/or IPA. All threads are chased out with a fine bamboo skewer or pin. The outer helicoils threads are very fine and the smallest bit of dirt or dried grease will give the lens a lumpy or gritty feel. A lens shouldn’t be cleaned more often than necessary so you should take pains to get this right.
The inner helicoil is a challenge. On the MD series the diaphragm forms part of the inner helicoil and the diaphragm can not be removed easily. In order to clean the helicoil I place the helicoil on its side on a clean cloth and then gently wipe the old grease off with cotton wool balls. When most of the grease is removed I then use a cotton wool ball moistened with IPA to run around the threads. Too much liquid on the wool ball can easily seep into the diaphragm and cause problems so go easy on liquids and be VERY CAREFUL of the aperture lever
The diaphragm of most MDs seldom suffer with oil contamination so its unusual to have to deal with stuck diaphragms in this series of lenses. If contamination is slight you can immerse the diaphragm in IPA and then air dry. For serious contamination, which is rare, you will need to dissemble the diaphragm which is not covered in this guide.
OPTICS CLEANING
The Minolta MD series usually show haze caused by oil vapour on the lens group inner surfaces. These are the optical surfaces that face inside the lens in each of the two optical groups. These can be cleaned with a mild IPA solution and a lint free soft cloth. You need to exercise extreme care here and do not apply pressure to the glass. Apply a mild IPA solution to the cloth just so the cloth is damp and then apply lightly. Use a puffer brush to blow off any moisture and then use a clean cloth to clean out any evaporation marks by gently breathing on the lens surface.
In the MD series the front and rear optical groups are encapsulated and cannot be removed as individual components. If your lens has fungus or issues between elements in a group there is no repair possible
I normally clean the optics just prior to their reassembly into the lens and make sure the lens interior is blown clean with a puffer bulb. You will always find some dust is present on reassembly – do not worry – they were no different when they came from the factory.
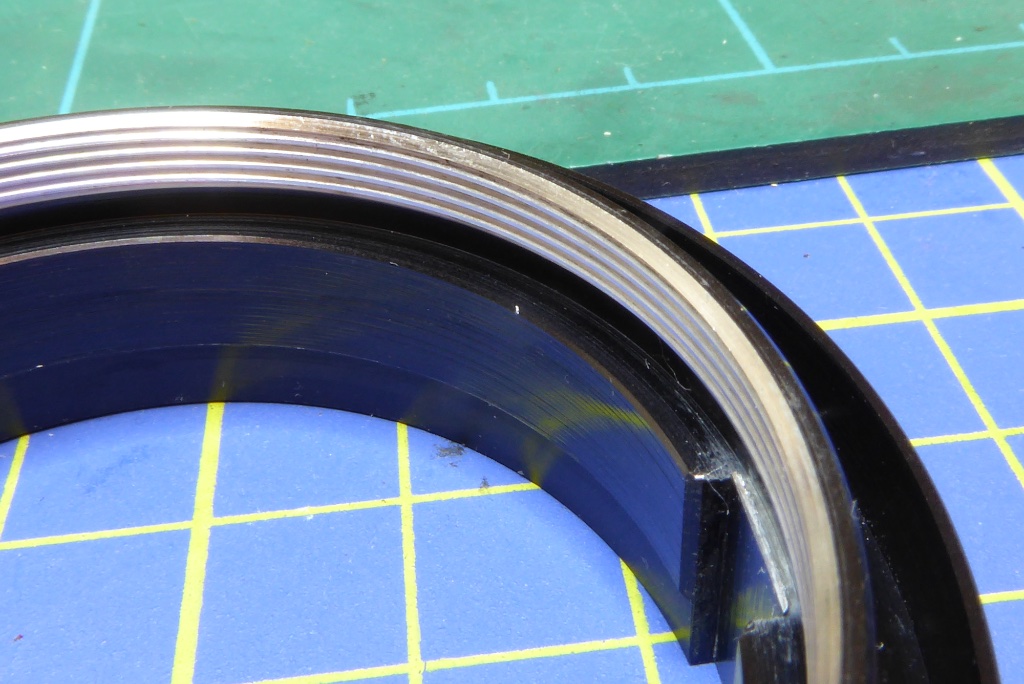
After cleaning the helicoils should be lightly greased using a suitable lubricant. I prefer Helimax XP for most Minolta lenses. This is applied thinly using a fine sable brush. On a Minolta MD series the lubrication needs to be slightly thicker on the inner helicoil thanks to its plastic surface. The outer helicoil needs to be very thinly lubricated or else the lens focus will be too stiff.
Notes on lubrication – The first time you so this you will need to work by trial and error to get the right feel.
Too much lubricant will result in the focus being stiff, too little and it will grind or be too light. You can test the ‘feel’ while the helicoils are assembled but it will be hard to assess without practice as to what the lens will feel like with its focus barrel mounted.
| Phase 6 Minolta MD Lens Repair Guide |
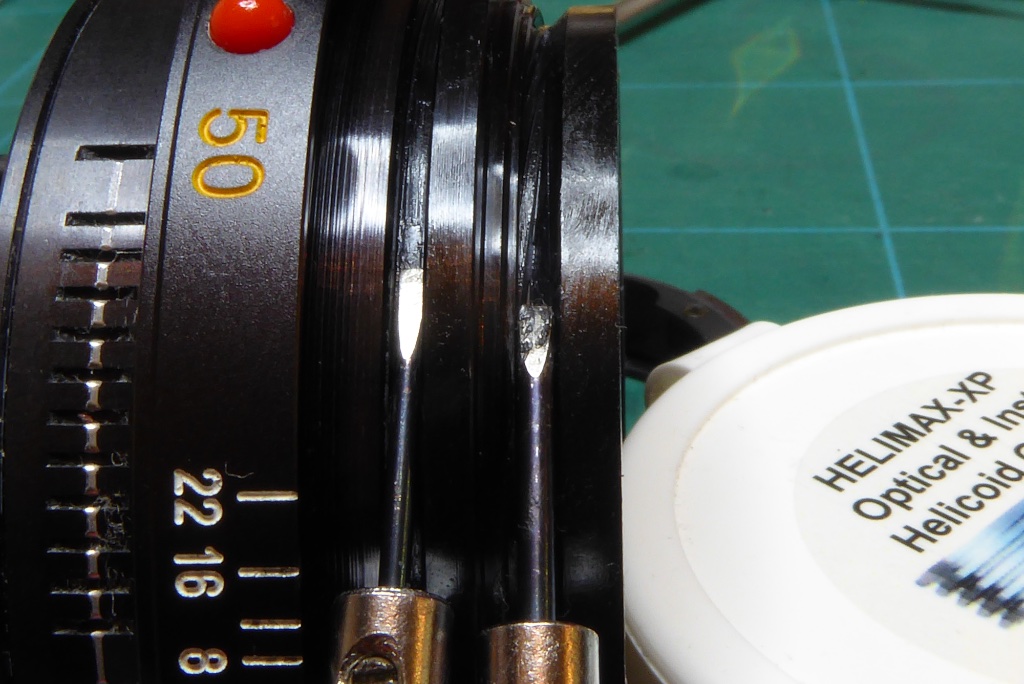
On reassembly the object is to get the helicoils spacing for focus the same as you measured at the end of Phase 2 and…
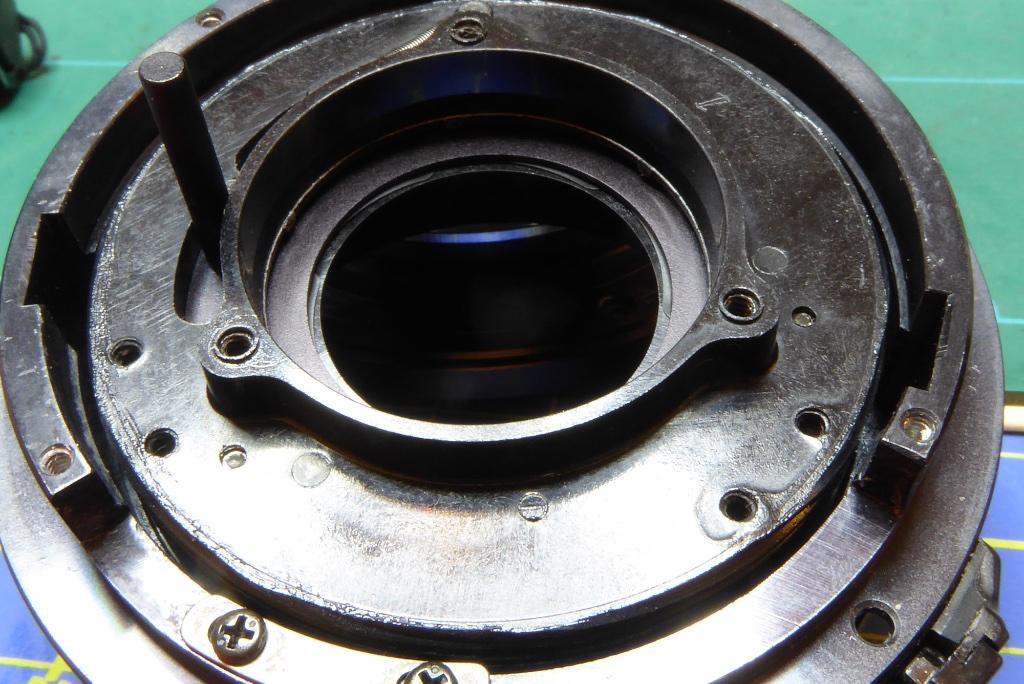
…with the lock tab locating holes in the right position for the lock tabs to engage with their slots.
You may need to unscrew the lens a few times and reassemble to get this correct.
You can see in the picture that the locating holes for the tabs are correctly orientated for the tabs to fit into the slots.
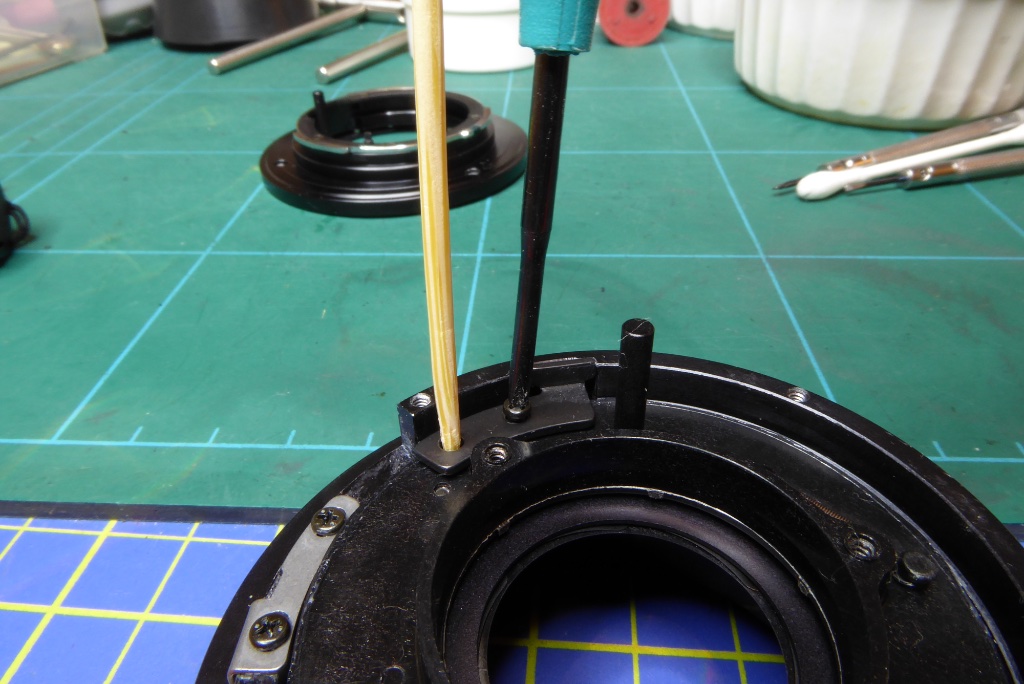
Replace the lock tabs. This is the most fiddly thing with an MD series and supercritical on the 45mm f2 lens.
Here I am using a bamboo skewer to keep the tab in position while the first screw is put in. The tabs can easily twist and turn while being replaced…
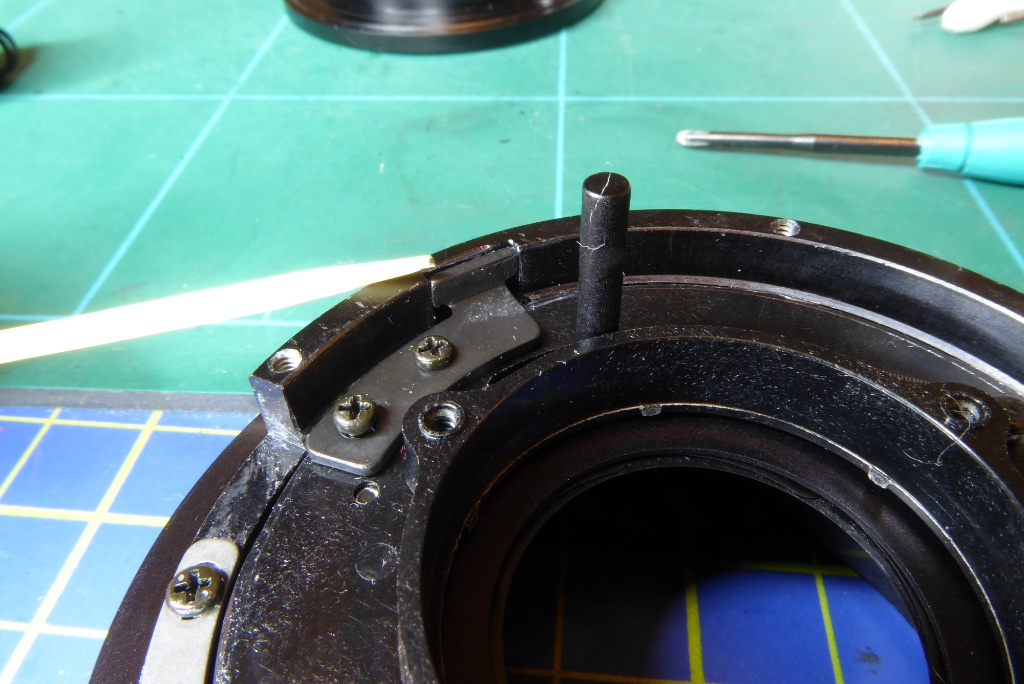
…and can impact the side of the lens. The tabs do not need to be in close contact with the edge of the lens or else they will cause the lens to jam. They also need to be flush with the top surface of the lens body when the lens is fully pulled back.
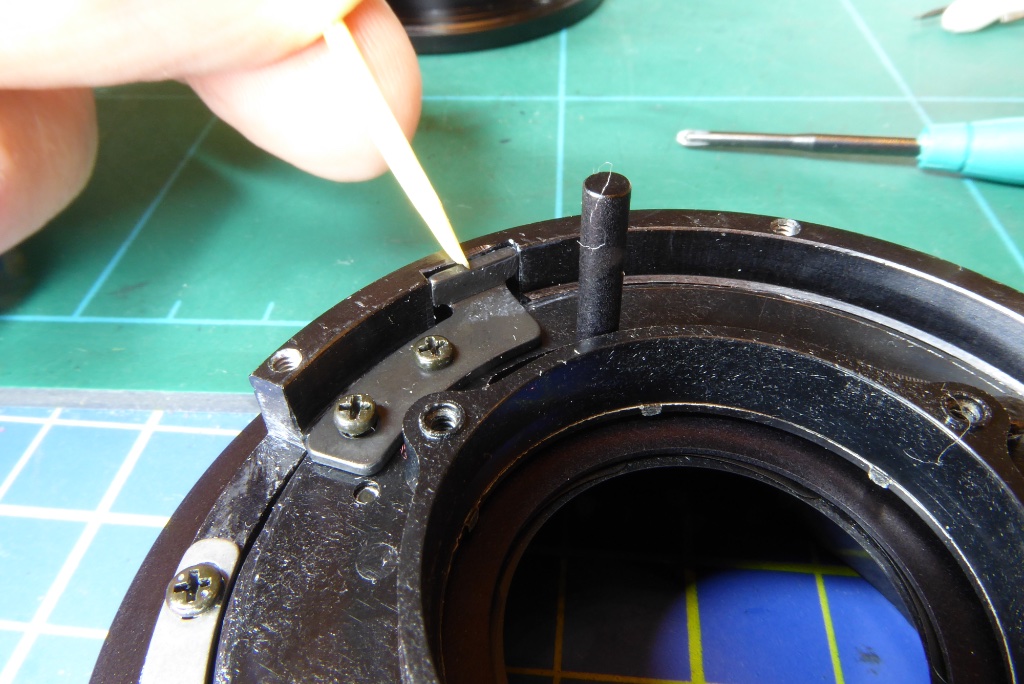
If the helicoil gaps are set correctly at the start of Phase 6 then it may be the tabs stand a little proud with the focus pulled back as far as possible. This is not usually a problem but you must remember not to reassemble the rear of the lens with the tabs proud of the rear surface or the aperture mechanism can be jammed.
| Phase 7 Minolta MD Lens Repair Guide |

Replace the aperture lock tab if you removed it earlier.
Replace the aperture ball bearing spring if you removed it at the end of PHASE 4. Seat the ball bearing on the top of the spring using a small blob of Helimax XP grease.
While keeping a close eye on the bearing (and preferably doing this step inside a large Tupperware box or bucket)…
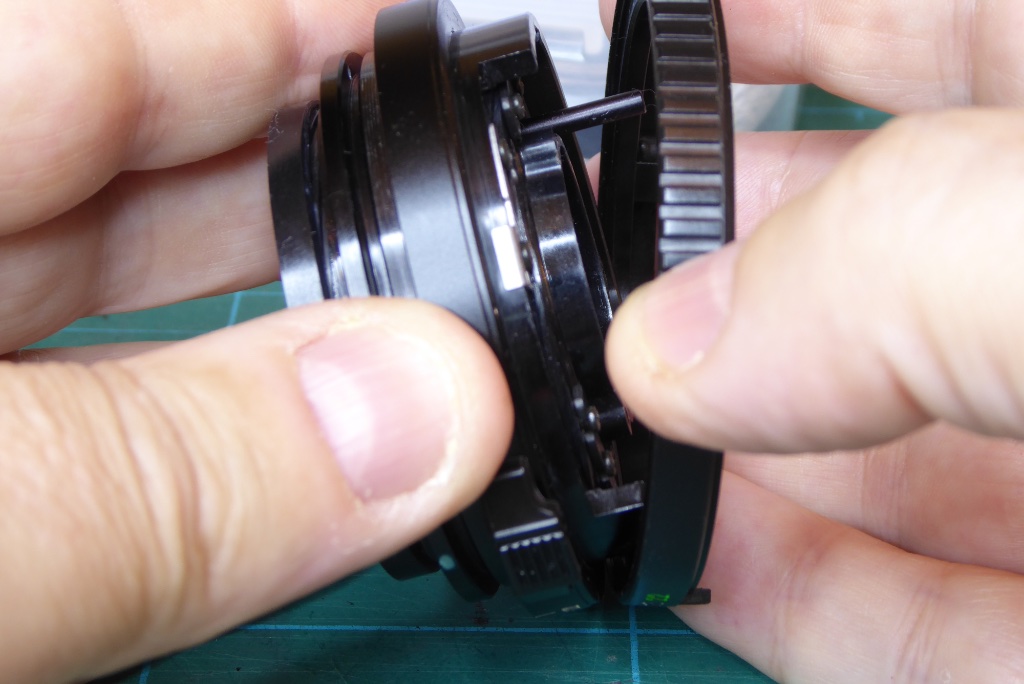
…trap the bearing in place by applying the aperture control ring at a slight angle to trap the bearing and then ease the rest of the aperture control ring down over the body of the lens.
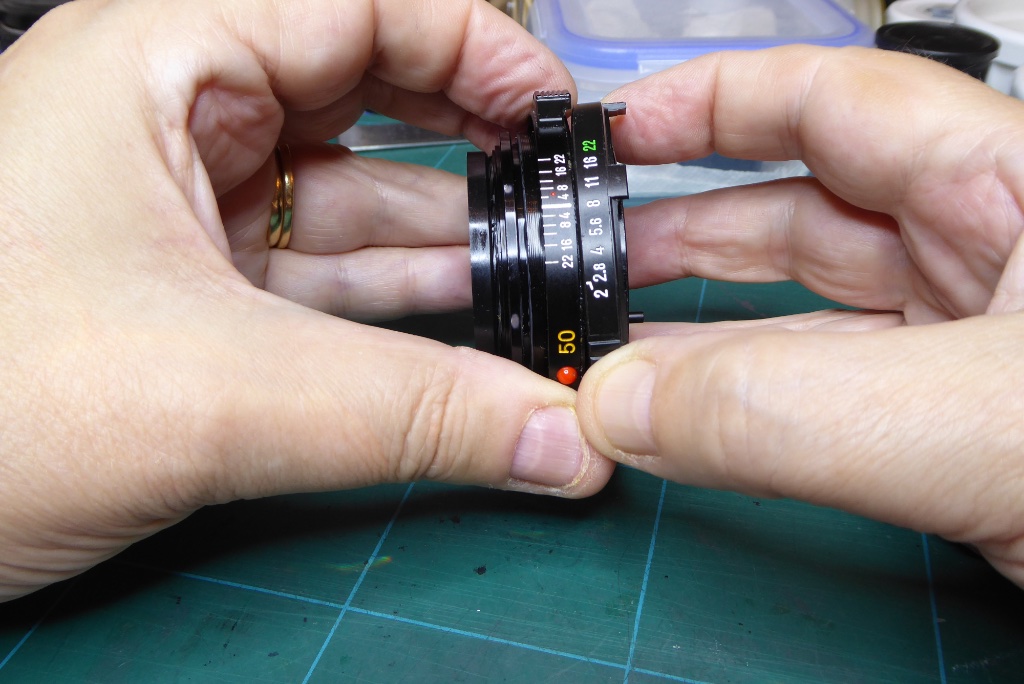
NOTE: You will find it easiest if you trap the bearing under the aperture ring with the aperture control ring set at about a mid point.
Before attempting to refit with the bearing do a couple of dry runs so you know what to expect.
Immediately after fitting the aperture ring test the aperture ring f stops are nicely clicking.
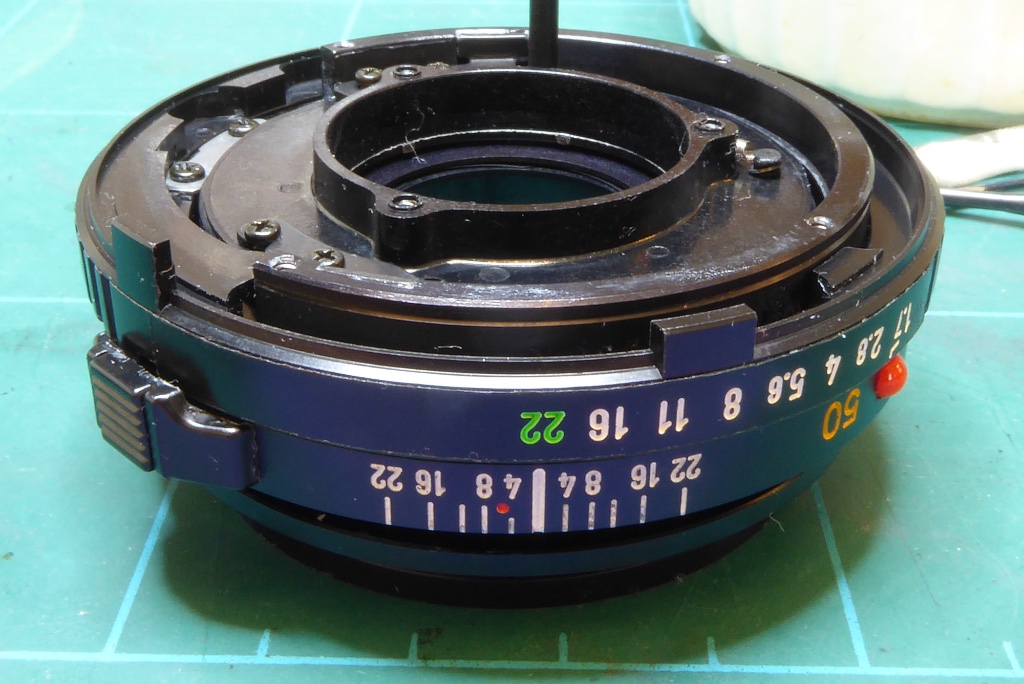
Making sure the aperture control ring doesn’t slip off turn the aperture ring to its highest value the highest value (smallest aperture)
NOTE: Some versions of the 50mm MD series only go as high as f16 but the MDIII will go to f22.
Double check that the helicoil lock tabs are flush with the top edge of the lens body as described at the end of Phase 6
| Phase 8 Minolta MD Lens Repair Guide |
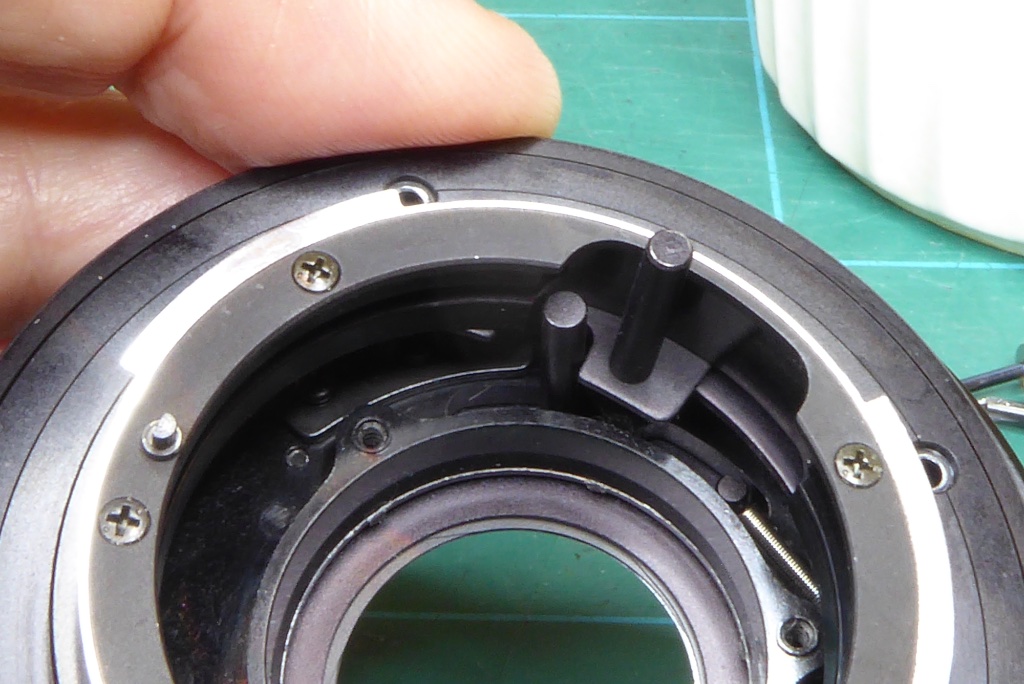
Place the lens mount over the lens and check that the diaphragm actuating lever is captured by the cut out in the mounting rings lever mechanism and place the lens mount onto the rear of the lens……
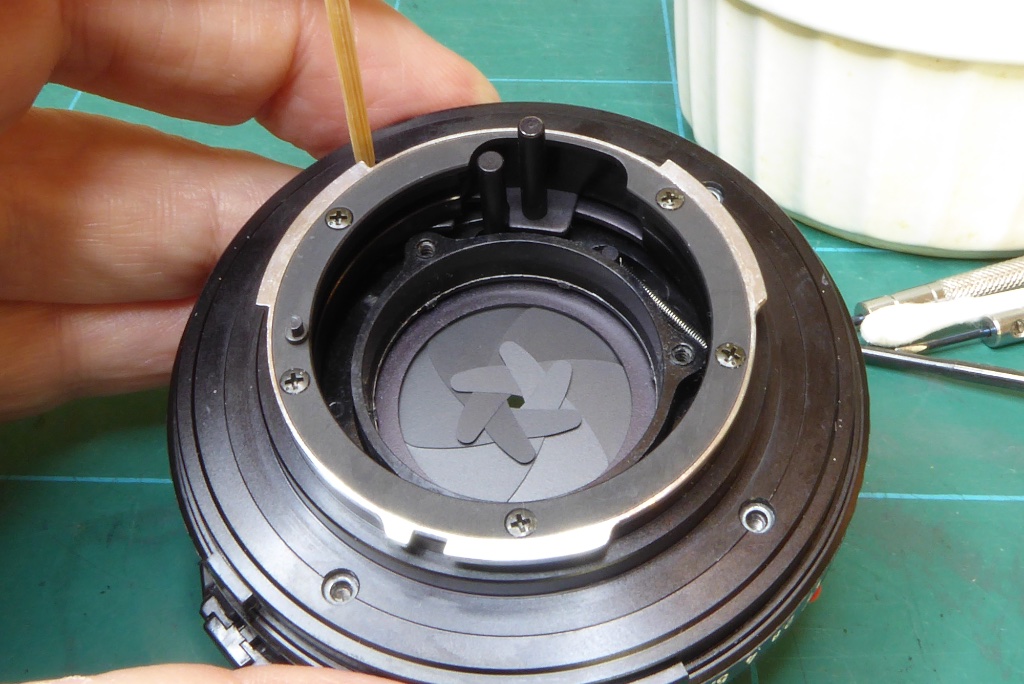
…. Now rotate the lens mount until the screw holes align with their fixing points. If all is well the lens diaphragm will stop down as you turn to the lens mount around to match the F16 or f22 setting.
In the picture a skewer is being used to hold the mount in place at the correct position.
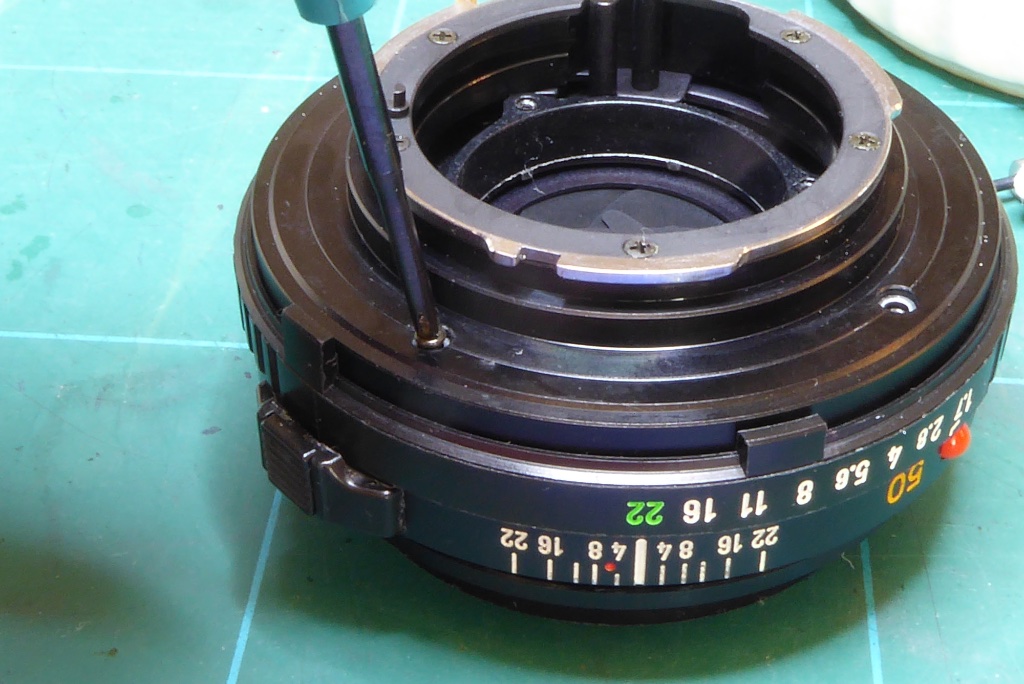
Secure the 4 screws that retain the lens mount to the lens body. Do not overtighten these as the threads can strip quite easily. They need to be firm but not gorilla tight.
Generally I leave these quite loose at this stage and only tighten down once I am happy the lens is working correctly. Check at this stage that the aperture is working correctly by activating the lever. Check also that the lens focus is working by turning the outermost helicoil. Do not wind the lens too far out or it can slip off the lock tabs at this point just turn it a quarter turn at most to ensure the focus is free and operating.
| Phase 9 Minolta MD Lens Repair Guide |
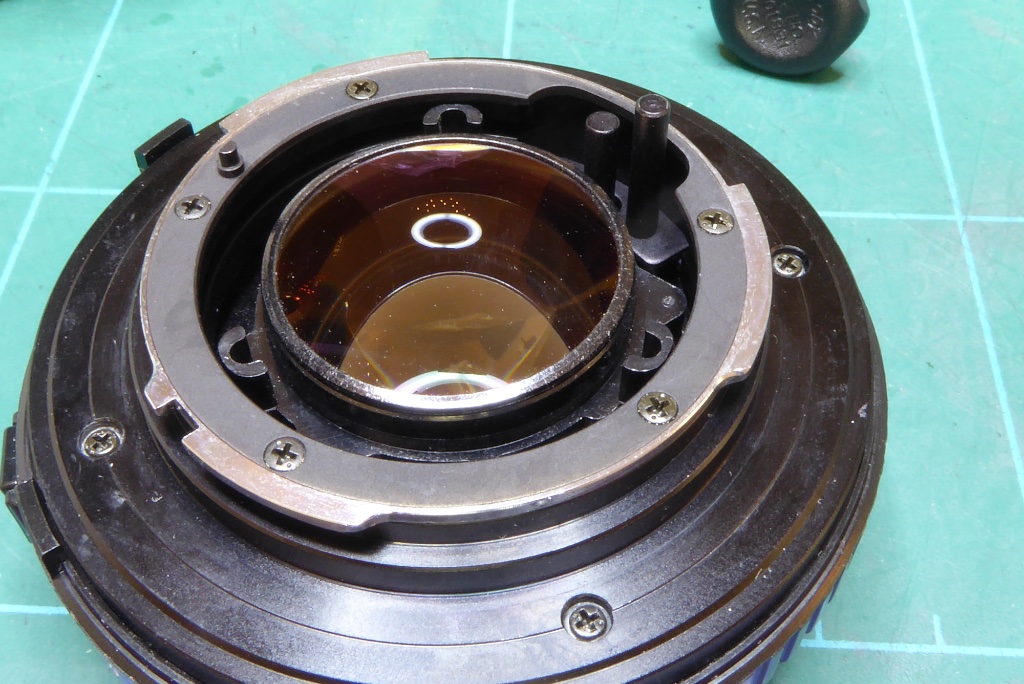
Replace the rear optical assembly making sure its screw hole are aligned with the fixing points beneath. I use a cocktail stick to move the optical unit around and check that the holes are aligned to their fixing points.
Blow the lens clean before reinserting it.
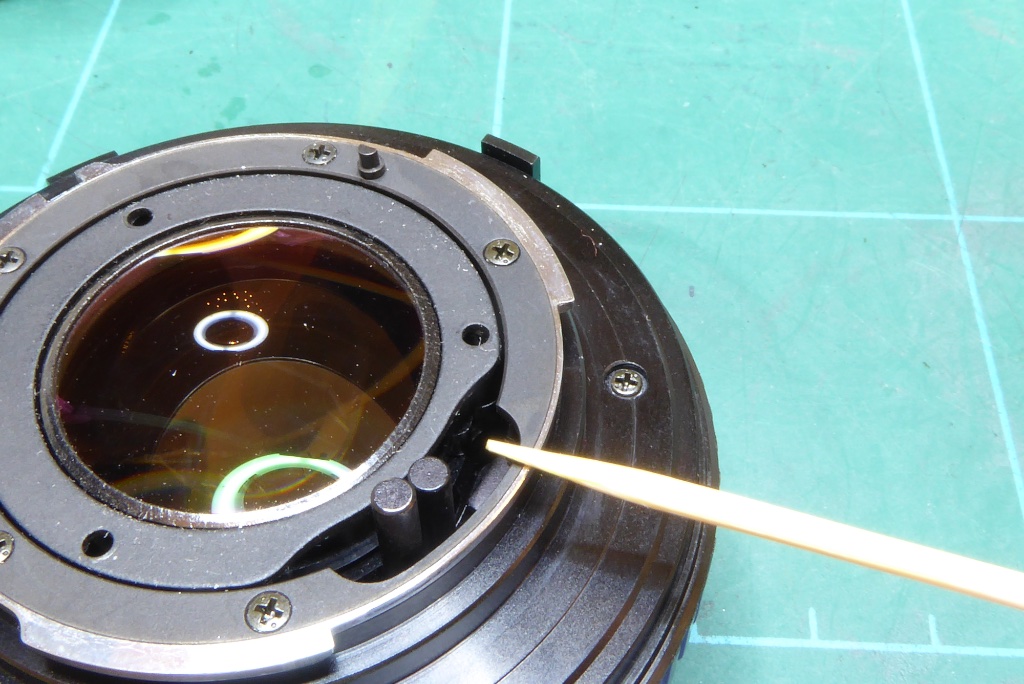
Replace the rear plate making sure the flat side is located against the aperture lever and the blackened side is facing outwards (eg would face into the camera when mounted).
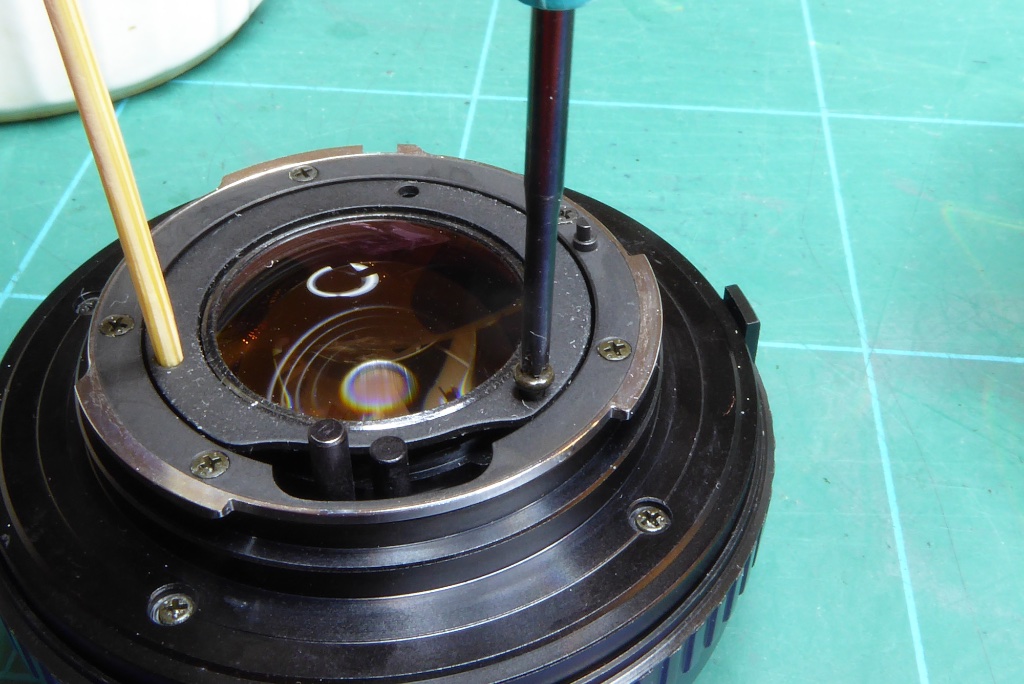
Replace the three screws that secure the plate and the rear optical group and then secure a rear cap to protect the rear of the lens.
| Phase 10 Minolta MD Lens Repair Guide |
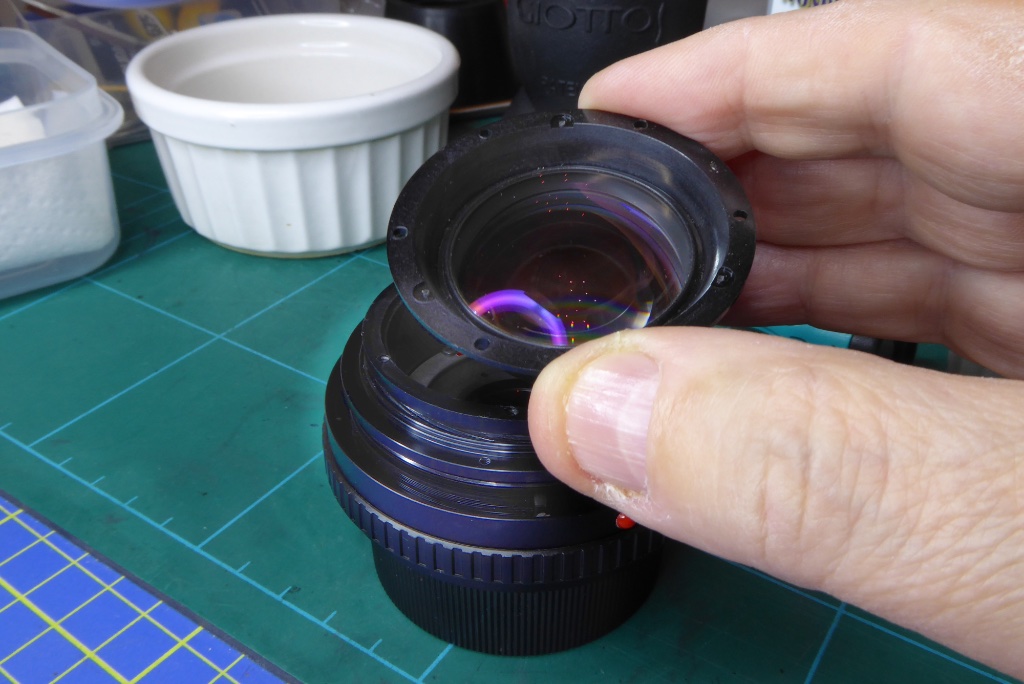
Replace the front optical group. The lens should be blown clean prior to replacement.
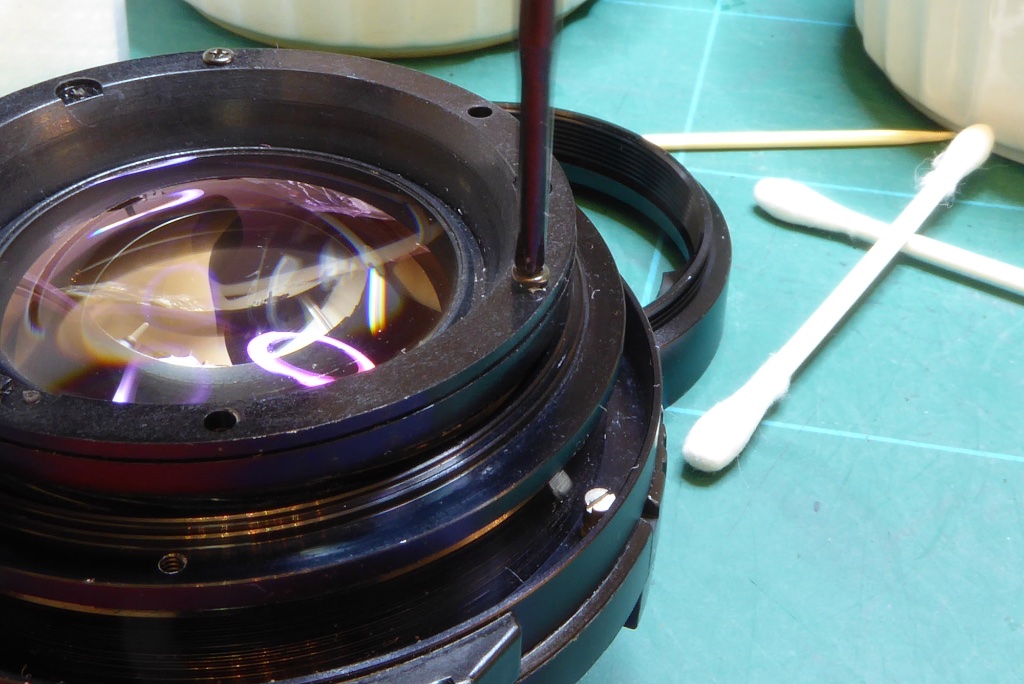
Replace the 3 screws that secure the front optical group.
| Phase 11 Minolta MD Lens Repair Guide |
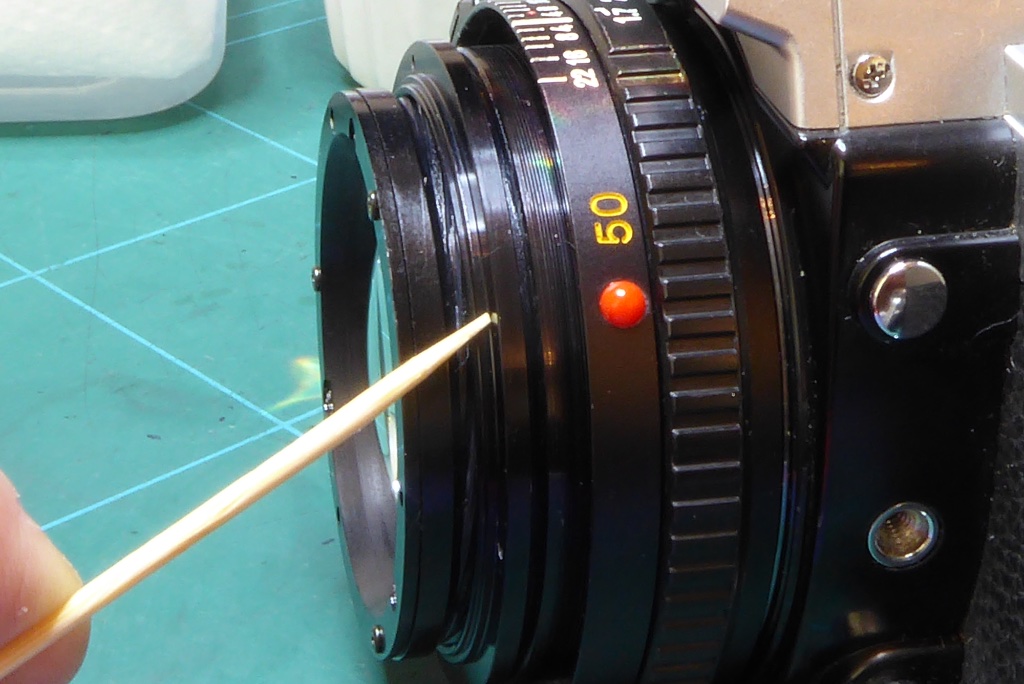
Attach the lens to a known good camera, look through the viewfinder and use the outer helicoil to bring the lens to infinity focus.
I normally aim at a pair of radio towers around 8 miles away and use a camera with a split field focus.
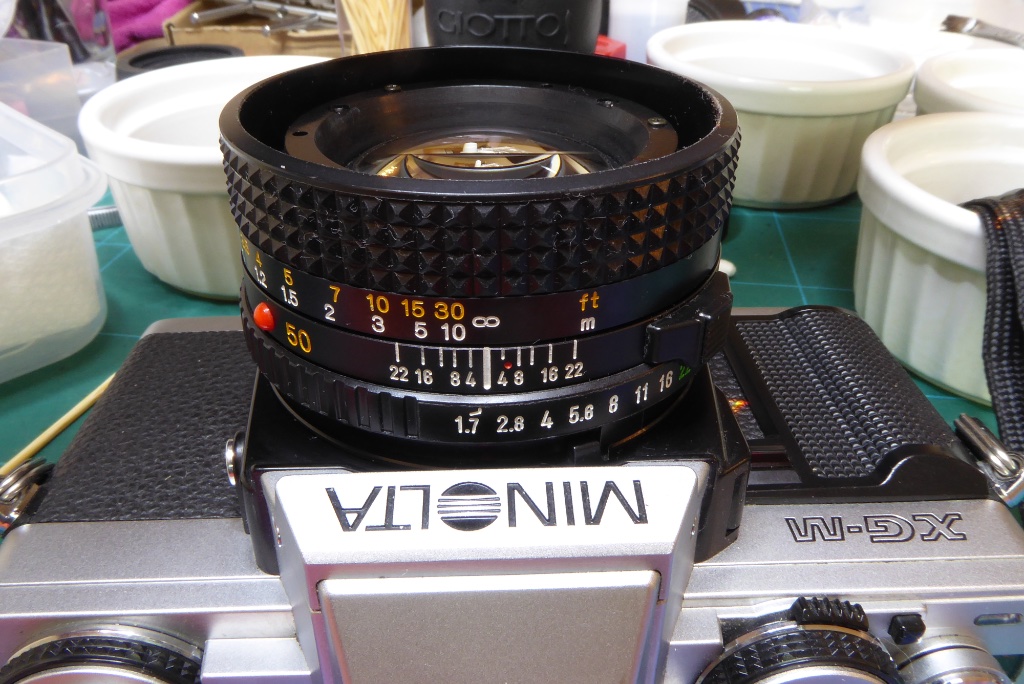
If all is well with focus gently put the focus barrel over the lens and make sure the infinity mark is against the index line. The barrel will also be set against the focus stop.
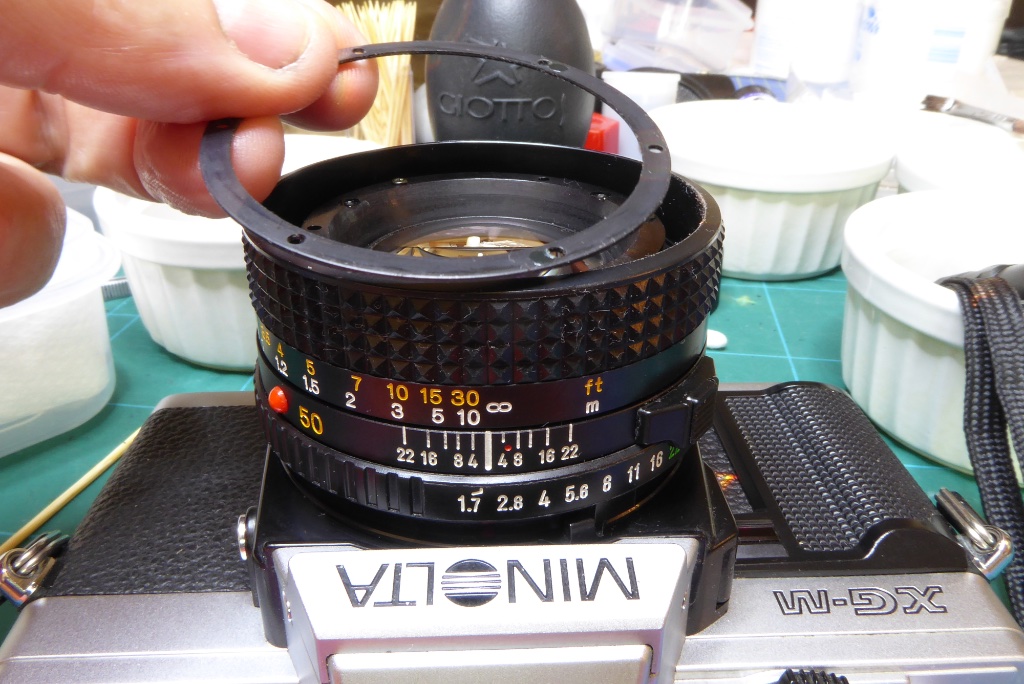
Carefully position the focus barrel locking ring to align with the three fixing positions.
A bamboo skewer is helpful for positioning this.
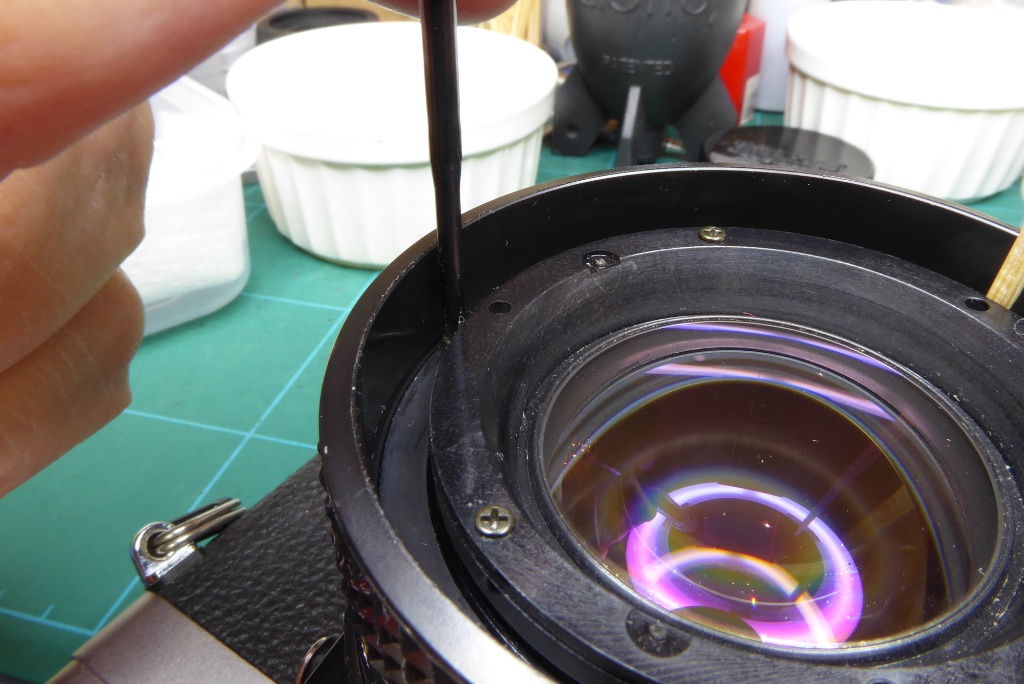
Fix the focus barrel locking ring with the three screws. Do not overtighten as these will shear easily.
A good test of tightness is to hold the screwdriver between thumb and forefinger and roll the screwdriver between your fingers. This will take it to just tight enough.
Recheck focus at the end of this and if needs be release the screws a little and shift the focus barrel around. This can be fiddly to get perfect – take your time and don’t rush.
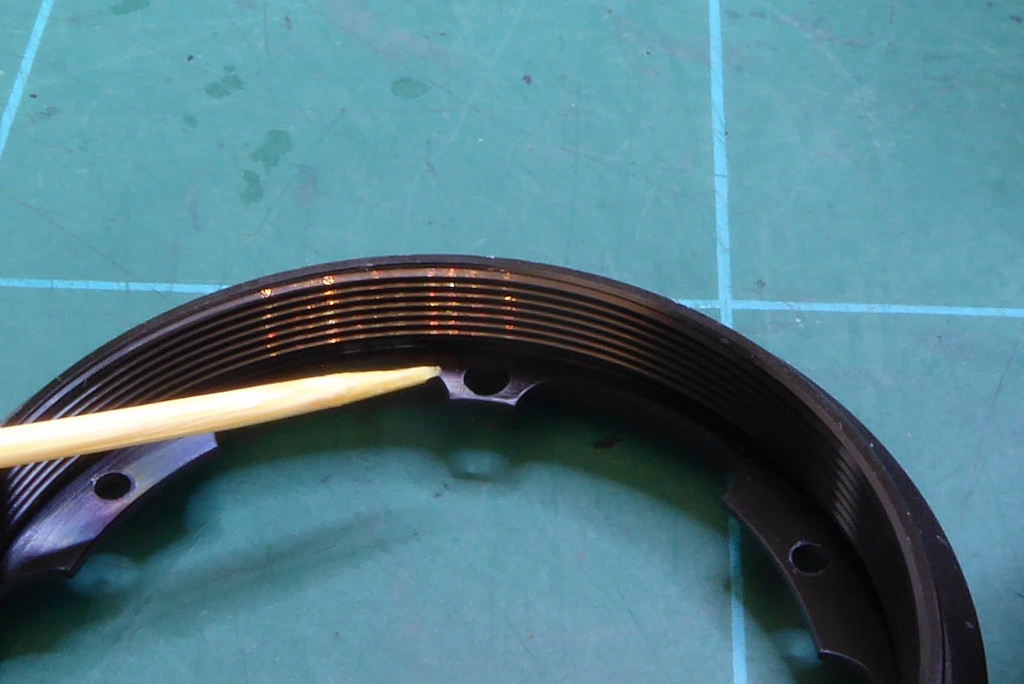
The filter rings come in differing styles for MD lenses. This one has a position that fits over one of the lens fixing screws as shown.
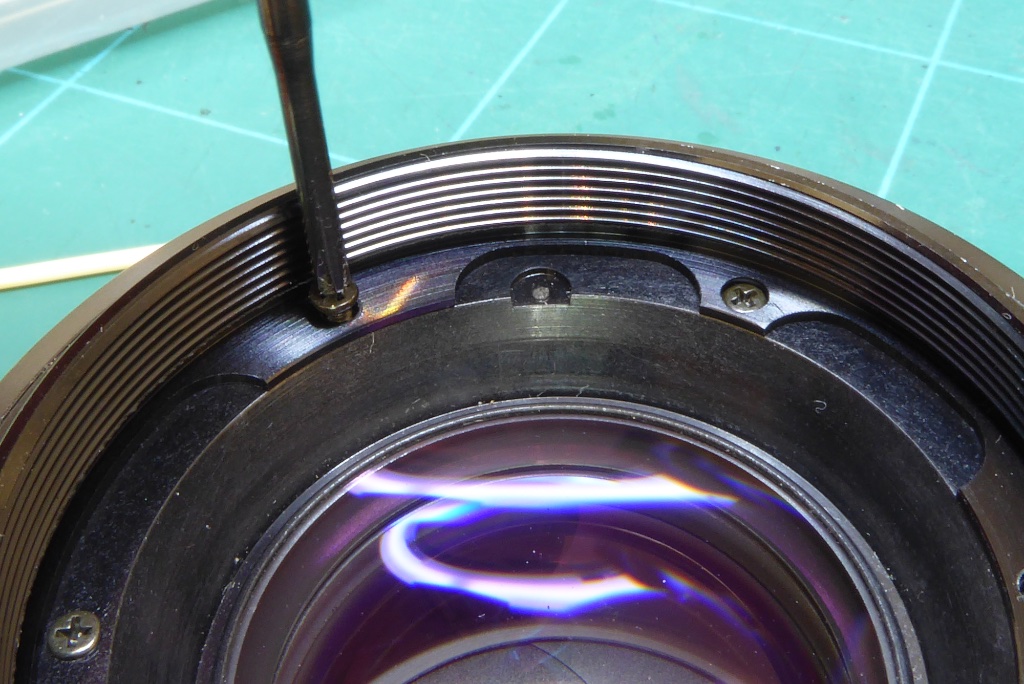
Replace the filter ring and replace the screws holding it in place. You can see in this picture the short tab which simply goes over one of the front element retaining screws.
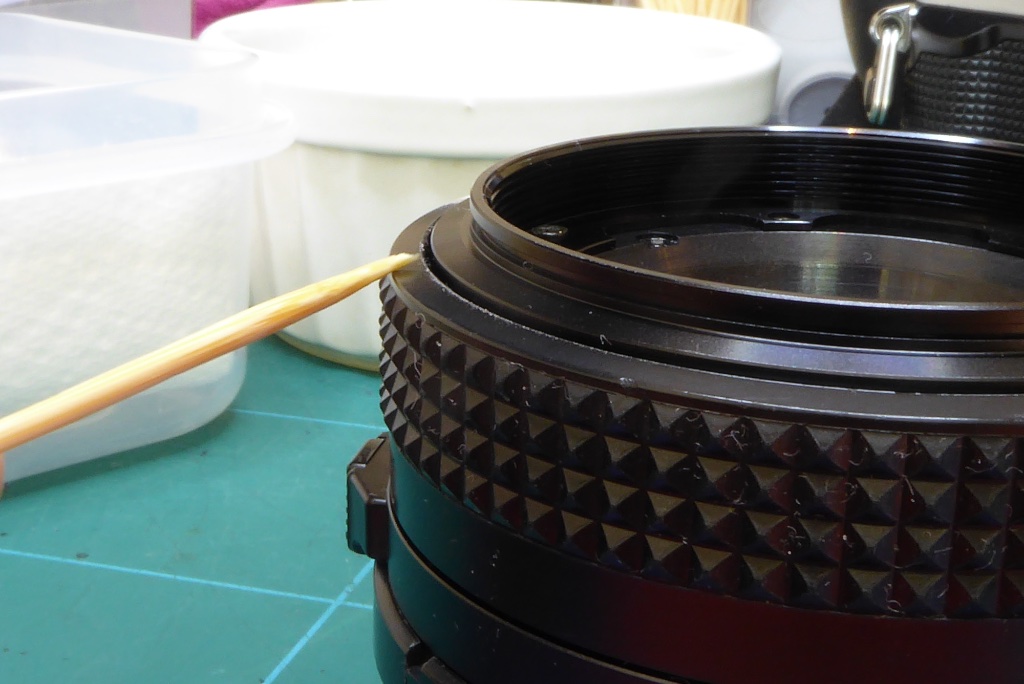
Cosmetically when the lens is at infinity the edges of the focus barrel and the filter ring shoulder should be almost flush. So long as the helicoil measurements were correct on reassembly this will be as close as you can likely get.
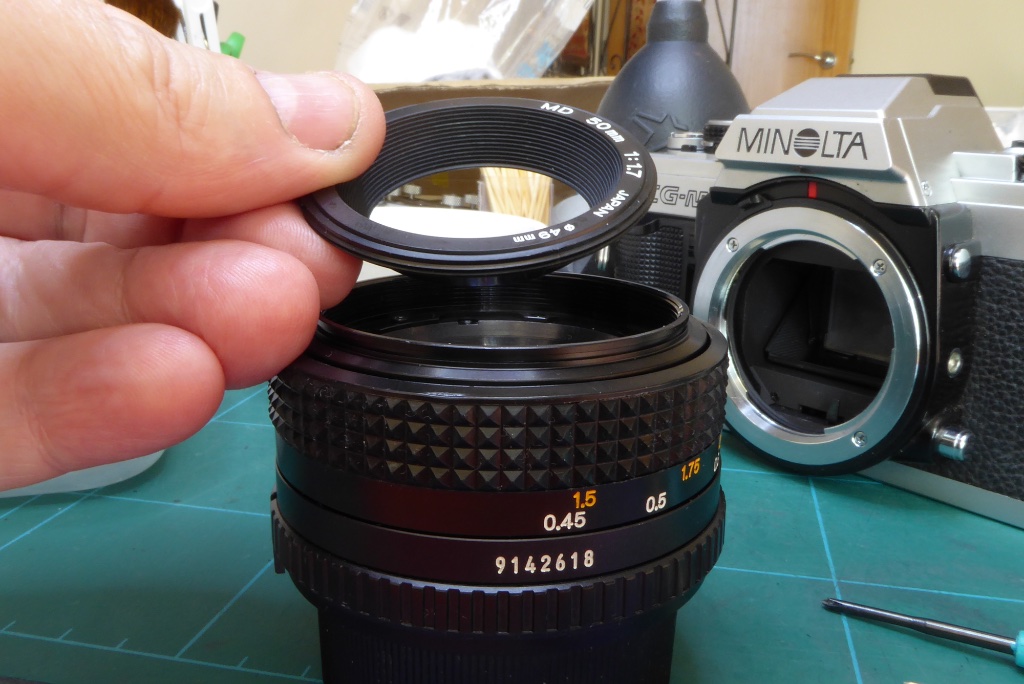
Replace the beauty ring….
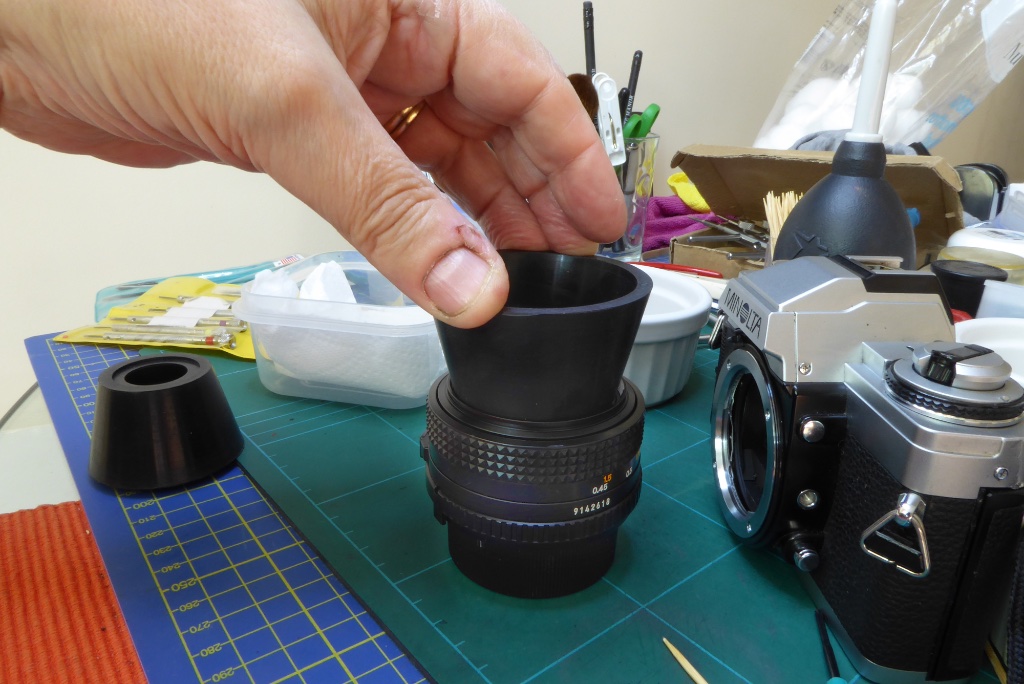
…and use a rubber cup to tighten down. Take care with this as the filter ring is metal while the beauty ring is plastic. Make sure it is correctly threaded before attempting to tighten down.
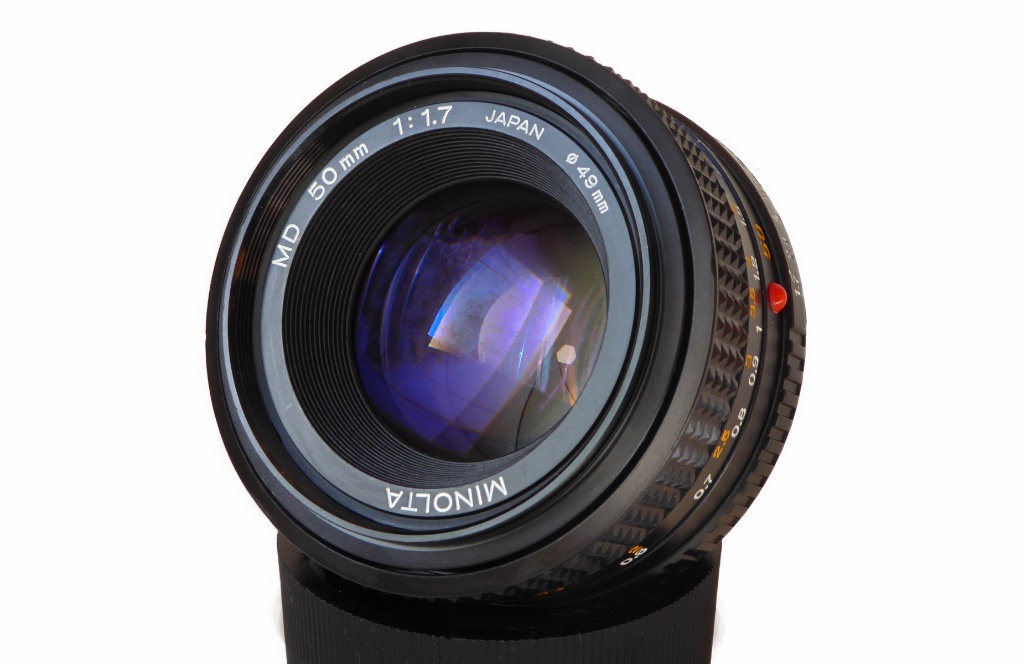
Take a final check and make sure the lens is operating correctly, focus at infinity is ok and all f stops and stop down are working correctly.
Notes on The Minolta MD 50mm f1.4 Lens
The f1.4 version of the MD lens is somewhat different. The basic process described for the f1.7 or f2 versions is the same but there are some differences in construction.
1/ The Filter Ring
The filter ring on the f1.4 version is part of the front lens body. With the beauty ring removed you will see two small grub screws. Remove these and then simply twist the enire front of the lens away which includes the filter ring.
2/ The Front Optical Element
The front element is retained by three JIS screws.
3/ The Rear Optical Element
Unlike the f1.7 and f2 versions the rear optical element is not retained by the use of screws. It is screwed to the rera of the diaphragm assembly. You will find this easiest to remove with the lens mount and aperture ring removed. You may need to use some Isoprop to break down the thread lock.
4/ The f1.4 most usually only has a single helicoil lock tab.
The actual process for stripping down, rebuilding and setting infinity focus is otherwise identical in most respects.
Further Reading

Mel is one of the driving forces behind High 5 Cameras and writes all our articles.
Starting serious photography back in 1972. Over the years she got to shoot film with most of the major brands in 35mm and large format as both a studio photographer and content provider for websites in the early life of the web. These days she is rediscovering photography and has become the GOTO person for knowledge on camera repair advice.


