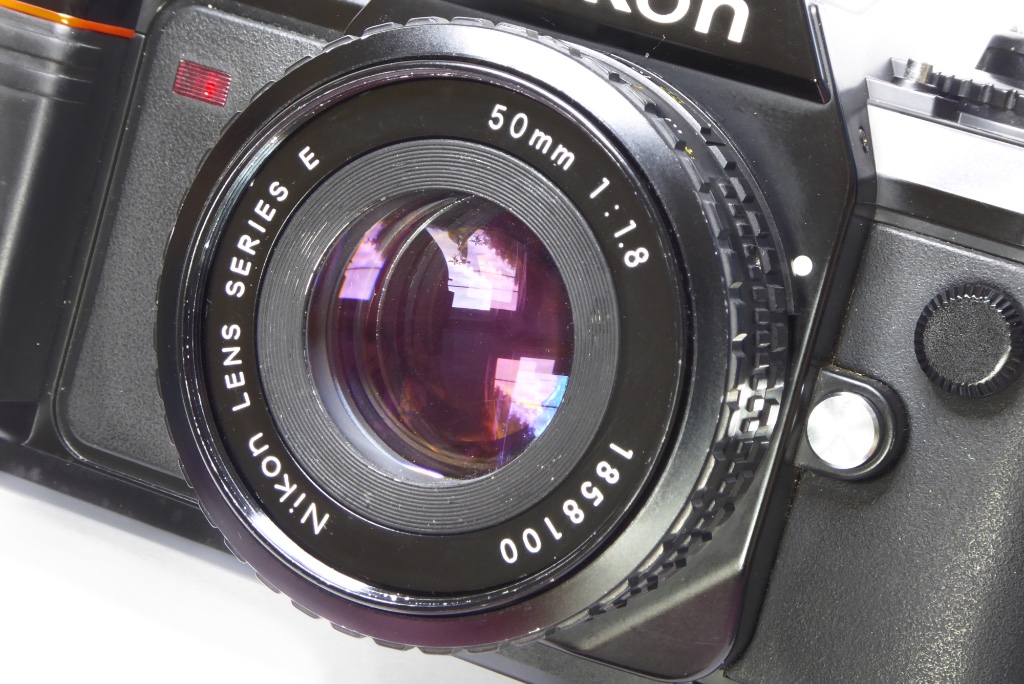
A step by step Nikon E Series Repair Guide to the first version of the Nikon Series E 50mm f1.8 lens.
Copyright 2022 High5Cameras,
Free to use, copy and distribute so long as no charge is made for use,
distribution or access and authorship and web address is freely acknowledged.
The Series E 50mm f1.8 started production in 1979 when Nikon launched the Series E line of compact, budget-conscious lenses.
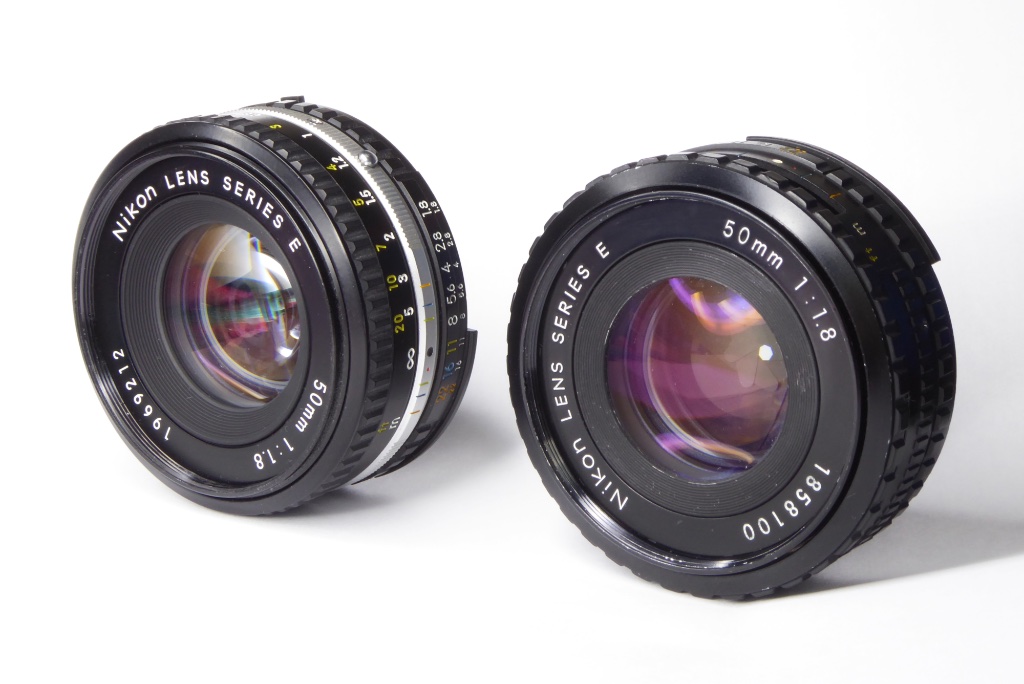
The original Series E made between 1979 and 1981 was made almost entirely of plastic and its exterior finish is somewhat cruder giving it a budget look. The later version 2 made between 1981 and 1985 was a little larger and had a more refined look. Optically there’s little to choose between them.
The Series E line was comprised of eight lenses and was intentionally branded differently from the primo quality Nikkor lenses. Nikon obviously did not want the much vaunted Nikkor brand contaminated by lenses with plastic parts and lower quality coatings. Nikon being Nikon though just couldn’t do budget anything. They may have been low cost but Nikon managed to produce an exceptional lens in the 50mm f1.8 – the most common Series E lens.
The Series E 50mm was not originally intended to be budget but had its roots in Nikons requirement to improve their original 50mm f2 Nikkor. They gave this task to legendary Nikon designer Souichi Nakamura who somehow managed to create on a budget a lens with amazing properties. Small, light, almost pancake in appearance the Series E 50mm f1.8 could kick it with the best of them. It could blow more venerable lenses into the weeds back then.
Sadly its capabilities went largely unrecognised in its day. It was most usually bundled with Nikons low end consumer cameras like the EM and the FG which is why it lacks the ‘bunny ears’ of the more upmarket lenses designed to work with all of the pro gear as far back as the Nikon F. The EM and FG series cameras had a poor reputation for reliability and I suspect that pretty much doomed the Series E to obscurity. Pros never bought it anyway and consumers either lacked the skills to appreciate it or else found it stuck on a camera that was junked. The sole exception to this was the Nikon F-301, Nikons last manual focus 35mm SLR, which came bundled with a late model series E 50mm f1.8 early in production – the F301 found a lot of favour with pros, including me, as a backup camera.
It’s taken over 40 years for the lens to be truly appreciated. At one time a budget lens it now commands a fairly hefty price. Almost on a par with a Nikkor 50mm f1.8 in pricing!
The Series E has become a kind of must have among Nikon fans and digital users. Razor sharp optics and 40 years have finally given it the standing it deserves.
NOTES BEFORE YOU START
The Nikon ‘E’ Series 50mm f1.8 is a bit of a challenge. It’s nowhere near as tough as some lenses but it does have some booby traps to catch the unwary.
This Nikon E Series Repair Guide only covers the early version of the lens. If you want a good guide on the later version I can recommend Richard Haws guide here.
If you have read my guides on Minolta lenses you will know that Minoltas are usually very kind to beginners and you can afford to not worry too much about helicoil distances. That’s absolutely NOT true with this lens and you need to mark alignment point on EVERYTHING unless you want to spend the next 2 weekends reworking it.
This particular lens was not in a good state and its focus barrel was jammed. As a result I had to work from scratch and estimate its helicoil distances. This resulted in numerous rebuilds. This guide will talk you through how to establish infinity focus if you have the same issues. If your lens is basically working AND you are very careful about marking and measuring the lens will be quite straightforward but its good practice to make marks and measurements. Get in the habit of doing that.
When working on one side of the lens (eg the front) always be mindful about what’s happening at the other side (eg the back). I always keep caps on as much as possible to prevent any accidents. The classic mistake is for people to press on the lens while it is on a workbench and break things on the back end of the lens like the aperture lever.
Nikon are swinish at applying threadlock so an absolute must for this lens (and any others to be honest) is a decent set of JIS screwdrivers. Philips drivers can be totally relied on to round out screw heads on most Japanese gear and it’s a near certain result when working with Nikon lenses. If you hit a stuck screw apply some Isoprop and wait, if its still stuck apply a bit more and wait. Brute force is seldom a good thing with this lens.
You can use acetone sparingly but be VERY CAREFUL – the lens is mostly plastic and acetone can melt the lens parts as well as the threadlock.
There is no such thing as luck in repairing optical equipment, if you do it right, using skill and patience you will be rewarded with a perfectly operating lens. A rushed or bodged job will result in the lens being devalued, unpleasant to use and possibly unusable so…..take your time, get the right tools and materials, don’t take shortcuts or advice from people who know less than you (check out my camera history here).
The biggest issue with the Series E lens is the very tricky focus helicoil distances. I have made lots of notes throughout the Nikon E Series Repair Guide so make sure you read the entire guide before starting work.
Nikon E Series Repair Guide – Disassembly
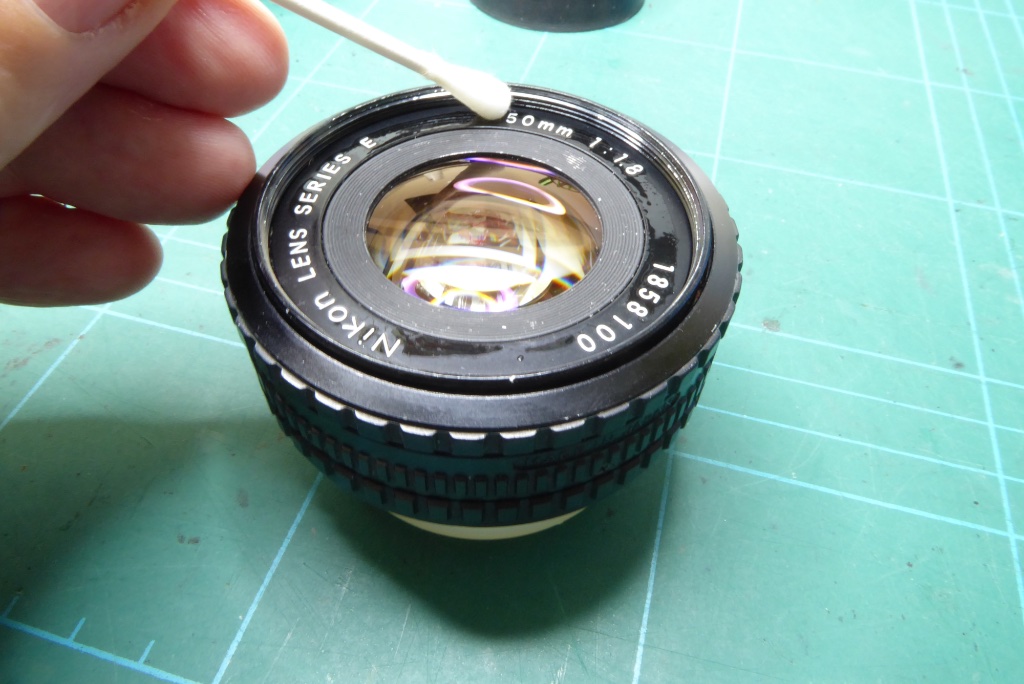
First step is to remove the beauty ring. On the ‘E’ Series 50mm f1.8 these are very thin and very fragile. Too much pressure will cause the ring to distort outwards and jam. This one was stuck fast by layers of grime so it took a few applications of Isoprop soaked into the filter threads to get it to release.
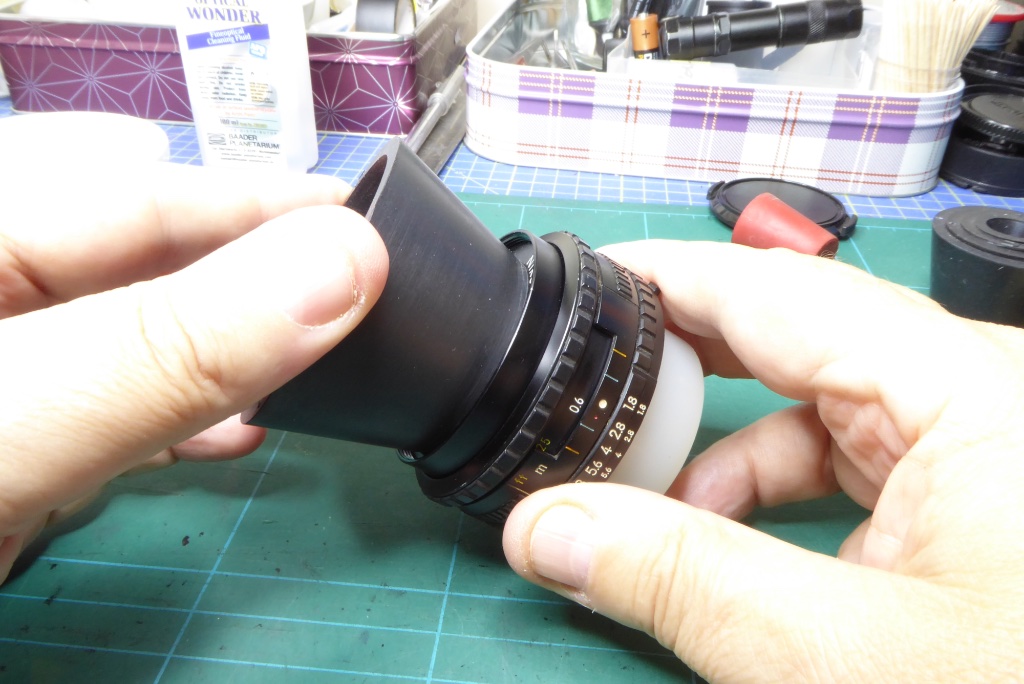
Now it’s time to remove it with a rubber cup – do not apply pressure or the beauty ring will get distorted and will jam. If this isn’t working for you then you can try applying some sticky tape to the beauty ring and just try and turn it out with your fingers on the tape. Don’t let gum from the tape get on the lettering – the lettering can easily be damaged.
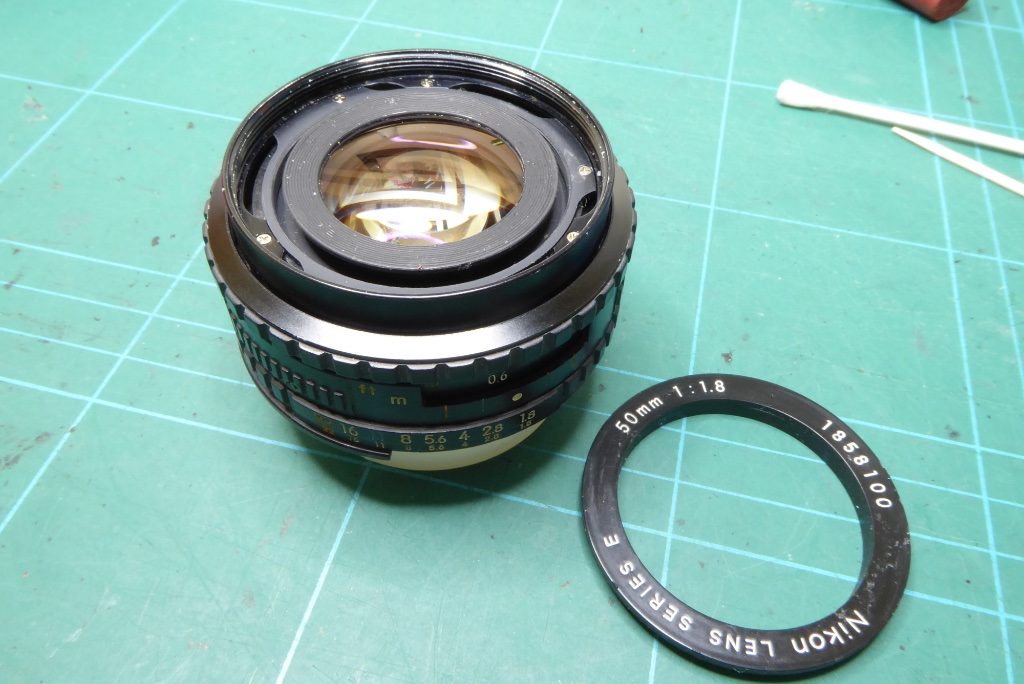
Here’s the beauty ring removed revealing all of the fittings and screws to get the front of the lens off.
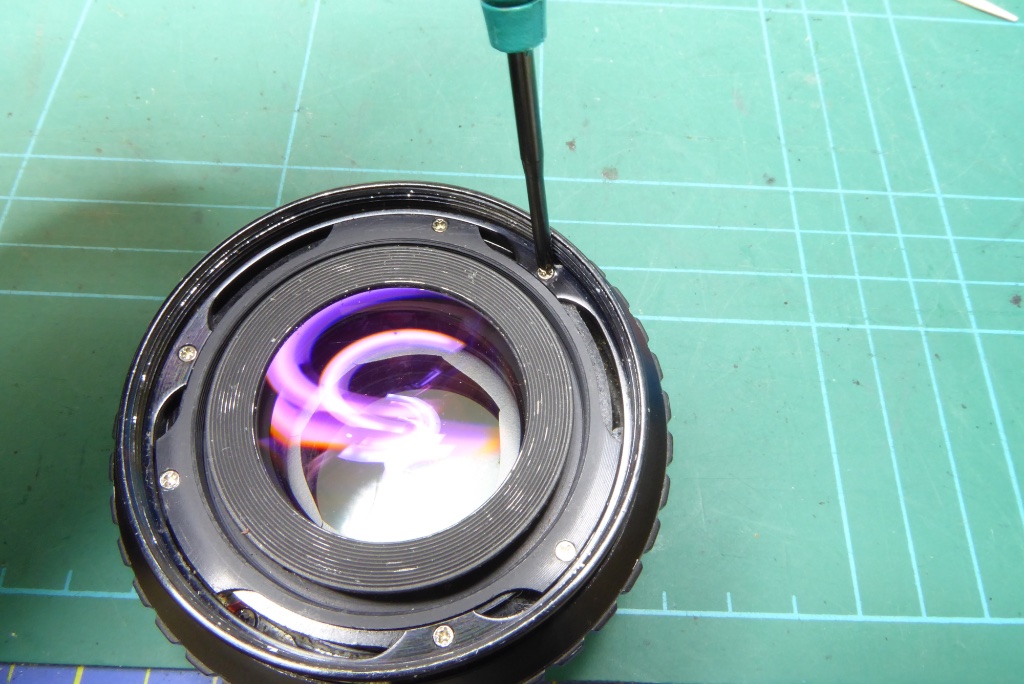
First we remove the filter ring. This is secured with three small screws. Use a JIS driver here or the heads will round out.
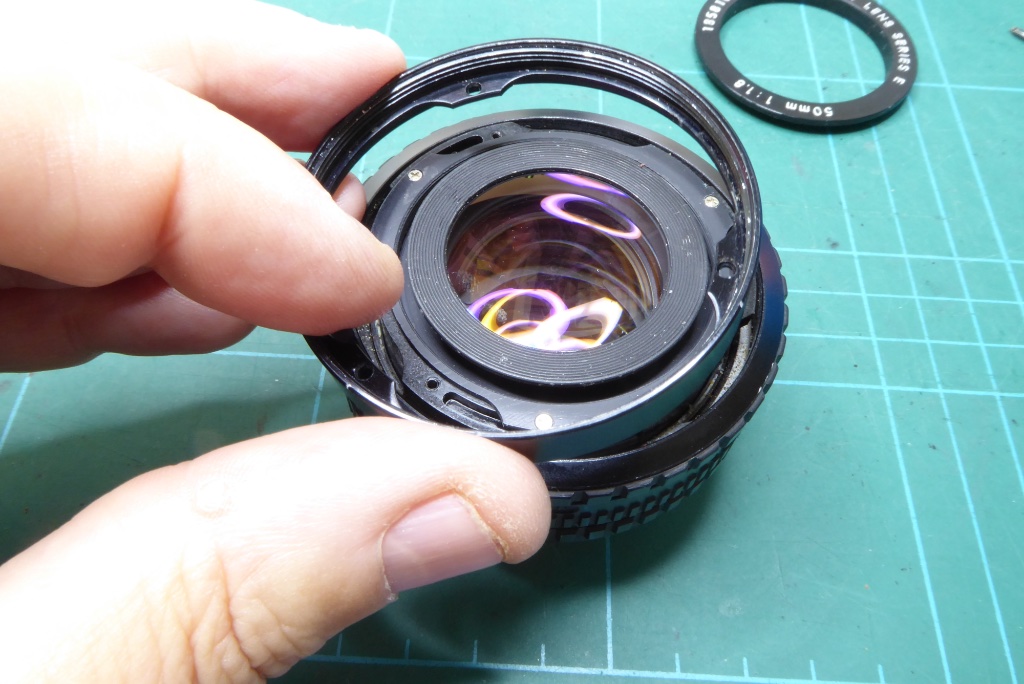
Remove the filter ring.
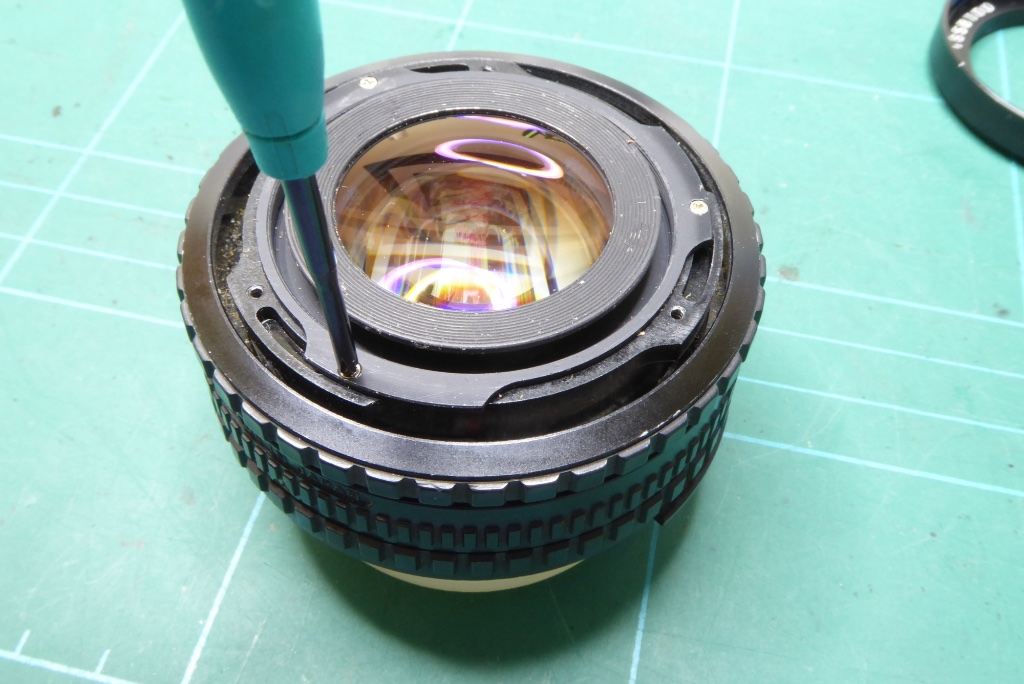
Now remove the three JIS screws that secure the front element group.
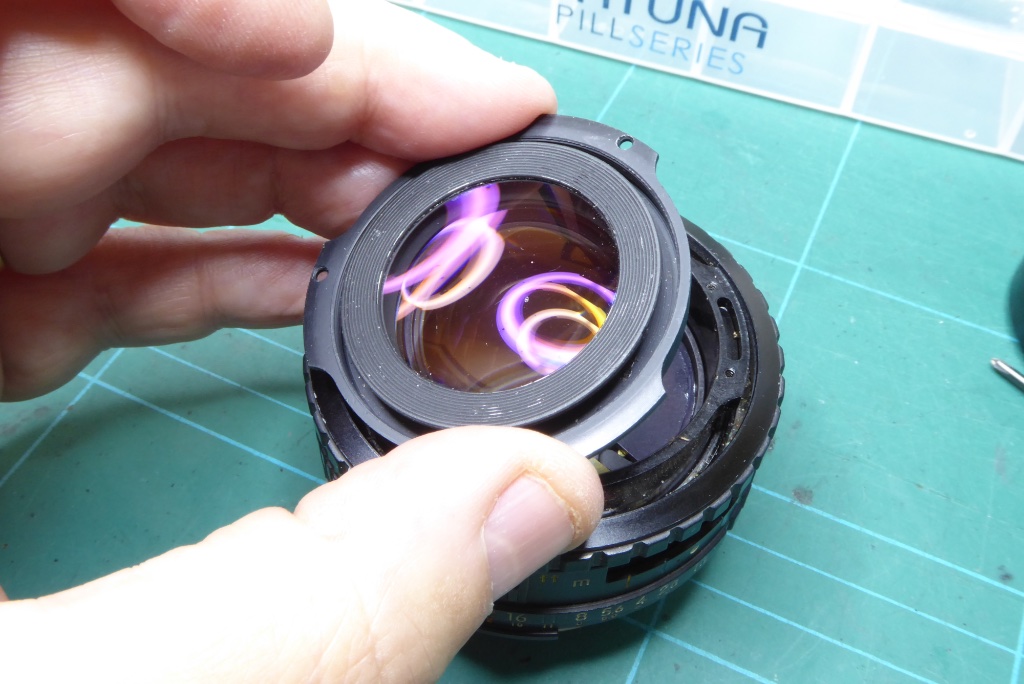
The front element group can now be lifted off. Store this somewhere safe. Don’t bother cleaning it just yet. This lens can be a pig and you may end up doing multiple rebuilds.
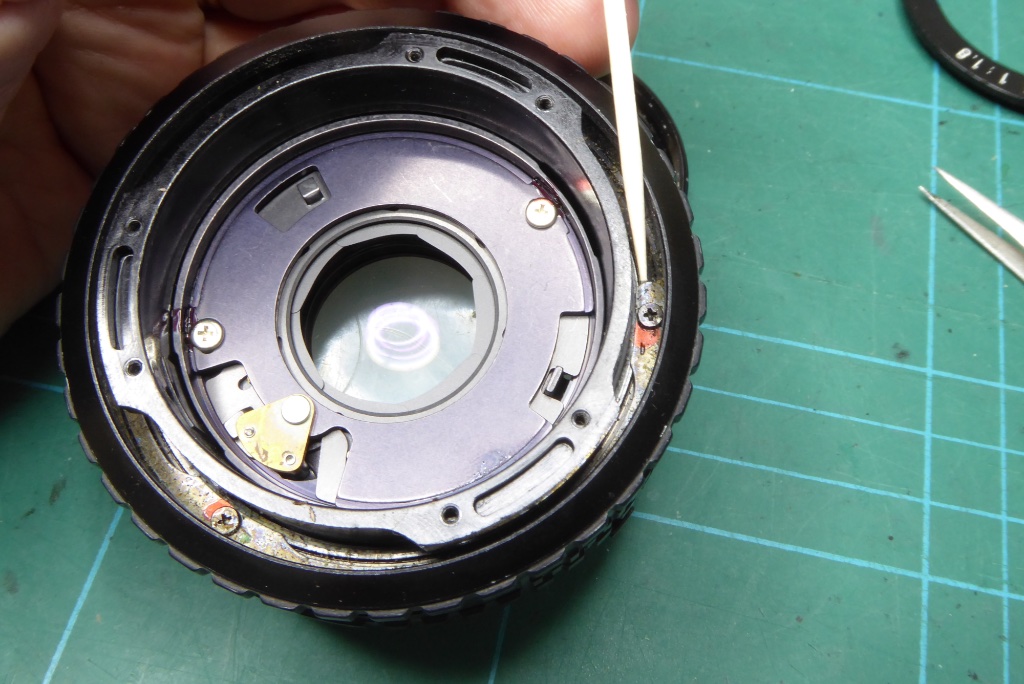
Now remove the focus barrel. This is retained by a thin metal retainer. It does not go all the way round the lens and is retained by three screws.
Before you remove this set the lens to infinity and mark the inside of the barrel for the two screws at each end. This will save a lot of grief later.
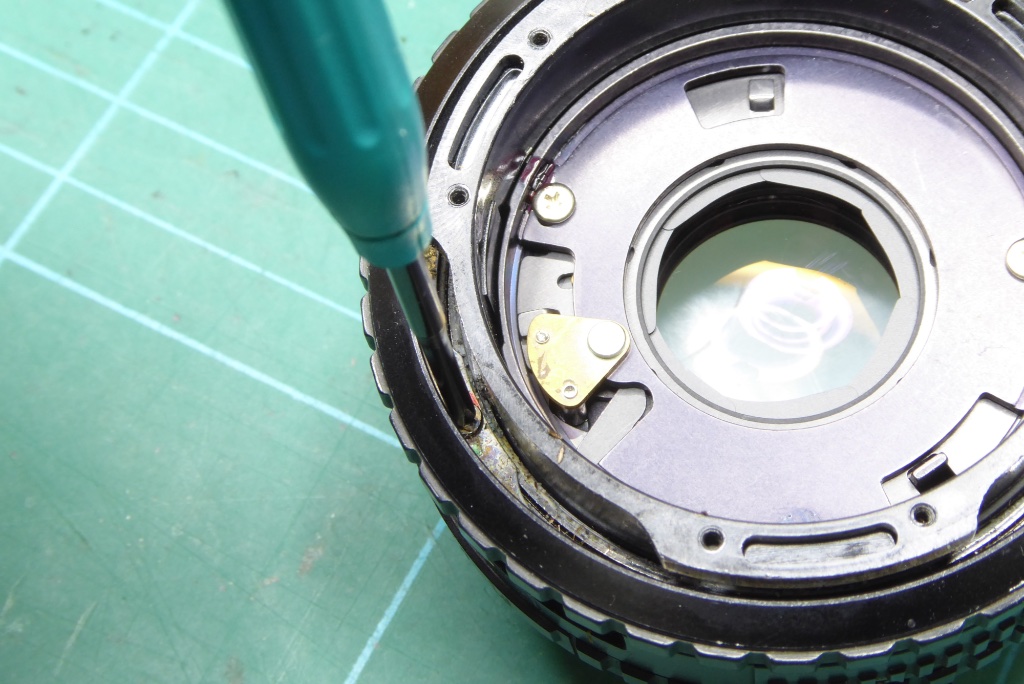
Here’s one of the screws being extracted.
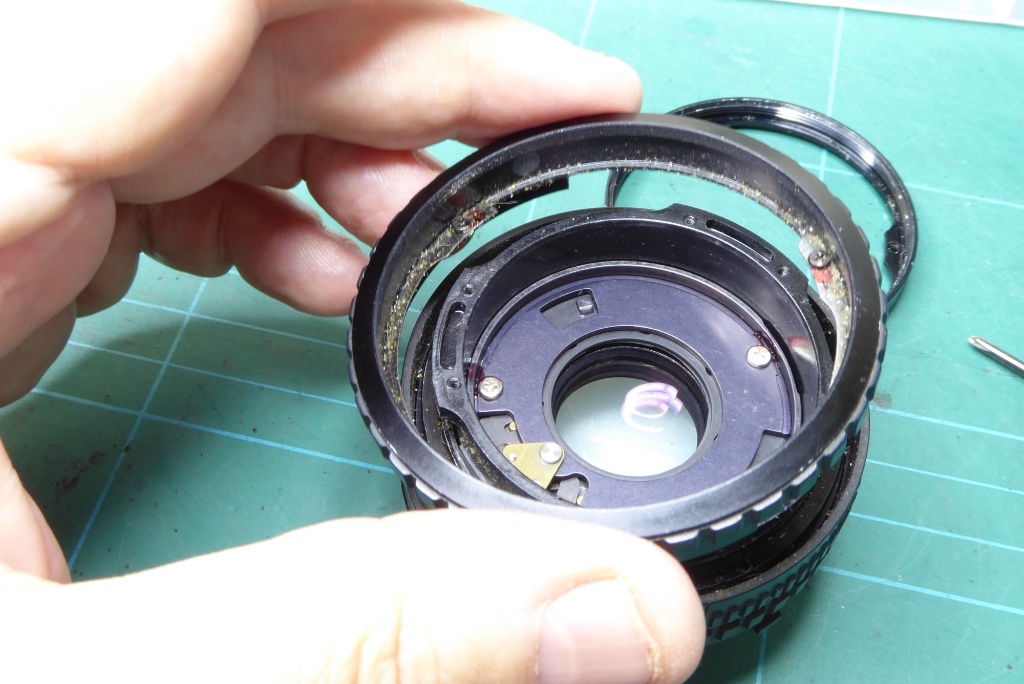
And now the focus barrel can be removed – you can see in the picture the focus barrel retaining ring only goes around 2/3rd of the barrel diameter and it’s position is super critical when replacing the barrel later on.
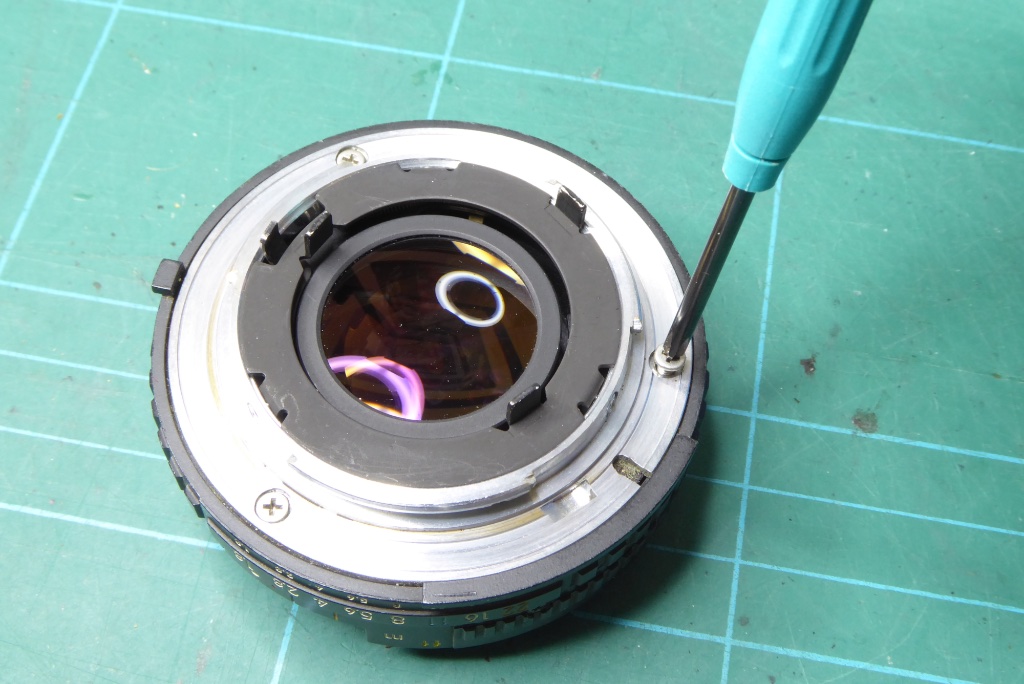
It’s now time to turn the lens over and start work on the rear of the lens.
Remove the three JIS screws using a JIS screwdriver. These screws are usually VERY tight. Nikon loved the use of thread locker so if they don’t turn out easily apply some Isoprop and wait. A JIS driver is essential for these as they can be rounded out very easily.
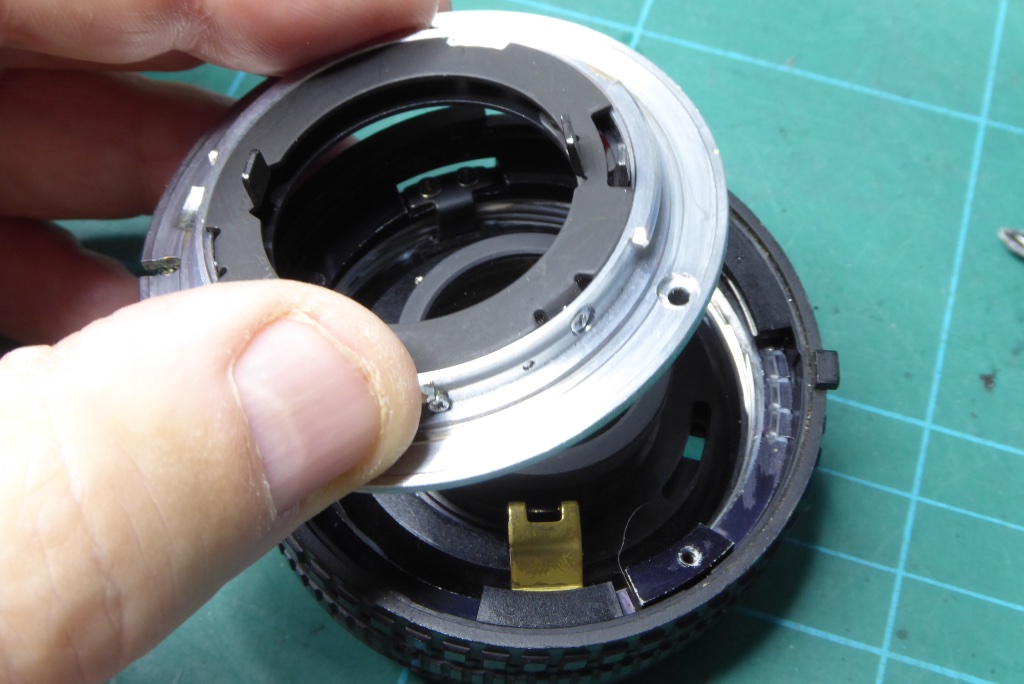
With the three screws removed the lens mount can be simply lifted off.
Note its orientation with respect to the aperture lever below.
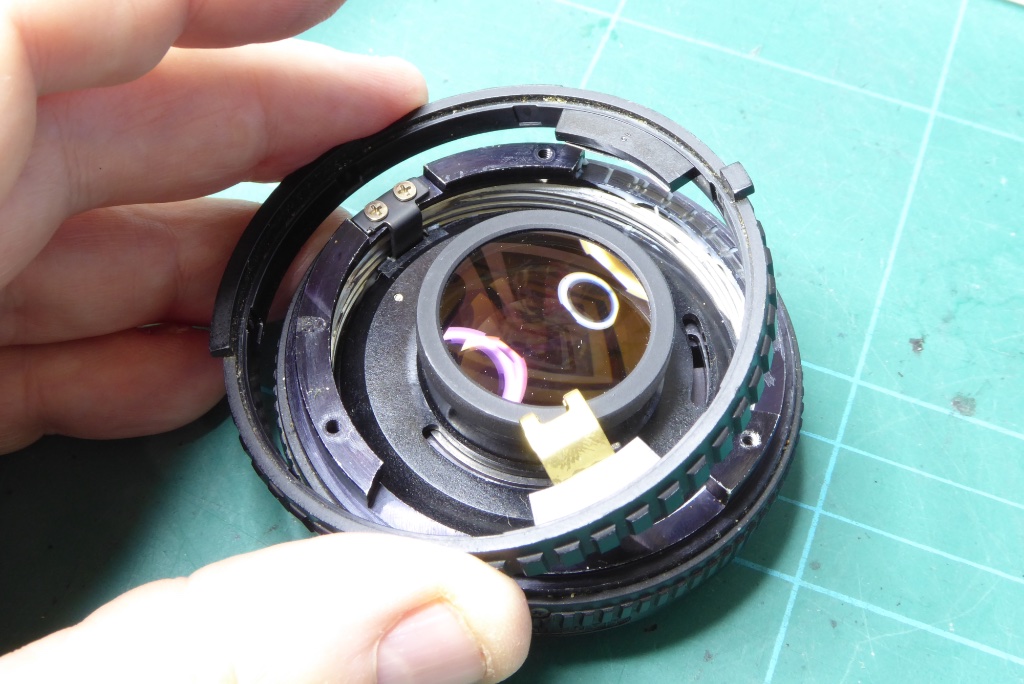
Now you can simply lift the aperture ring away. Note how the fork on the aperture ring locates on the lens aperture lever inside.
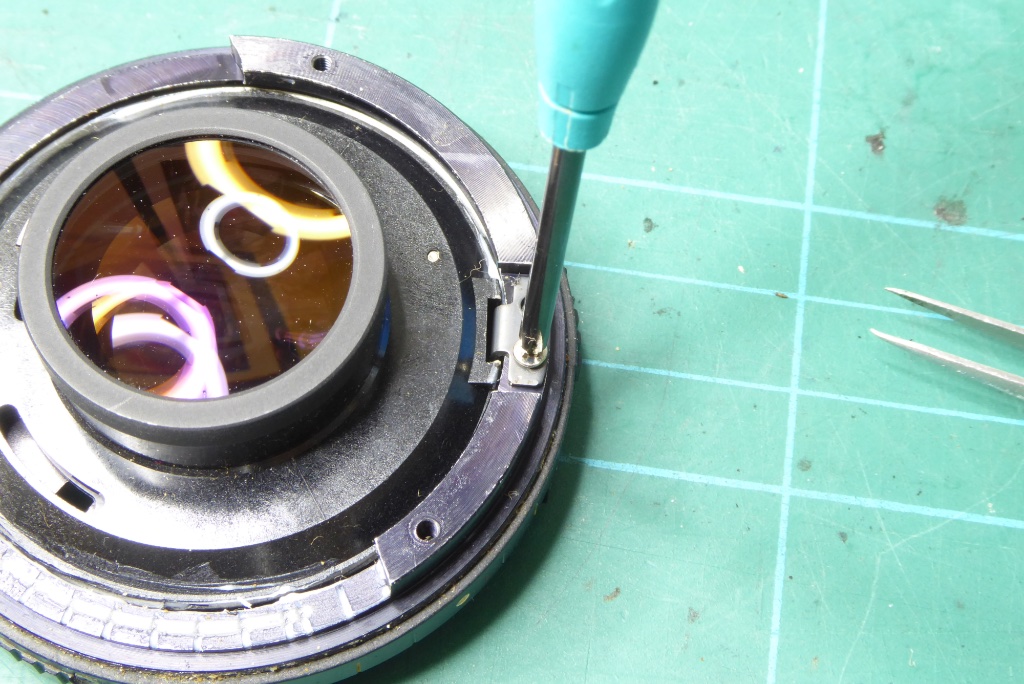
Remove the focus lock tab. Again on this part Nikon loved to use thread locker so use a JIS driver only and if these are reluctant to come out apply a few dabs of Isoprop and wait.
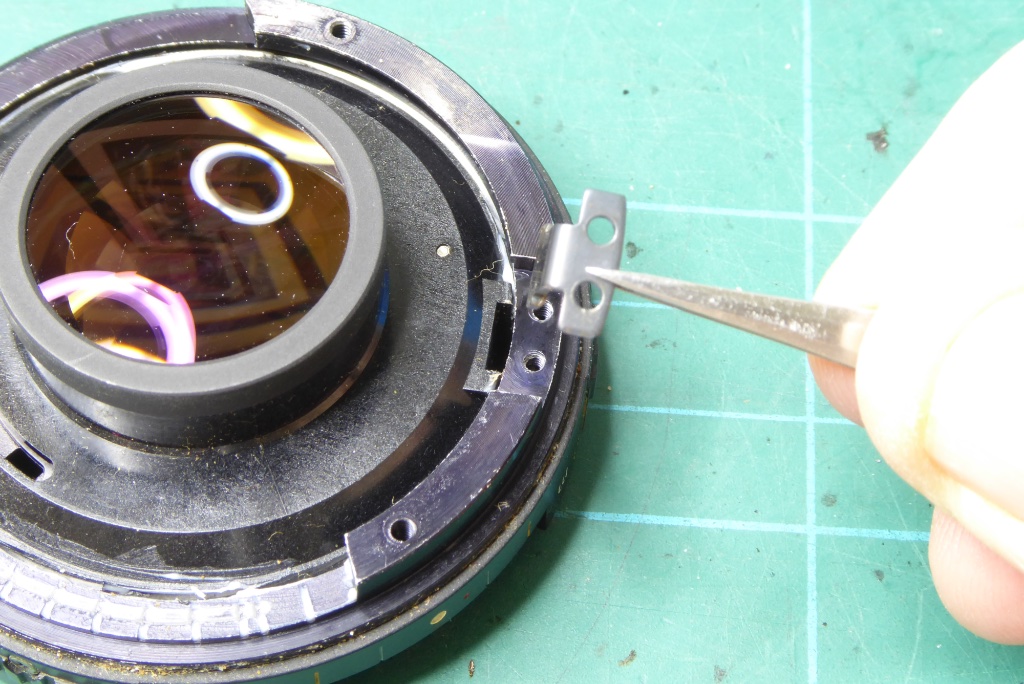
Once the screws are out the lock tab can simply be extracted.
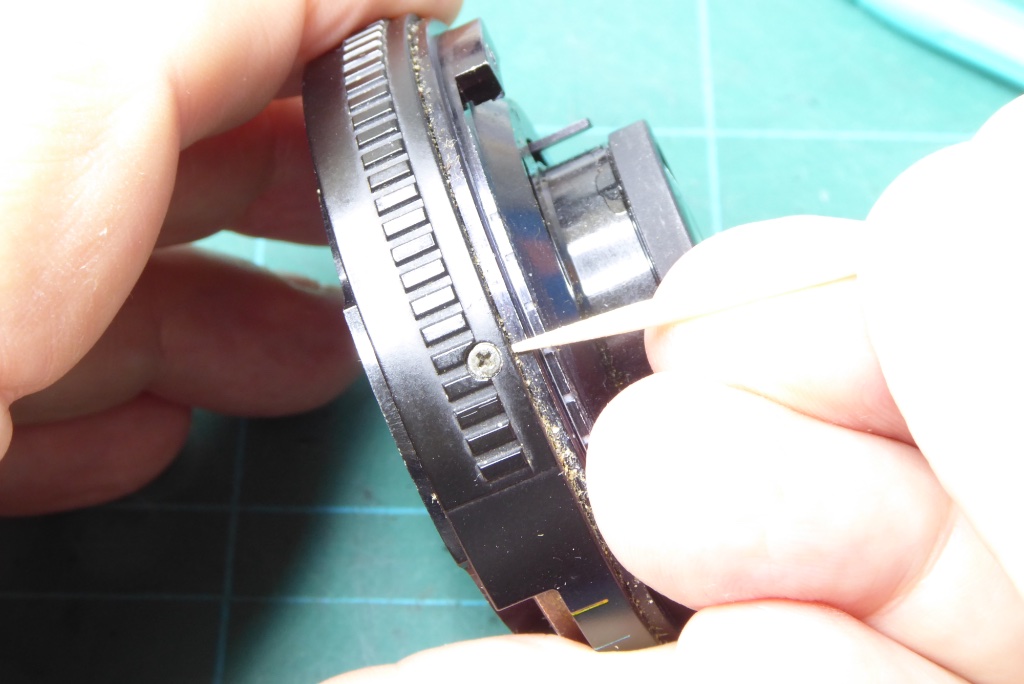
If you wish you can remove the aperture index ring.
When I rebuild I rebuild and everything gets cleaned.
You may HAVE to remove this to set infinity focus later so now is as good a time as any.
Note the orientation of the cut out with respect to the lens body and mark it appropriately.
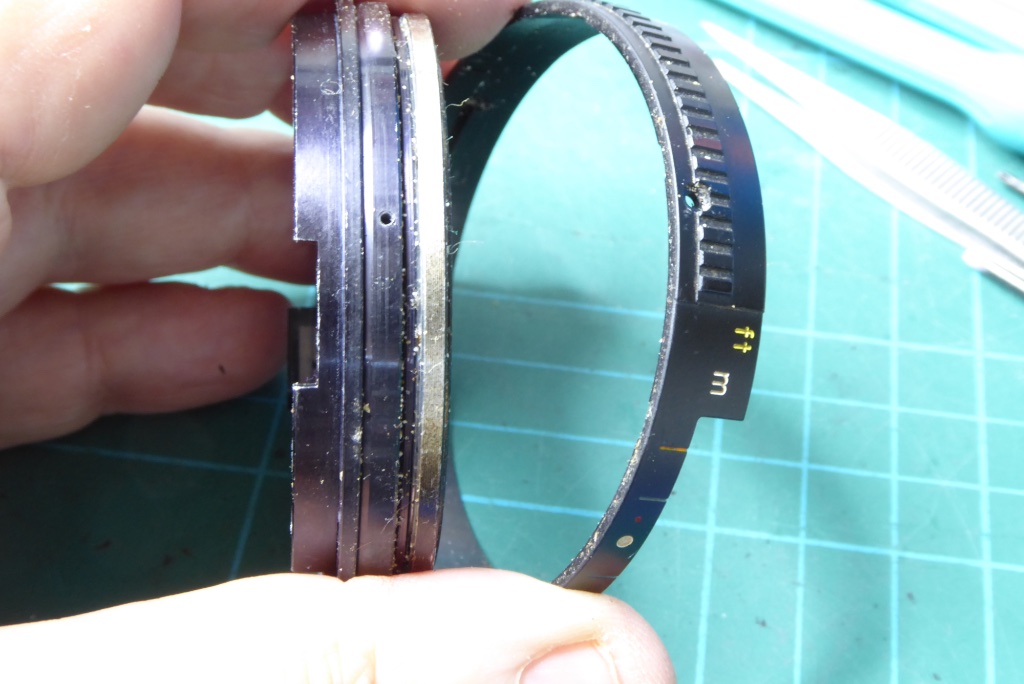
Here you can see the index ring being removed and observe the cut out on the lens body. The reason for marking is I have seen this lens with an extra hole as though there were two positions. To avoid confusion just make a note or put a small mark on the lens body to indicate the orientation of the index ring.
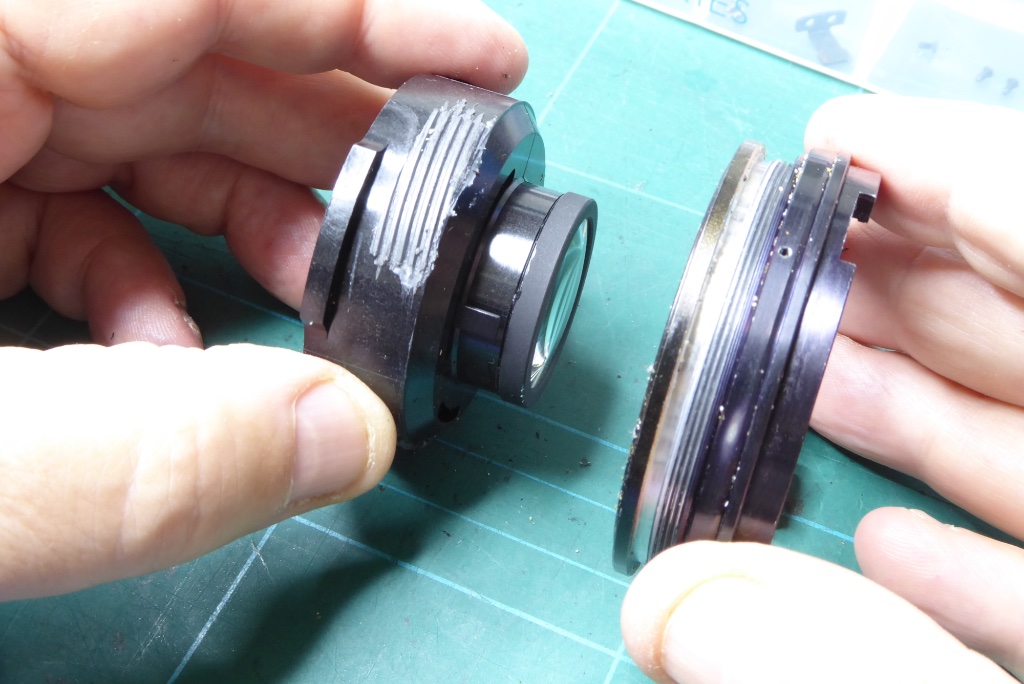
This part is CRITICAL you need an accurate measurement of the distance between the inner helicoil seen here being removed AND a mark showing its position relative to the outer helicoil (the brass coloured helicoil in the picture) when they were at infinity focus. I normally use the tip of a jewellers screwdrivers to measure the distance by seeing which driver will fit in the gap between the helicoils.
If you cant measure because your lens was jammed don’t worry. I’ll show you how to resolve this but it’s a lot easier if its marked at inifinity.
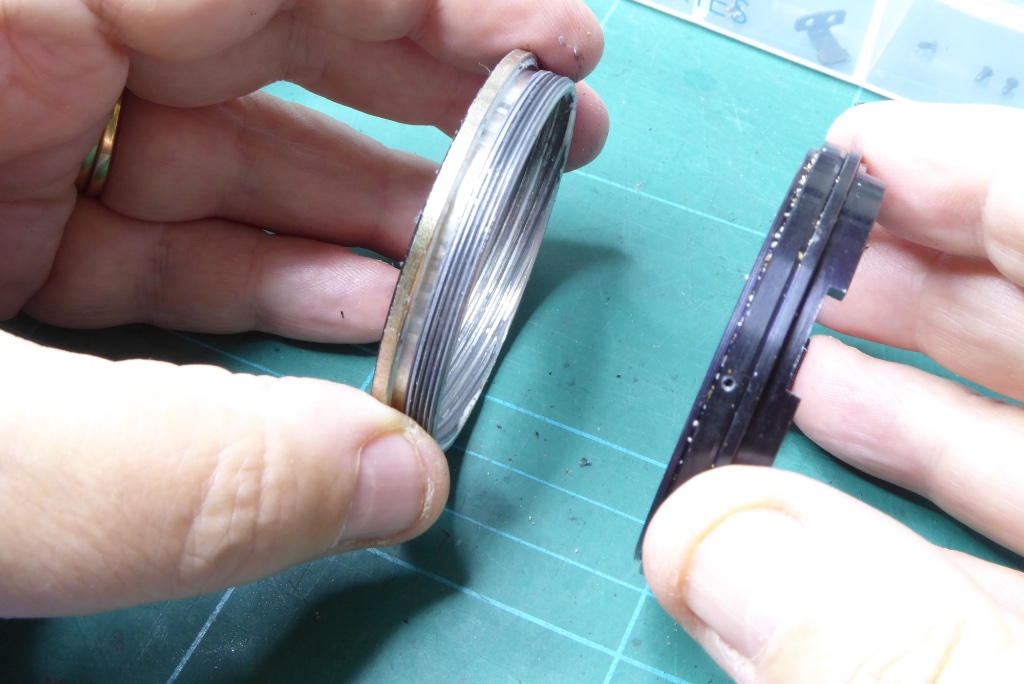
This part is also CRITICAL make a measurement of the distance between the outer helicoil and the lens body and make a mark of how they were orientated with respect to each other.
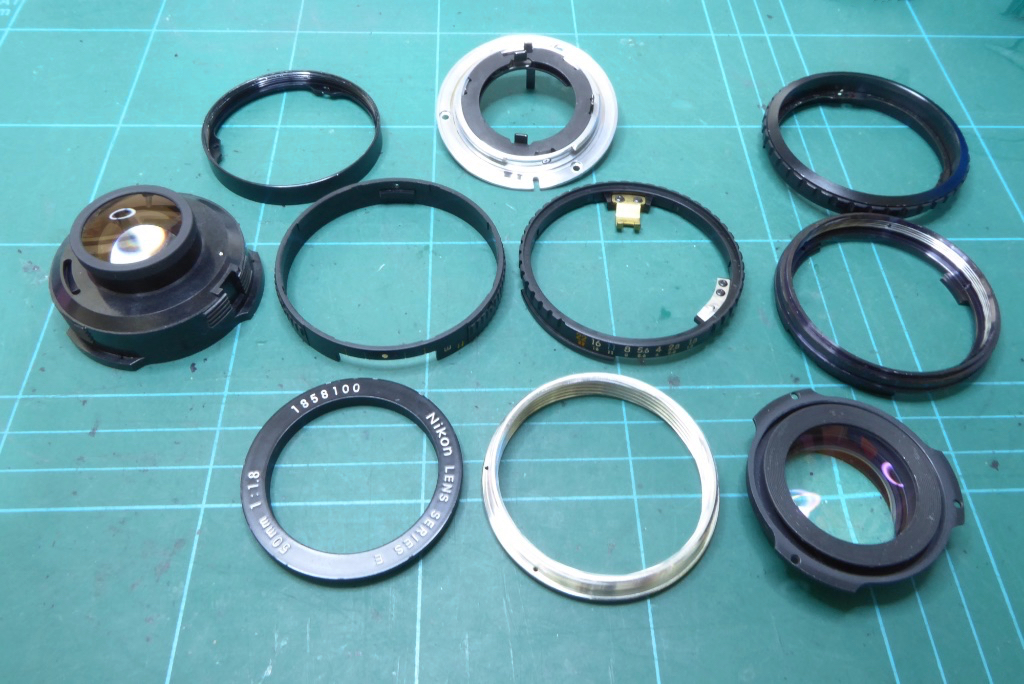
With the lens almost completely stripped you can now clean all of the lens body work.
Note that the rear element group, diaphragm and inner helicoil are all one piece. You are advised not to take this to pieces.
If you have fungus in the rear groups you can use acetone very sparingly to remove the rear group retainer but be very careful about spacers. You will also need a lens sucker to extract these and replace them. If the fungus is between lenses in the front group it’s a write off. The front group is a sealed group and cannot be disassembled.
The optics on this lens were ok and just needed the outer facing parts cleaning.
Once fully cleaned the helicoils are lubricated with Helimax XP. As with most lenses you need to get the dosing right for the helicoil lubricant. Like many plastic bodies lenses this one needed a very tiny amount of lubricant on its metal/metal threads but a thick dose on the metal/plastic threads.
Do not clean the front optical unit inner surface until you are ready for final reassembly – you will see in the reassembly phase you may have to remove this a few times while setting the lens up so don’t clean its inner surface until you are sure all is working well.
Nikon E Series Repair Guide – Reassembly
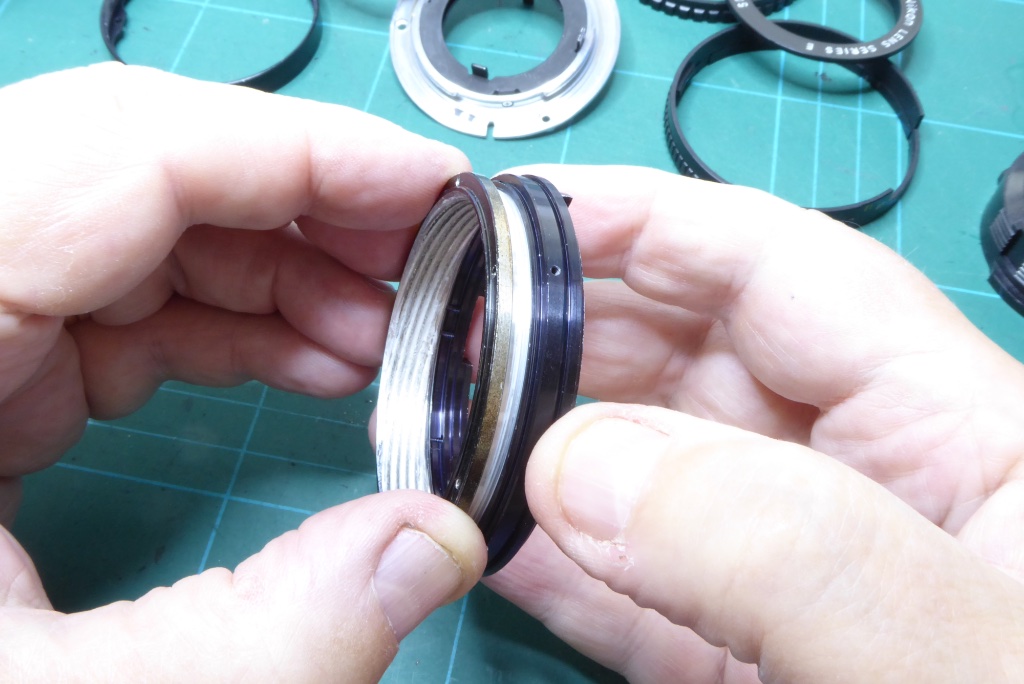
First lubricate lightly the outer helicoil and rethread it to the lens body. Assuming you marked the lens up appropriately earlier you need to find the thread entry point that allows the same distance to be achieved between the helicoil and the lens body AND the marks you made to align….
If your lens had jammed like this one start off with around 1.2mm of gap between the outer helicoil and the lens body.
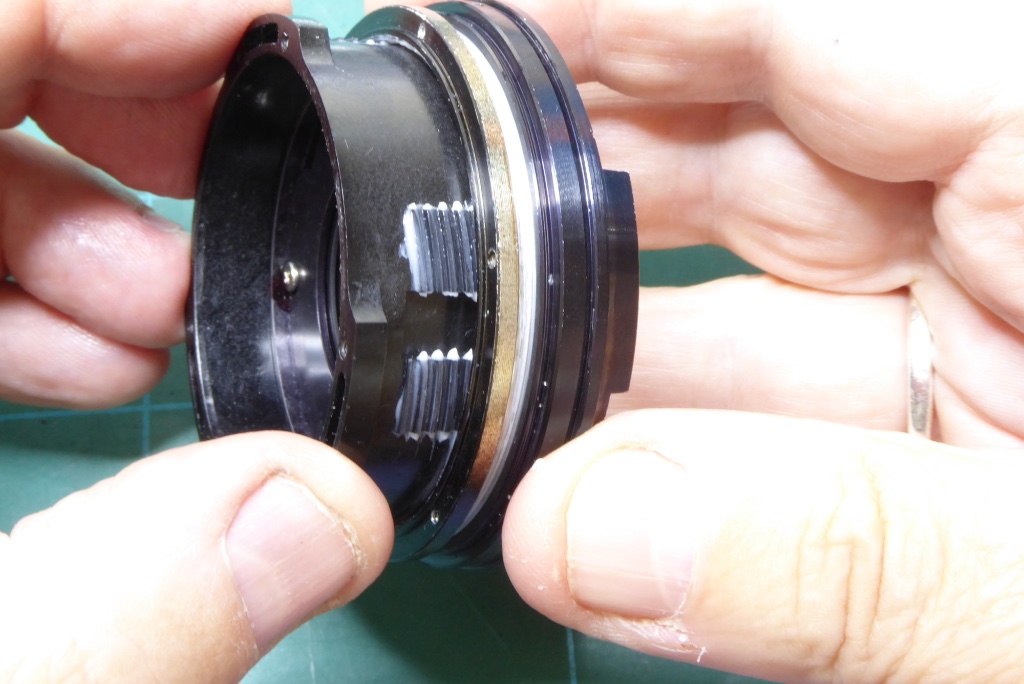
Now insert the inner helicoil using the same approach. Thread the inner helicoil into the outer helicoil so that the distance is the same as when you took it apart and the marks you made earlier align.
If your lens was jammed like this one wind the inner helicoil in until it has around a 2mm gap between the inner helicoil and the outer helicoil.
The helicoils must also align with the focus lock tab position.
If you are assessing distance from an unknown start point (eg like this lens the lens was jammed) you MUST leave a cap of at least 1.5mm between the lip of the inner helicoil and the outer helicoil when the lens is at infinity. Otherwise you will be unable to mount the focus barrel retainer.
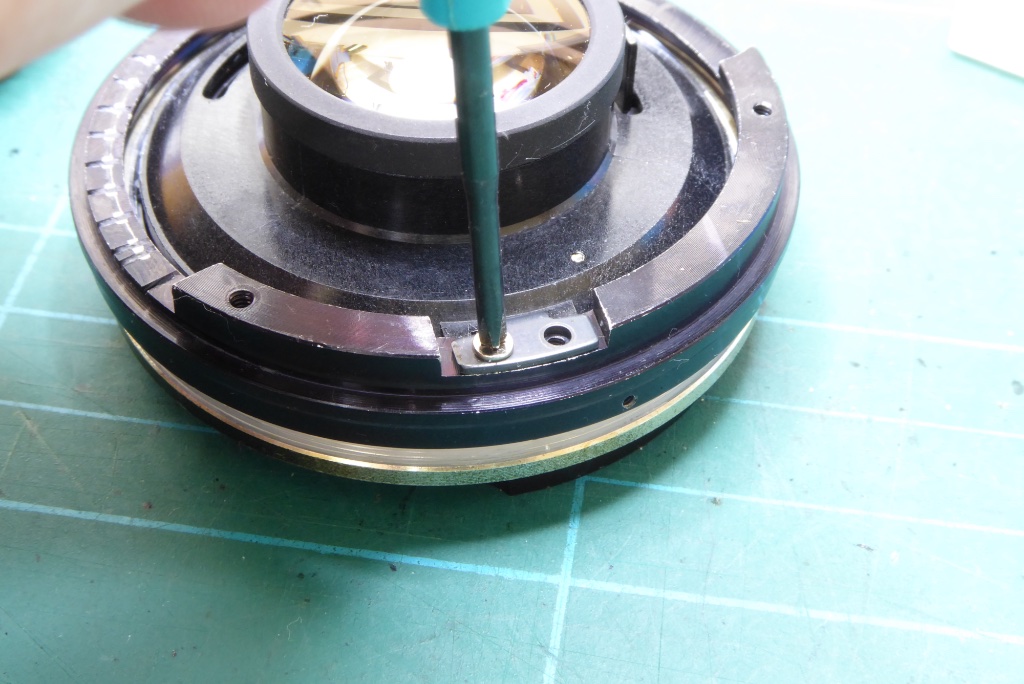
If the lens was marked up correctly you should find that the lock tab position will be very close to correct. Use the outer helicoil to get it exact.
If your lens wasn’t marked this is where the guesswork will come in. You will need to extract the inner helicoil and outer helicoils until you can find the sweet spot where the gaps between the helicoils are roughly right AND the lock tab position lines up.
Note: Do not tighten the lock tab down too much. If your focus is out at the end of the rebuild you will having to dismantle this part. The lock tab screws do not need to be thread popping tight.
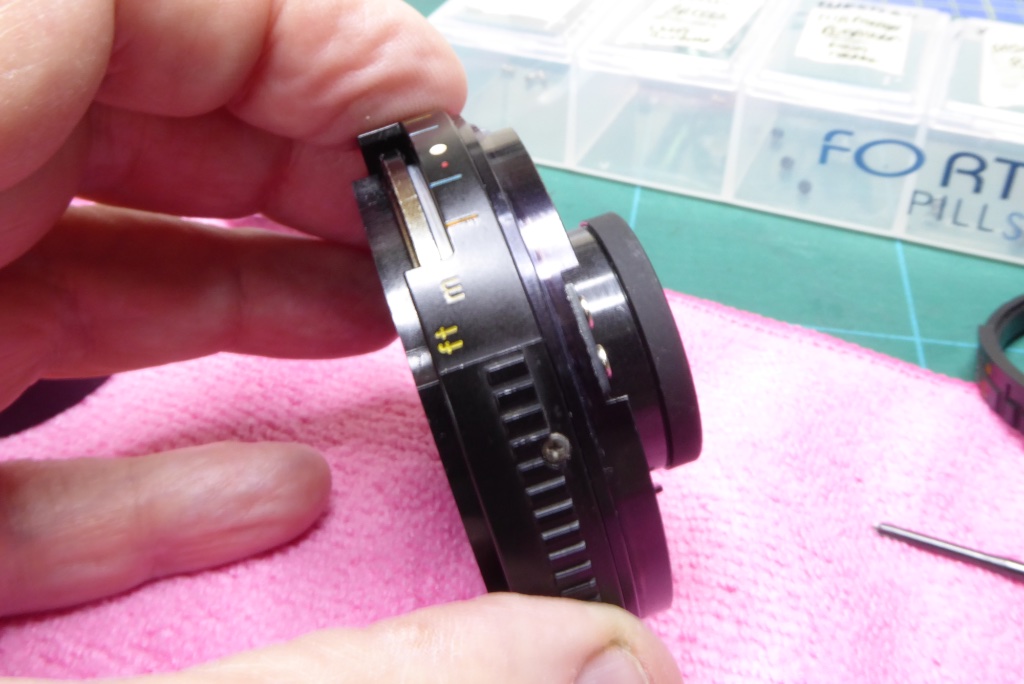
POINT X (this will be explained later) If all of your threads have lined up and you are super confident the lens has been assembled exactly as it was when it was taken apart you can go ahead and refit the index ring.
My advice is to leave this ring out for the moment. This is one of the headaches with the ‘E’ Series 50mm f1.18. If you mount this ring and it turns out your infinity focus is off it will be harder to adjust the lens.
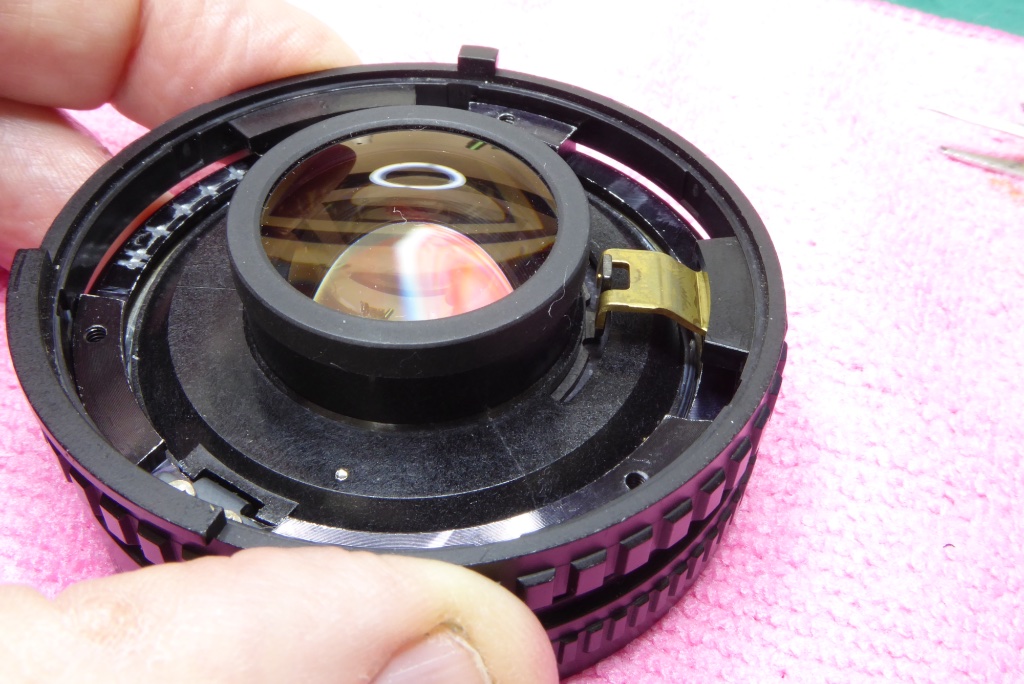
Replace the aperture ring making sure the forked connector is aligned to the lens body aperture lever.
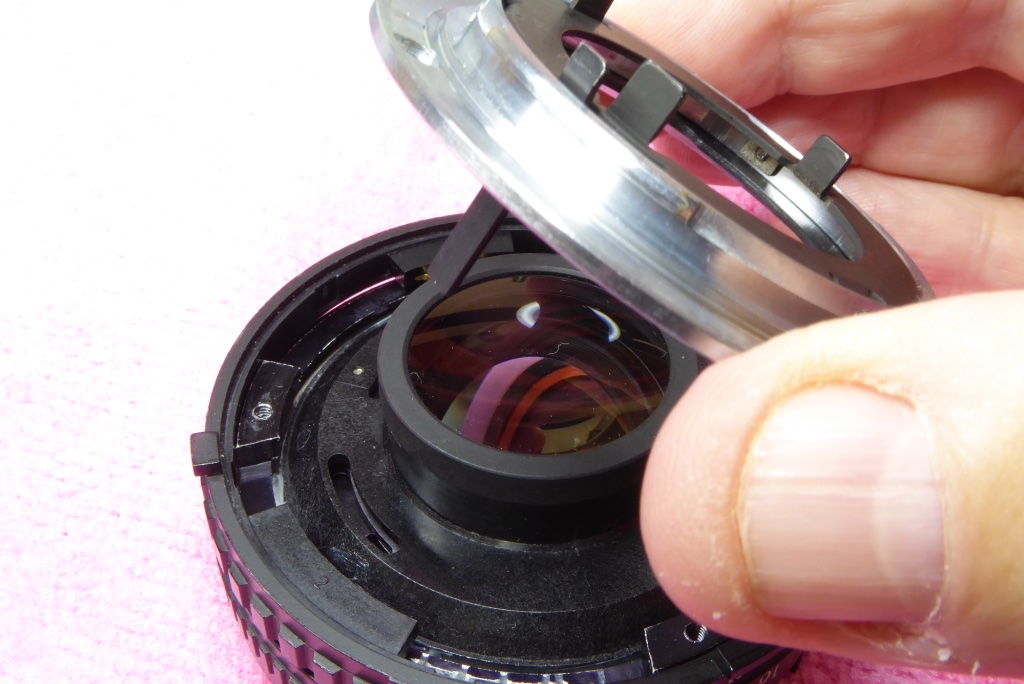
Replace the lens mount making sure it is orientated correctly and the aperture lever is correctly located into its slot.
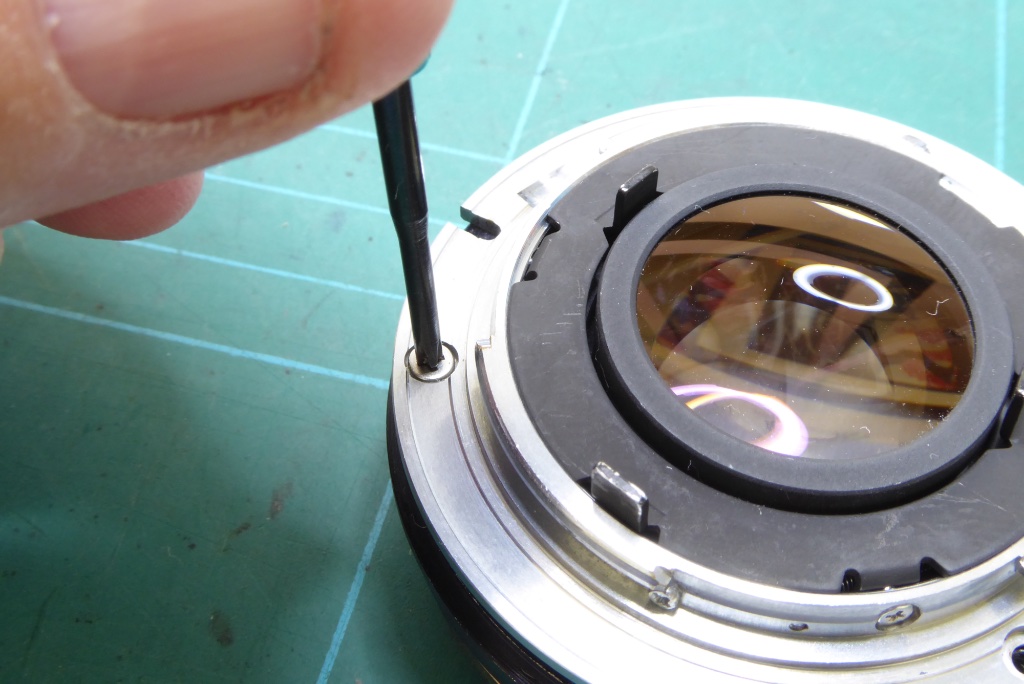
Replace the mount plate screws. Do not tighten these yet. Just dog them down until the lens mount is firm.
You need to make sure the lens can reach infinity focus at the end of the process. If it cant you will be taking this off again!
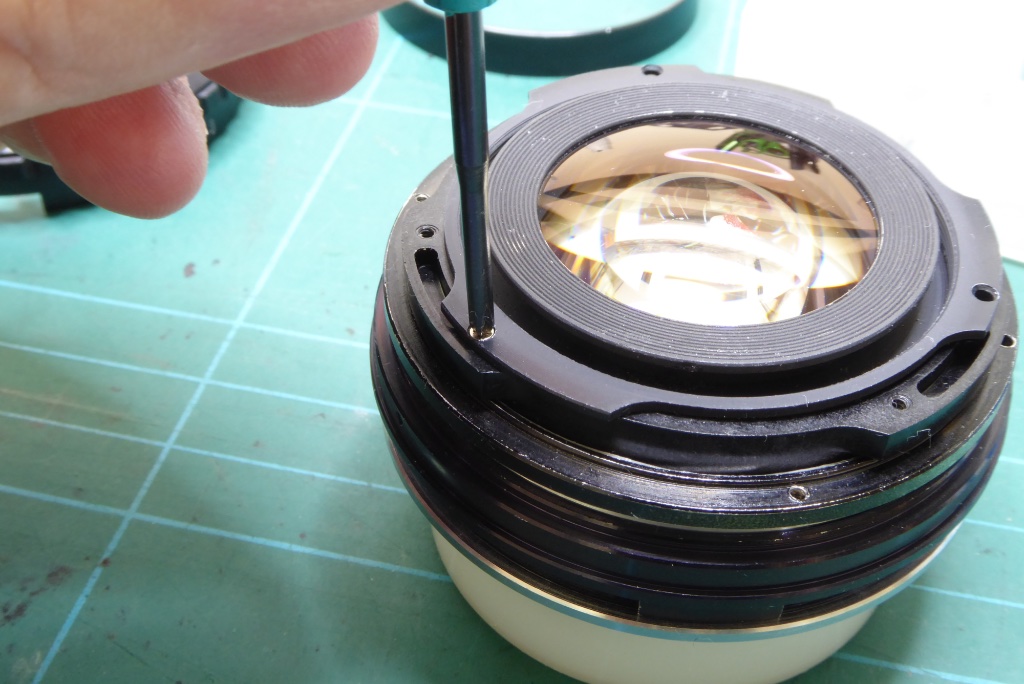
Replace the front optical element group and lightly screw down.
You need to make sure the lens can reach infinity focus. If it cant you will be taking this off again along with the mount place and aperture ring.
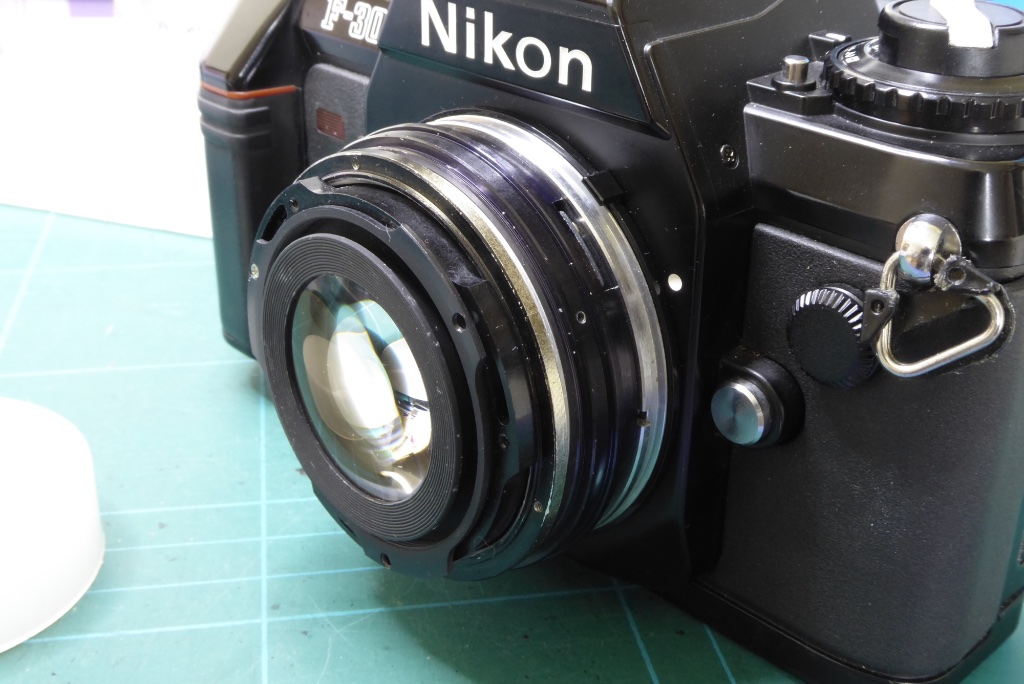
Mount the lens on a known good camera. This is tricky without the lens mounting index mark in place so be careful.
You will need to feel for the correct orientation to the mount. DON’T Force anything. Once the lens is in place turn the brass outer helicoil to reach infinity focus. I use a pair of radio towers about 8 miles away as a test of infinity. Find a distant object and focus the lens until the focus is sharp on the far object.
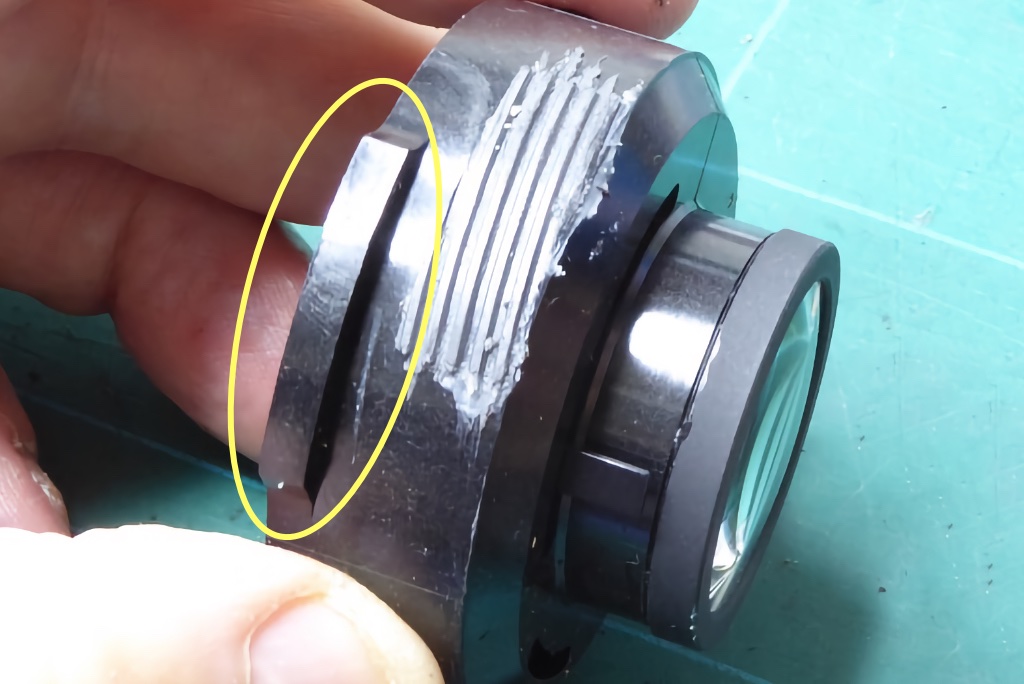
If focus is good at infinity you must make sure that the projections on the inner helicoil have at least 1.5mm gap between their lower edge and the top of the outer helicoil. Otherwise you will be unable to mount the focus barrel retainer.
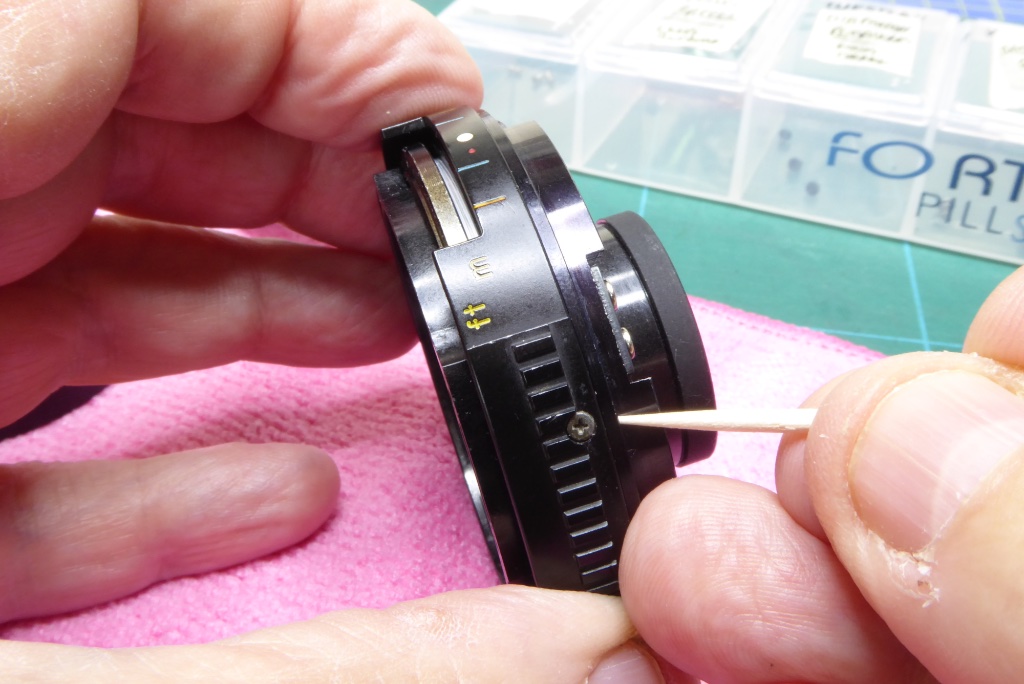
If all is well and the lens reaches infinity AND you have a sufficient clerarance under the inner helicoil as per the previous note you now need to remove the mount plate and aperture ring and replace the index ring. Secure it using the small screw. Then replace the aperture ring and mount plate.
You can see in this picture with the index ring in place you only have a small amount of access to the brass outer helicoil for focusing but it is much harder to do the infinity test with this in place. This is why it was left off at POINT X
If you have not been able to achieve infinity and leave a sufficient gap under the inner helicoil you will need to disassemble and start the rebuild again. The Helicoils on the Series E lens are tricky to get right.
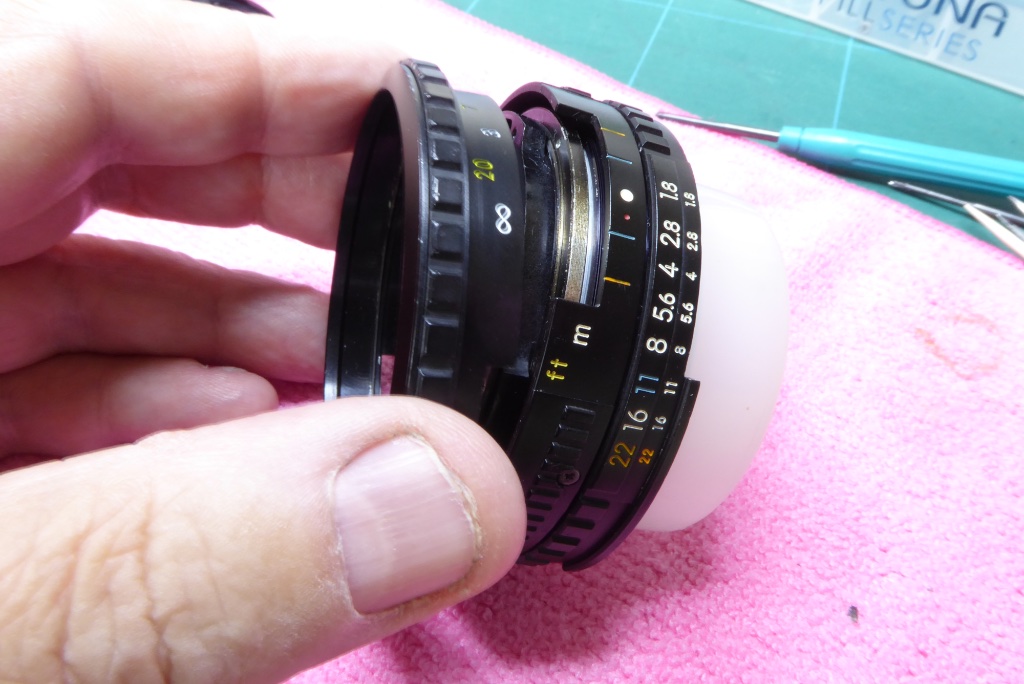
You will have to remove the front optical element to fit the focus barrel and its retainer. With the front element removed slip the focus barrel over the lens, check that the infinity mark is aligned to the index mark…

…and replace the focus barrel retainer.
Nikon E Series Repair Guide

SPECIAL NOTE:
If your lens, like this one could not be suitably measured for its original infinity focus this part can be a horror of a job. At infinity the focus barrel retainer may foul part of the lens.  Your only option is to rebuild from the start again.  You need to find an infinity position where the inner helicoil is a little bit further out which means the outer helicoil must move further in.
There is a sweet spot where this can happen but you may have to try several iterations to find it.
This is one of the less amusing aspects of the Nikon ‘E’ Series 50mm f1.8 early version.

Once you have found the sweet spot or, if your lucky and all has gone perfectly well on the first attempt, you can now do a final clean on the rear of the front lens if needed and then replace the front optical unit.

Replace the filter ring.

Replace the beauty ring. Be very careful with this and do not get it cross threaded. It can be very tricky to get it right as the beauty ring is so thin.
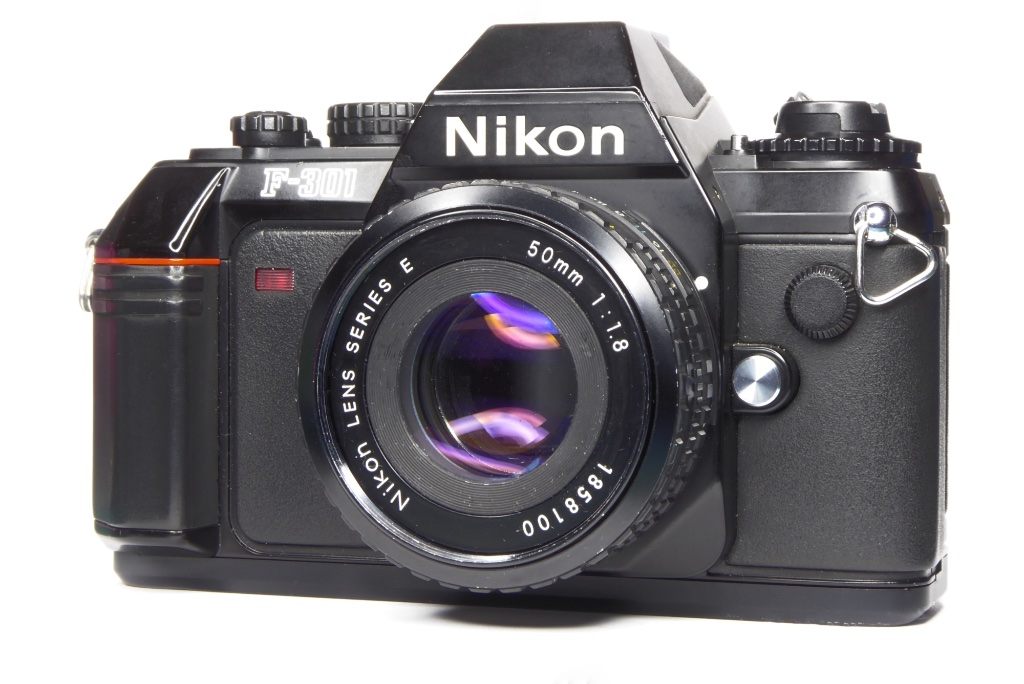
Mount the lens and run a final check on the lens, check infinity, check aperture and stop down.
This Nikon E Series Repair Guide article can always be improved. If you have any questions and or comments we would love to hear them below. Mel.
Further Reading

Mel is one of the driving forces behind High 5 Cameras and writes all our articles.
Starting serious photography back in 1972. Over the years she got to shoot film with most of the major brands in 35mm and large format as both a studio photographer and content provider for websites in the early life of the web. These days she is rediscovering photography and has become the GOTO person for knowledge on camera repair advice.


