Posted on 25 Comments

Minolta X-700 Capacitor Replacement

Minolta X-700 Capacitor Replacement

A step by step guide to Minolta X-700 capacitor replacement in the popular 35mm SLR Camera.

Copyright 2023 High5Cameras,
Free to use, copy and distribute so long as no charge is made for use,
distribution or access and authorship and web address is freely acknowledged.

The Minolta X-700 is one of the most popular cameras for modern film fans being equally at home in the hands of both the expert and novice photographer.

It can though suffer the dreaded capacitor-itis where its shutter release and aperture control capacitors can fail. If your camera has a serial number lower than 2000000 then it almost certainly has tantalum capacitors (STEC) and these are unlikely to be the cause of problems. Serial numbers higher than 2000000 usually have electrolytic capacitors (ALEC) and these are very often the culprits when problems arise.

Minolta X-700 Capacitors - Tantalum Bead Type
Minolta X-700 Capacitor (tantalum bead type) – these seldom fail and will almost never need replacing.
Minolta X-700 Capacitors - Electrolytic Type
Minolta X-700 capacitor (Electrolytic type). These are prone to failure.

Serial numbers alone are not the best test. We have seen an X-700 in the 2040000 range with tantalum capacitors. The surest way to know for sure if your camera has the early tantalum bead type or the later electrolytic type is to remove the base plate and have a look. The pictures above show the two types of Minolta X-700 capacitor in use.

The classic symptom of Minolta X-700 capacitor failure is when you half press the shutter release the LEDs in the viewfinder will illuminate, on full press the LEDs will go out but the shutter will not activate. The winder/film advance will be locked solid because the shutter is wound on but the camera is unable to release the shutter.

Sometimes after a power down and power back up again the problem will clear but it will return after a few shots.
While this symptom is almost always related to capacitors it is not ALWAYS the case. Other faults can create these symptoms like shutter derails, jammed curtains, faulty release magnet and power issues to name a few. However if the symptoms arise it is usually best to consider capacitor replacement as the first step IF the camera has the electrolytic type capacitors and if you have made sure its not as simple as a corroded battery chamber or flat battery.

The X-700 is cursed with two capacitors which can be problematic – both are are 220uF 4V types. The good news is that modern ALEC capacitors are very long lasting and relatively inexpensive. You will need the smallest physical size you can get to ensure a good fit. Normally we fit using a Panasonic made capacitor with dimensions of 7.15mm long by 6.38mm wide.

This guide will hopefully get you through a Minolta X-700 capacitor replacement but do not over-estimate your soldering skills. The circuit boards in these cameras are VERY fragile and we have seen a fair few written off due to shoddy soldering work.

You will need the following tools and parts to replace a Minolta X-700 Capacitor

You will also need a great deal of patience coupled with a steady hand. I always use leaded solder with an internal flux core which works best. Lead free solder can be tricky to use and usually requires flux to make it work well.

NOTES: This Minolta X-700 capacitor replacement guide can be used to replace the single capacitor in the base of X-500 and X-300 variants as well. Be aware though that the capacitors orientation is different. You need to check carefully which side the capacitor has its white (-) stripe prior to removal and make sure replacement is identical.
Note also that for this guide I am using a junk camera. Your soldering should be neater but its tough to photograph a process while working at your best single handed.


Read the Minolta x-700 capacitor replacement guide from start to finish before jumping in. As ever any repair is down to your tools and skills. Take you time, don’t rush. There are no prizes being offered for fastest repair times.

Minolta X-700 Capacitor Replacement – The Shutter Release Capacitor

Removing the X-700 base plate

First step is to remove the base plate. It’s also sensible to remove the battery cap and batteries while work is being carried out.

Note that the two centre screws are much shorter than the two screws at the outer edges.

With the base removed observe the capacitor. If it looks like this is an ALEC type. Note the orientation of the white/grey stripe along one side. This is the negative (-) side of the capacitor and must be orientated correctly when replacing.

On an X-700 the stripe faces inwards and is nearest the circuit board. On an X-300 the stripe faces outwards towards the edge of the camera. You should make a note prior to removal.

The circuit board in all versions of the X-700, X-500 and X-300 is very fragile. You need to minimise heat as the tracks and the board will simply burn away if too much heat is used.

The easiest way to remove the old capacitor is to clip it away from its leads with some snips.

If you are nervous about applying heat to he circuit board you can now use the remains of the legs to solder the replacement onto…

…Or simply desolder these. A light touch is needed.

A replacement 220uf 4V Panasonic ALEC is now installed. You need to tin the leads on the capacitor and clip the legs to the right length. Some snipe nosed pliers are used to form the legs to the right distance apart.

If you are working on an X-300 or X-500 this completes the repair. Simply replace the base plate and test the camera.

Sometimes after capacitor replacement you may find your X-700 still refuses to fire. This can be because the upper aperture control capacitor is also defective but normally I make a small modification to the camera here as sometimes even with perfectly working capacitors the X-700 can fail to release the shutter.
Note the yellow wire here and desolder this from the board.

Note the other yellow wire leading onto the board here and desolder this from the board as well.

Solder the two yellow wires together like so and wrap a strip of insulation tape around them to prevent contact with the board.

CREDIT: to James Holman of Learn Camera Repair for this tip. It really does work and saves a lot of grief.

NOTE: It’s not a great pic – the two wires are not on the board they are simply soldered together end to end.

Minolta X-700 Capacitor Replacement – The Aperture Control Capacitor

To get to the top capacitor which manages aperture control we need to remove the top cover. Only an X-700 has this capacitor the X-300 and X-500 do not support program mode so do not have an aperture control circuit.

Start by using a JIS screwdriver to remove the screw on top of the rewind capstan.

With the screw removed I usually put a strip of tape around the top of the film spool spindle. This will reduce the risk of it getting pushed into the camera and causing problems.

Set the ASA ring to a known value and make a note and set exposure compensation at Zero (0) this will make life a bit easier later.

Use either a spanning wrench or a rubber bung to remove the slotted retaining ring underneath. On some X-700s this will be plastic but some have a metal retainer here. This is not generally very tight and a suitable rubber bung will usually remove this, it’s a conventional thread.

Underneath you will find a washer, remove this.

The film speed ISO ring and exposure compensation ring will now simply pull away.

Under the film speed control you will find a thin plastic washer. Note it’s positioning with reference to the slots.

Remove the washer and handle carefully. It is very easy to get this bent or damaged.

You can now see the levers under the film speed and exposure compensation ring. Make a rough note of where these are located. It will make assembly easier later.

Remove the threaded cap/trim on top of the film advance lever. This is usually not fitted too tight so a rubber bung will usually remove it. It’s a conventional thread.


Here you can see one of my best tools for camera repair in use. Its a wine stopper for a wine fermentation bottle and this tool will remove an awful lot of stuff very easily.

If the threaded cap doesn’t come loose you can either apply a small amount of Isoprop and try after 15 minutes or resort to a spanning wrench.


You do need caution here as the trim can easily be damaged. Normally I would apply some masking tape over the cap to reduce any risk of damage to the trim.

With the threaded cap removed you can see that the advance lever is hooked onto a spring. Some X series do not have the spring and rely instead on a sprung washer. If it’s a sprung washer type the washer will be directly under the film advance. If it has the coil spring gently left the film advance lever up and unhook the spring.
The spring is easily wrecked so do not pull the film advance lever about too much until the spring is unhooked.

With the spring released the film advance lever will simply pull free.

Be careful as the spring underneath has a tendency to fly off into the void.

The spring has two hooked ends. One to the film advance lever and one to a slot cut out in the base of the top cover.

Gently ease the spring free and store it safely.

Use a spanning wrench remove the slotted nut.

Here’s the nut coming free. Note its orientation.

Set the shutter speed dial to Program. This will make life simpler during reassembly and will also allow a test of the camera without complete reassembly later.

Using a spanning wrench remove the silver trim ring around the shutter release. Caution as the finish is easily damaged.
This ring is usually not very tight.

Another camera tool dear to my heart. A cocktail stick. Once items are loose a cocktail stick can be relied on to turn items to remove them and being a soft wood will not mar the finish.

The trim ring is removed. Be careful here when this comes away the shutter button is spring loaded and can easily fly away.

With the trim gone the shutter button and its associated spring will simply pull free.

The shutter speed dial can now be lifted off.

Remove the two screws under the Minolta logo and remove the name plate.

Now you can see the Judas Window arrangement which displays the lens aperture into the viewfinder. Its best not to mess with this as getting the mirror and lens aligned can be a painful experience but if you are missing an aperture mirror (very common on X series) this is where it would be mounted.

All of the screws on the cover are different lengths so best to store them separately or make notes.

Remove the screw on the left shoulder of the camera.

Remove the screws either side of the viewfinder.

Now carefully lift off the top cover.

As the top cover comes free watch out for the small button which releases the shutter speed dial from Program mode and the viewfinder surround. These are loose once the cover is away.

Don’t put any strain on the cover as there are wires attaching the electronics to the hot shoe of the camera and they are relatively fragile. I don’t usually desolder these for a simple capacitor replacement.

Bear in mind you have exposed ICs here so take sensible anti-static precautions.

Note the position of the two plastic rings which are under the film speed dial. Remove these and be careful. The inner one contains very fine brushes which act on the copper tracks beneath.
Note that these are sprung and held in place by the film speed dial when assembled. If you want to test the camera prior to assembly you will need to replace these parts and apply a slight pressure on them.

Remove the JIS screw which retains the top circuit board.

Remove the small JIS screw which retains the flex board and and be sure not to lose the small plastic washer underneath this.

Note the film speed contactor plate and pay attention to the small black wire that runs along its back edge. This is very fragile and during repairs can shear off if not handled very carefully. It can be re-soldered but you don’t’t want to make more work and take more risks.

Very carefully ease up the film speed contactor plate. It doesn’t have to go far it just needs to be out of the way.

You need to desolder these wires at the front of the circuit board. There is a small sticky tape that holds these in place. Carefully peel the tape back and desolder these.

This is why the contactor plate was lifted in the previous step – its plastic and its very easy for it to get clipped with the soldering iron.

Heres the wires again as a reference.

It is worth making your own notes though as I have seen some Minoltas where the wiring colours were different.

Carefully desolder the wires from the front edge of the circuit board.

Now you can very gently lift the circuit board. It may stick a bit close to the prism. Do not apply force but a gentle jiggle will free it.
Close to the prism the circuit board has LEDs which fit into a plastic mounting which relays the LEDs to the viewfinder. Its like a small multi connector plug and can sometimes need a small amount of jiggling to free it.
Now we can see the aperture control capacitor. Note the orientation of its grey/white stripe indicating its (-) leg.

Carefully pull the circuit board back but do not apply pressure or lever it around. The PCB to flexboard tracks and joins are very fragile.
To get a picture I am using a rubber bung to hold the circuit board open a bit to give you a view of the aperture control capacitor. I also use this to keep the board opened while desoldering the capacitor and fitting the replacement. As with the other capacitor it is easiest to clip its leads to remove it and then desolder the remaining part of the leads.

Here’s a replacement ready to go. Its legs have already been formed into the right shape and the leads have been tinned. You can also see its coloured stripe indicating its (-) negative leg.

Placement of this Minolta X-700 capacitor is quite critical as it can easily foul on other parts so you need the utmost care in getting its placement perfect.

With the new capacitor in place you now need to solder the leads at the front edge of the board.
Note the silver coloured clip around the the film spool housing and make sure this pushed home otherwise it will not allow the contactor plate to be replaced easily.
Note also how close the capacitor is to the camera edge and internal mouldings. This is why placement is quite critical

With the leads re-soldered push the contactor plate back into position. Note it is keyed so will only fit in one position.

Make sure the circuit board is seated correctly with its LED plug block near the prism reseated.
Replace the JIS circuit board retainer screw.

Replace the film speed/exposure compensation rings and check that the black wire seen here at the back of the contactor plate is still connected.

Now replace the flex board retainer with its plastic washer.
If you wish to run a test now before replacing the top cover; replace the batteries, fit a lens and set it to f16, put the advance ever loosely on just so you can wind the camera on and put the shutter button into the camera, apply slight pressure to the film speed/exposure compensation rings to put them in contact with the contactor plate and press the shutter button. If all is well the camera will trip the shutter.

Replace the shutter speed lock button into its position…

…and use a bit of low tack tape on its top to hold it in place while you replace the cover.

Replace the viewfinder surround and gently ease the top cover back onto the camera. Make sure you don’t pinch any leads while replacing the cover.

Refit the screw on the left shoulder of the camera.

Refit the screws either side of the viewfinder.

Replace the plastic washer under the film speed ring.

Refit the film speed/exposure compensation ring. Note the cut outs in the ring and align these with the two plastic levers which you can push into their original position from your notes earlier.

It’s easiest to replace the ring and ‘feel’ for when the levers are located. If it doesn’t feel right then it probably isn’t. Do not force things.

You should be able to feel the film speed ring is right without putting any of the retaining fittings on.

By gently pressing its down and pressing the exposure compensation button you should feel it click into place correctly.

If all seems well fit the sprung silver washer (missing in this photograph) and the replace the slotted retaining ring.

Loosely tighten down and check that the ASA dial can move from lowest to highest ASA. Set it at around ASA 400 and check the exposure compensation can also move between -2 and +2

Do NOT over tighten the ASA retaining ring – you will run the risk of cracking the film spool guide plus if its over-tight and it will make the exposure compensation ring very tight to turn.

I normally use a rubber bung, tighten down gently until it impacts the sprung washer and then apply 1/8th to 1/4 turn. The sprung washer acts to stop it coming loose so it doesn’t need to be very tight.

Replace the slotted nut under the film advance lever.

Note the slot where one end of the film advance spring hooks on.

Hook one end of the spring into the slot.

Hook the other end of the spring onto the advance lever….

…you need to tension the spring so with the spring hooked on you need to rotate the entire film advance lever round in an imaginary circle ABOVE the spindle and then fit it onto the spindle while making sure the spring does not get trapped or run under the advance lever. This is tricky and its easiest if you don’t have the shutter speed dial in the way. You need one complete turn of the spring before fitting the advance lever down onto its spindle.

Replace the threaded trim and tighten down with a rubber bung. Do not apply too much pressure as you can shear the threaded part away from the cap quite easily..this is best done with a rubber bung rather than a lens spanner. Its too easy to end up shearing the threaded part off with a lens spanner.

Replace the shutter speed dial and shutter button and then…

Replace the trim/retainer. Tighten this down to not much more than finger tight.

Note the rewind capstan has a keyed shape and locate this to the top of the film spool spindle.

Do not allow the spindle to be pressed down into the camera so either grip it with some pliers or wrap some tape round it to stop it being pushed down.

Replace the JIS screw on top of the rewind capstan.

Now replace the Minolta name plate…

…replace the two screws either side of the name plate.

Give the camera a check to make sure all functions are operating correctly and pay attention to making sure all viewfinder LEDS are showing.

If you cracked any circuit tracks you may find the ‘P’ or ‘A’ indicators are missing.

Minolta X-700 35mm SLR

If all has gone well with your Minolta X-700 capacitor replacement you now have a fully working camera.

Treat yourself to your favourite beverage and get ready to get some great pictures.

You may want to treat your newly repaired camera to some new light seals so check out the guide HERE for light seal replacement on the X-700.

Buy Me a Coffee

Thank you all so much for visiting our site and for the great feedback. This site is also a labour of love and we are passionate about keeping it alive for as long as possible. If you found this site/page helpful why not buy us a coffee to say thank you and say hi. We love to hear how you get on with our tutorials and articles. Mel xx

Posted on 2 Comments

Nikon E Series Repair Guide

Nikon Series E 50mm f1.7

A step by step Nikon E Series Repair Guide to the first version of the Nikon Series E 50mm f1.8 lens.

Copyright 2022 High5Cameras,
Free to use, copy and distribute so long as no charge is made for use,
distribution or access and authorship and web address is freely acknowledged.

The Series E 50mm f1.8 started production in 1979 when Nikon launched the Series E line of compact, budget-conscious lenses.

The original Series E made between 1979 and 1981 was made almost entirely of plastic and its exterior finish is somewhat cruder giving it a budget look.  The later version 2 made between 1981 and 1985  was a little larger and had a more refined look. Optically there’s little to choose between them.

The Series E line was comprised of eight lenses and was intentionally branded differently from the primo quality Nikkor lenses. Nikon obviously did not want the much vaunted Nikkor brand contaminated by lenses with plastic parts and lower quality coatings. Nikon being Nikon though just couldn’t do budget anything. They may have been low cost but Nikon managed to produce an exceptional lens in the 50mm f1.8 – the most common Series E lens.

The Series E 50mm was not originally intended to be budget but had its roots in Nikons requirement to improve their original 50mm f2 Nikkor. They gave this task to legendary Nikon designer Souichi Nakamura who somehow managed to create on a budget a lens with amazing properties. Small, light, almost pancake in appearance the Series E 50mm f1.8 could kick it with the best of them. It could blow more venerable lenses into the weeds back then.

Sadly its capabilities went largely unrecognised in its day.  It was most usually bundled with Nikons low end consumer cameras like the EM and the FG which is why it lacks the ‘bunny ears’ of the more upmarket lenses designed to work with all of the pro gear as far back as the Nikon F. The EM and FG series cameras had a poor reputation for reliability and I suspect that pretty much doomed the Series E to obscurity.  Pros never bought it anyway and consumers either lacked the skills to appreciate it or else found it stuck on a camera that was junked. The sole exception to this was the Nikon F-301, Nikons last manual focus 35mm SLR, which came bundled with a late model series E 50mm f1.8 early in production – the F301 found a lot of favour with pros, including me, as a backup camera.
It’s taken over 40 years for the lens to be truly appreciated.  At one time a budget lens it now commands a fairly hefty price. Almost on a par with a Nikkor 50mm f1.8 in pricing!

The Series E has become a kind of must have among Nikon fans and digital users.  Razor sharp optics and 40 years have finally given it the standing it deserves.

Nikon Series E 50mm f1.7 - Early and Late Versions
Nikon Series E 50mm – Late model on the left, early model on the right

NOTES BEFORE YOU START

The Nikon ‘E’ Series 50mm f1.8 is a bit of a challenge. It’s nowhere near as tough as some lenses but it does have some booby traps to catch the unwary.

This Nikon E Series Repair Guide only covers the early version of the lens.  If you want a good guide on the later version I can recommend Richard Haws guide here.

If you have read my guides on Minolta lenses you will know that Minoltas are usually very kind to beginners and you can afford to not worry too much about helicoil distances.  That’s absolutely NOT true with this lens and you need to mark alignment point on EVERYTHING unless you want to spend the next 2 weekends reworking it.

This particular lens was not in a good state and its focus barrel was jammed. As a result I had to work from scratch and estimate its helicoil distances.  This resulted in numerous rebuilds.  This guide will talk you through how to establish infinity focus if you have the same issues.  If your lens is basically working AND you are very careful about marking and measuring the lens will be quite straightforward but its good practice to make marks and measurements.  Get in the habit of doing that.

When working on one side of the lens (eg the front) always be mindful about what’s happening at the other side (eg the back).  I always keep caps on as much as possible to prevent any accidents.  The classic mistake is for people to press on the lens while it is on a workbench and break things on the back end of the lens like the aperture lever.

Nikon are swinish at applying threadlock so an absolute must for this lens (and any others to be honest) is a decent set of JIS screwdrivers.  Philips drivers can be totally relied on to round out screw heads on most Japanese gear and it’s a near certain result when working with Nikon lenses. If you hit a stuck screw apply some Isoprop and wait, if its still stuck apply a bit more and wait.  Brute force is seldom a good thing with this lens.

You can use acetone sparingly but be VERY CAREFUL – the lens is mostly plastic and acetone can melt the lens parts as well as the threadlock.

There is no such thing as luck in repairing optical equipment, if you do it right, using skill and patience you will be rewarded with a perfectly operating lens. A rushed or bodged job will result in the lens being devalued, unpleasant to use and possibly unusable so…..take your time, get the right tools and materials, don’t take shortcuts or advice from people who know less than you (check out my camera history here). 

The biggest issue with the Series E lens is the very tricky focus helicoil distances. I have made lots of notes throughout the Nikon E Series Repair Guide so make sure you read the entire guide before starting work.

Nikon E Series Repair Guide – Disassembly

Nikon Series E removing the beauty ring

First step is to remove the beauty ring. On the ‘E’ Series 50mm f1.8 these are very thin and very fragile.  Too much pressure will cause the ring to distort outwards and jam.  This one was stuck fast by layers of grime so it took a few applications of Isoprop soaked into the filter threads to get it to release.

Removing the beauty ring 2

Now it’s time to remove it with a rubber cup – do not apply pressure or the beauty ring will get distorted and will jam.  If this isn’t working for you then you can try applying some sticky tape to the beauty ring and just try and turn it out with your fingers on the tape.  Don’t let gum from the tape get on the lettering – the lettering can easily be damaged.

Beauty ring removed

Here’s the beauty ring removed revealing all of the fittings and screws to get the front of the lens off.

Removing the filter ring

First we remove the filter ring.  This is secured with three small screws.  Use a JIS driver here or the heads will round out.

Removing the filter ring

Remove the filter ring.

Removing the front element groupo

Now remove the three JIS screws that secure the front element group.

Removing the front element group

The front element group can now be lifted off.  Store this somewhere safe. Don’t bother cleaning it just yet. This lens can be a pig and you may end up doing multiple rebuilds.

Removing the focus barrel

Now remove the focus barrel.  This is retained by a thin metal retainer.  It does not go all the way round the lens and is retained by three screws.

Before you remove this set the lens to infinity and mark the inside of the barrel for the two screws at each end.  This will save a lot of grief later.

Focus barrel screws

Here’s one of the screws being extracted.

Focus barrel removal

And now the focus barrel can be removed – you can see in the picture the focus barrel retaining ring only goes around 2/3rd of the barrel diameter and it’s position is super critical when replacing the barrel later on.

Removing the Series E mount plate

It’s now time to turn the lens over and start work on the rear of the lens.

Remove the three JIS screws using a JIS screwdriver. These screws are usually VERY tight.  Nikon loved the use of thread locker so if they don’t turn out easily apply some Isoprop and wait. A JIS driver is essential for these as they can be rounded out very easily.

Removing the Series E Nikon Mount

With the three screws removed the lens mount can be simply lifted off. 
Note its orientation with respect to the aperture lever below.

Removing the aperture ring

Now you can simply lift the aperture ring away.  Note how the fork on the aperture ring locates on the lens aperture lever inside.

Focus lock tab removal

Remove the focus lock tab. Again on this part Nikon loved to use thread locker so use a JIS driver only and if these are reluctant to come out apply a few dabs of Isoprop and wait.

Nikon Series E focus lock tab

Once the screws are out the lock tab can simply be extracted.

Nikon Series E Index Ring

If you wish you can remove the aperture index ring.
When I rebuild I rebuild and everything gets cleaned.
You may HAVE to remove this to set infinity focus later so now is as good a time as any.
Note the orientation of the cut out with respect to the lens body and mark it appropriately.

Index ring removal

Here you can see the index ring being removed and observe the cut out on the lens body.  The reason for marking is I have seen this lens with an extra hole as though there were two positions.  To avoid confusion just make a note or put a small mark on the lens body to indicate the orientation of the index ring.

Nikon Series E Inner Helicoil

This part is CRITICAL you need an accurate measurement of the distance between the inner helicoil seen here being removed AND a mark showing its position relative to the outer helicoil (the brass coloured helicoil in the picture) when they were at infinity focus. I normally use the tip of a jewellers screwdrivers to measure the distance by seeing which driver will fit in the gap between the helicoils.

If you cant measure because your lens was jammed don’t worry.  I’ll show you how to resolve this but it’s a lot easier if its marked at inifinity.

Nikon Series E outer helicoil

This part is also CRITICAL make a measurement of the distance between the outer helicoil and the lens body and make a mark of how they were orientated with respect to each other.

Nikon Series E Major Parts

With the lens almost completely stripped you can now clean all of the lens body work. 
Note that the rear element group, diaphragm and inner helicoil are all one piece.  You are advised not to take this to pieces. 

If you have fungus in the rear groups you can use acetone very sparingly to remove the rear group retainer but be very careful about spacers.  You will also need a lens sucker to extract these and replace them. If the fungus is between lenses in the front group it’s a write off. The front group is a sealed group and cannot be disassembled.
The optics on this lens were ok and just needed the outer facing parts cleaning.

Once fully cleaned the helicoils are lubricated with Helimax XP.  As with most lenses you need to get the dosing right for the helicoil lubricant.  Like many plastic bodies lenses this one needed a very tiny amount of lubricant on its metal/metal threads but a thick dose on the metal/plastic threads.

Do not clean the front optical unit inner surface until you are ready for final reassembly – you will see in the reassembly phase you may have to remove this a few times while setting the lens up so don’t clean its inner surface until you are sure all is working well.

Nikon E Series Repair Guide – Reassembly

Series E Outer Focus helicoil

First lubricate lightly the outer helicoil and rethread it to the lens body. Assuming you marked the lens up appropriately earlier you need to find the thread entry point that allows the same distance to be achieved between the helicoil and the lens body AND the marks you made to align….

If your lens had jammed like this one start off with around 1.2mm of gap between the outer helicoil and the lens body.

Series E inner focus helicoil

Now insert the inner helicoil using the same approach.  Thread the inner helicoil into the outer helicoil so that the distance is the same as when you took it apart and the marks you made earlier align.

If your lens was jammed like this one wind the inner helicoil in until it has around a 2mm gap between the inner helicoil and the outer helicoil.
The helicoils must also align with the focus lock tab position.
If you are assessing distance from an unknown start point (eg like this lens the lens was jammed) you MUST leave a cap of at least 1.5mm between the lip of the inner helicoil and the outer helicoil when the lens is at infinity. Otherwise you will be unable to mount the focus barrel retainer.

Replacing focus helicoil lock tab

If the lens was marked up correctly you should find that the lock tab position will be very close to correct.  Use the outer helicoil to get it exact.

If your lens wasn’t marked this is where the guesswork will come in. You will need to extract the inner helicoil and outer helicoils until you can find the sweet spot where the gaps between the helicoils are roughly right AND the lock tab position lines up.

Note: Do not tighten the lock tab down too much.  If your focus is out at the end of the rebuild you will having to dismantle this part. The lock tab screws do not need to be thread popping tight.

Replacing Index Ring

POINT X  (this will be explained later) If all of your threads have lined up and you are super confident the lens has been assembled exactly as it was when it was taken apart you can go ahead and refit the index ring.

My advice is to leave this ring out for the moment.  This is one of the headaches with the ‘E’ Series 50mm f1.18.  If you mount this ring and it turns out your infinity focus is off it will be harder to adjust the lens.

Replacing Aperture Ring

Replace the aperture ring making sure the forked connector is aligned to the lens body aperture lever.

Nikon Series E - Replacing Lens Mount

Replace the lens mount making sure it is orientated correctly and the aperture lever is correctly located into its slot.

Replace lens mount screws

Replace the mount plate screws.  Do not tighten these yet.  Just dog them down until the lens mount is firm.

You need to make sure the lens can reach infinity focus at the end of the process.  If it cant you will be taking this off again!

Replacing front element retainers

Replace the front optical element group and lightly screw down. 

You need to make sure the lens can reach infinity focus.  If it cant you will be taking this off again along with the mount place and aperture ring.

Mounting Nikon Series E to camera body

Mount the lens on a known good camera.  This is tricky without the lens mounting index mark in place so be careful. 
You will need to feel for the correct orientation to the mount. DON’T Force anything. Once the lens is in place turn the brass outer helicoil to reach infinity focus. I use a pair of radio towers about 8 miles away as a test of infinity. Find a distant object and focus the lens until the focus is sharp on the far object.

Inner Helicoil Critical Distance

If focus is good at infinity you must make sure that the projections on the inner helicoil have at least 1.5mm gap between their lower edge and the top of the outer helicoil. Otherwise you will be unable to mount the focus barrel retainer.

Replacing the index ring

If all is well and the lens reaches infinity AND you have a sufficient clerarance under the inner helicoil as per the previous note you now need to remove the mount plate and aperture ring and replace the index ring.  Secure it using the small screw. Then replace the aperture ring and mount plate.

You can see in this picture with the index ring in place you only have a small amount of access to the brass outer helicoil for focusing but it is much harder to do the infinity test with this in place.  This is why it was left off at POINT X

If you have not been able to achieve infinity and leave a sufficient gap under the inner helicoil you will need to disassemble and start the rebuild again. The Helicoils on the Series E lens are tricky to get right.

Replacing the focus barrel

You will have  to remove the front optical element to fit the focus barrel and its retainer. With the front element removed slip the focus barrel over the lens, check that the infinity mark is aligned to the index mark…

Focus Barrel Retainer Ring

…and replace the focus barrel retainer.

Nikon E Series Repair Guide

SPECIAL NOTE:
If your lens, like this one could not be suitably measured for its original infinity focus this part can be a horror of a job. At infinity the focus barrel retainer may foul part of the lens.  Your only option is to rebuild from the start again.  You need to find an infinity position where the inner helicoil is a little bit further out which means the outer helicoil must move further in. 
There is a sweet spot where this can happen but you may have to try several iterations to find it. 
This is one of the less amusing aspects of the Nikon ‘E’ Series 50mm f1.8 early version.
Replacing the front optical unit

Once you have found the sweet spot or, if your lucky and all has gone perfectly well on the first attempt, you can now do a final clean on the rear of the front lens if needed and then replace the front optical unit.

Replace the filter ring

Replace the filter ring.

Replace the beauty ring

Replace the beauty ring.  Be very careful with this and do not get it cross threaded.  It can be very tricky to get it right as the beauty ring is so thin.

Final check and test of Nikon Series E 50mm

Mount the lens and run a final check on the lens, check infinity, check aperture and stop down.

This Nikon E Series Repair Guide article can always be improved. If you have any questions and or comments we would love to hear them below. Mel.

Posted on 2 Comments

What is Lens Fungus: – The Reason Why

How to manage fungus

What is Lens Fungus: – 2,400 Million years ago fungus developed.  Long before most life on the planet and it’s been going ever since. These days if you’re an avid photographer with a penchant for classic lenses you’re most likely to discover it in a lens and will want to remove lens fungus quickly.

So, what is it? How does it get there? And, most importantly of all how do you remove lens fungus? It’s one of the questions that most often comes up on  photography forums and message boards so to save me having to type this out repeatedly here’s an article that answers everything you ever wanted to know about fungus and how to get rid of it.

What is it?   …Fungus is one of the earliest known life forms on the planet. Its spread by microscopic spores carried in the air.  Right now you are surrounded by these spores, they are on your clothes, in your food and in the air you are breathing and both fungal spores and us get along pretty well.  Many types of fungi are positively beneficial (penicillin for one, yeast for another). Many fungal types assist the breakdown of other organic matter but you didn’t come here for a biology lesson.

How does it get in your lens? …Well fungal spores are quite literally everywhere. When you focus a lens you are basically pulling in air, lenses are seldom sealed airtight and even if they were, on a vintage lens the spores would have been present in the factory, on the people assembling the lens and on the actual material in the lens.  People more used to the modern world of microchips think in terms of clean rooms, sterile, devoid of any small motes.  That’s not how classic lenses were assembled.  The environment would have been more akin to a factory or, in some cases, a shed. So, the spores get in your lens. What happens next?

The spores are basically inert until they get good growing conditions.  What fungi likes is dark and damp. And that’s why many vintage lenses survive ok.  Guess what? They were being exposed to light and generally dry conditions.  Anywhere with high humidity like tropical countries create more perfect conditions for the fungi to grow. Of course a lot of lenses were kept in sub optimal conditions – left in storage for many years in people lofts and garages.  Some of these locations provide heat, humidity and of course darkness.  Conditions essential for the fungal spores to turn into something nasty like glass eating fungus.

To make matters worse for you but nicer for the fungus is the fact that many older lenses used organic elements in their lubrication. Basically dead dinosaur guts. These organic based lubricants have a tendency to vaporise over time and create the classic lens haze. Lens haze is cleanable in most cases but the organic elements in the oil provide food stuffs for the fungal spores. It’s not a given that a hazed lens will also have fungus by any means but hazy lenses are often hiding fungus in them.

Lens and camera cases - the very worst for fungus
Lens and camera cases – the very worst culprits for fungus.

One of the worst things to store lenses in is leather and canvas bags and lens pouches and of course many lenses were supplied with leather pouches or placed in close proximity to leather like camera bags.  Leather and fabric create a great starting point for fungus – its organic for a start and quite often soaks up moisture. People will often wrongly assume one lens has caused contamination of other lenses when all of the gear is kept in the same bag.  The truth is much more likely to be one lens has shown signs earlier than the others but the storage is the basic problem.  Avoid damp, humid conditions. Get the lenses out in air and periodically expose them to sunlight it’s the dry air and light which keeps fungus at bay.

Given time and a dark and humid environment the microscopic spores grow into various types of fungus and most of these can eat lens coatings and even the glass itself if left unattended.

How to spot it? …Fungus can be very severe and easy observable in lens or it can hidden.  The best way to check a lens is a simple torch test.  Hold a torch at an angle to the lens and look through the other side.  Fungus will show itself as either strands or blooms.  Strands look like strands of cotton, blooms look like misty patches in the lens. Even apparently mild fungus can start eating into things so its needs to be get gone pronto.  It won’t get better with time. Heres some pictures of what it can look like and a prognosis for the lens.

Mild bloom type fungus in a Minolta MD lens
Mild bloom type fungus in a Minolta MD lens. It’s on the inner face of the rear element group. Cleanable.
Strand fungus getting a start in a Tamron zoom
Strand fungus getting a start in a Tamron zoom. It’s in between a cemented doublet. Game over.
Bloom AND strand fungus in a Minolta MD
Bloom AND strand fungus in a Minolta MD. It’s between elements. Coatings will fail and haze with chemicals. Game over.
Fatal strand fungus in a Minolta MD
Fatal strand fungus in a Minolta MD. Fungus is between sealed front elements. Game over.
Minolta 50mm f1.4 - fungus between front elements.
Minolta 50mm f1.4 – fungus between front elements. It’s a sealed unit. Game over.
Minolta MCX 50mm - probably haze rather than fungus
Minolta MCX 50mm – probably haze rather than fungus.
Cleanable but risky due to fragile coatings.

It takes a little experience to know when a lens is cleanable and when it’s not as there are so many different lenses out there with their own issues. It also should be noted that almost any classic lens will have small dust particles in the lens when subjected to a lens test.  This is perfectly normal and these lenses would have looked no different back when they were made. It also takes some experience to recognise other lens conditions such as haze and sometimes the anti-reflection coatings in the lens can look like mild haze under a torch test. Haze itself can often be hiding bloom type fungus.

Cleaning fungus from a lens is almost always a risk.  There’s simply no way of telling at the outset how well the lens will respond to cleaning and no reputable technician will ever give a guarantee. There are quite a few factors that can affect the outcome.

How much damage has the fungus done? You can’t be sure until you attempt to clean it.  It may simply clean away or it may leave behind damage to the coatings or the glass. Can the lens coatings take the cleaning needed? Some lenses have relatively soft internal coatings and these can fail with a simple wipe if the fungus has weakened them. Some coatings cannot cope with the chemicals needed to kill the fungus. These are all part of the game of Russian Roulette with lens cleaning and trying to remove remove lens fungus.

So the bottom line is fungal cleaning is ALWAYS a risk. There just isn’t anyway of knowing in advance without experience.

Cleanable or not lenses
Nikon Ai mostly cleanable, Minolta MC cleanable but risky, Minolta MD – forget it!

To add to the other headaches not all lenses are cleanable.  Many lenses have sealed element groups.  This is common in lenses from the mid 1970s where manufacturers trying to gain a price advantage over their competitors cut down on components and assembly time by simply building using a plastic encapsulation for the lens groups.

A Minolta MC prime lens usually has separate elements bound together into groups using spacers and threaded rings. Later Minolta prime MDs use only two groups of elements which are each encapsulated in a plastic mounting. 
There’s no getting between the elements on some of these lenses so if the fungus is between the elements in a group theres not much that can be done.  This type of manufacturing was employed by almost all of the big makers like Nikon, Olympus, Canon, Pentax etc.

Encapsulated elements and individual element construction
Minolta MD on left uses encapsulated element groups – fungus between the elements in a group usually signals end of the line for the lens. Minolta MCX on the right was the last of the high quality construction lenses with individual parts BUT its coatings can be very fragile.
Remove Lens Fungus - Fujinon 50mm f1.8 cleaning
Fujinon 50mm f1.8 using classic construction. All elements are removable and cleanable
Remove Lens Fungus - Late model Olympus Zuiko 50mm f1.8 cleaning
Late model Olympus 50mm f1.8. All of the front elements are bonded into a carrier. Theres no way to disassemble or clean.

Even early lenses where it’s possible to remove individual elements can have booby traps in them.  Soft coatings, specific orientation of the elements to one another within the group and even cemented doublets where fungus can grow between the cemented lenses. Plus if you take lens groups apart down to individual elements you will find it very hard to eliminate any dust without a fairly clean environment and a lot of patience.

It’s often stated on forums that UV light will kill fungus. It won’t.  While UV may reduce any further damage, it relies on direct exposure to the fungus.  Normal glass tends to block UV light so in order for UV to work the lens face has to be directly exposed.  I routinely subject any lens that’s been cleaned to a powerful UV light source with the right wavelength to cause the most harm to fungal spores but that’s done while the lens is in pieces.  A UV light box also creates ozone which is harmful to fungi so that’s a bonus.

So how do you remove lens fungus?

There’s no single answer to this.  It will depend on a range of factors.  Can you get to the fungus? If the lens uses encapsulated elements and the fungus is between elements in an encapsulated group there’s no way to get access so it’s a non-starter.

Without some experience of how some glass will react to cleaning its best to be careful. Be mindful of a medical rule which is ‘first do no harm’ and also do as little as possible.

I have seen people advised to take a lens completely to pieces so you can douse everything in Peroxide because spores will be in the lens. This is simply pointless. You will more than likely do more damage in a vain pursuit of inert fungal spores which, if the lens is well kept, will most likely never become a problem.

NEVER remove lens elements from their groups unless you have no choice. Minimise the amount of disassembly within a group to as little as possible and make sure you mark the lens orientation. Some lenses would have had a specific orientation when assembled and once this is lost it’s not possible without very specialised gear to get the lens right again. A second hazard is trying to get lens elements back into their groups without getting more dust in there than there was at the start. Finally, and it cant be overstated, some lens coatings within a group are very fragile and can react very badly to chemicals and improper handling.

Remove Lens Fungus - Nikon AiS with fungus
It’s possible – this is a Nikon AiS. The fungal blooms are hiding in amongst the general haze and drek inside the lens….
Nikon lens after fungal cleaning
…and this is the lens after VERY careful cleaning. Beautiful and fungus free.

Cleaning processes

Here I will relate my own approach which is basically to gradually step up the cleaning process in stages and see how the lens copes. Don’t rush in with strong chemicals. There is much bad advice on how to remove lens fungus online from people who don’t really understand the nature of fungus. I have used these methods successfully on very many lenses and they do work. Generally failures are the result of chemicals damaging the coatings OR fungus eating the actual coating or the glass itself.

Cleaning fungus
Minolta MC 58mm f1.4 – A complete strip down of a lens to ensure fungal kill does not include taking lens groups to pieces!

STEP 1 – Nose Grease. Simple and often surprisingly effective...

What! hang on, what’s nose grease and how the heck does it remove lens fungus? Nose grease is grease from the side of your nose in the creases of the outside of your nose. You can harvest it simply by rubbing your finger along the creases. It was traditionally used by watchmakers of fine mechanical pieces as nose grease has some amazing lubricating properties.  It’s just slippy enough, doesn’t dry out and doesn’t migrate easily.  It’s also mildly antiseptic.

So, you rub your finger against your nose to harvest a little and VERY gently wipe it on to the fungal area of your glass.  Leave it for 15 minutes or so and then gently clean with a small amount of diluted Isopropyl Alcohol (50/50 with water) and the use some breath and lint free cloth to very gently buff the lens. CAUTION some lens coatings have very poor abrasion resistance – even a mild rub with a lint free cloth can take the coatings off.  Notable lenses for this include the Minolta MCX series 50mm f1.7 where the front elements inner face can fail spectacularly with very little effort on your part.

Some people report good results using a mild hand cream.  Most hand creams use a mild antiseptic which of course kills fungus.  I have tried this but it failed to clean the fungus but to be fair on that lens the fungus was quite advanced.

Using nose grease…….I have had a Minolta MD 50mm f1.4 which had fungal strands on its inner faces. This was fortunate as its far more common between the sealed groups. Mindful of how fragile the inner faces on some Minolta lenses can be I used the nose grease method and it worked a treat.

STEP 2 Isoprop. Yes it CAN work...
Apply some pure Isopropyl Alcohol to the affected area and then blow it with cold air from a rocket blower. See how the lens copes.  If it’s cleaned it off then stop. Some strand like fungus will clean off without much effort and very weak chemicals. The name of the game is to try the mildest chemicals first. If the fungus is not well established it may simply wipe off. You wont have gotten the spores so thats why I strip down to clean the lens metal work out and give everything a hit of a UV lamp will help make sure the remaining spores are stunted.
This generally works on very mild bloom or strand type fungus. Isoprop wont kill the spores and its not lethal to fungus but it’s better to go easy rather than risk the lens with strong chemicals if at all possible.

STEP 3Peroxide. Lethal to organic life...
Time to get tough. Some fungus simply cant be killed or removed with nose grease or Isoprop.  Dilute Peroxide is the start point. Peroxide is lethal to organic things like fungus.  Normally I start at about a 50/50 mix with water.  NEVER mix Isopropyl Alcohol with Peroxide it creates an acidic mix which can be VERY destructive.  Apply the dilute Peroxide with a cotton bud sparingly to the affected area. Clean it off straight away with fresh water as Peroxide is quite a powerful chemical even at low concentrations and you don’t want the Peroxide doing more damage than the fungus. This will normally kill any fungus / remove lens fungus but some lens coatings will fail even with a dilute peroxide.

STEP 4 Peroxide/Ammonia Mix. Carpet bombing has its risks
Either apply a higher concentration of Peroxide OR use a mix of 50/50 Peroxide and Ammonia. This is a preferred method of many lens technicians but I am a dissenter on this. My reasons are these; Fungal spores are EVERYWHERE and to guarantee killing all spores you would need to use something like a surgical Autoclave or medical grade UV system ON EVERY SINGLE PART of the lens. Let’s assume you did just that and amazingly the lens could hold up under that sort of treatment – so what? The spores are in everything and the lens could easily be reinfected. Long term fungal protection is in the storage of the lens NOT in chemicals you apply during a strip down. I seldom use a powerful chemical mix such as Peroxide/Ammonia but it does have its uses for very stubborn fungus types.

For Peroxide/Ammonia treatment start with a very dilute mix (diluted with water) and increase strength but be aware once you start using powerful chemicals in strong mixes you can expect to see stuff like coating failure. This will often become apparent when you try to clean the lens afterwards. I have seen spectacular coating failures due to chemicals on the inner faces within element groups of Minolta MC series lenses and have been told by a reliable source that some Olympus lenses will fail in a similar fashion.

If I am using powerful chemicals like Peroxide I prefer to flush the lens with distilled water. It means the lens can be cold air blown dry and pure lab grade distilled water leaves no streaks which reduces any risk of polishing with a lint free cloth in case coatings have been weakened as some coatings have poor abrasion resistance.

A note of caution on ‘polishing. You need to be very gentle. Lenses are figured to wavelengths of light. Excessive or too harsh polishing can cause a lens to lose some of its figuring. You may not believe it but lenses are easily damaged by too frequent cleaning. Remember, you only want to remove lens fungus.

Once the fungus is gone from the glass the spores may still remain… 
It’s impossible to get everything dead and as stated in this article even if you could the lens will be ‘breathing’ spores in each time it’s used. Normally though I will run all of the metalwork through a mild detergent or bleach and expose every affected element and all of the lens metalwork to an anti-bacterial UV lamp. A 20-minute exposure will be enough to seriously stunt any remaining spores. I NEVER disassemble groups unless there is no choice. Removing a lens group is easy and it’s possible to then clean all the metalwork involved in the helicoids and barrels. Taking lens groups themselves to pieces is sheer folly unless the fungus is between a group and you have no alternative.
Whenever a lens presents with fungus I will always strip all the metal work and clean it and replace the old lubricants with modern synthetic lubricants which tend not to haze and modern synthetic lubricants deprive the fungal spores with their foodstuffs.

Nikon Ai - unsuccessful fungal cleaning
A Nikon Ai. Despite best efforts the fungus had damaged the coatings on the inner rear element. The fungus is dead but despite the damage the lens still performs very creditably.

Finally… its best not to become overzealous or obsessed. Fungus needs removing as it will only get worse with time. If you run into a lens where after cleaning the fungus has done some permanent damage it’s not the end of the world. The Nikon AI in the picture above is one of my most used lenses. It has slight fungal damage which cleaning could not correct at the edge of its rear element. You would be hard put to spot any difference between it and a mint example in the photographic output.

A general rule of thumb to remove lens fungus… unless you want to learn lens repair it’s best to avoid lenses with fungus for sale. It’s generally not worth the risk unless you are tooled up and happy to gamble. As this article has pointed out cleaning is fraught with risk BUT if that gorgeous Nikon AIS f1.2 or Minolta MC 35mm f1.8 comes into view and its cheap enough it’s maybe worth the chance. Even if you cant fix it a pro might be able to.

Just bear in mind you really do need to read up and practice lens disassembly if you want to try cleaning yourself. You also need a good range of tools. The guides on the site covering some models of lens strip down will, I hope, help you in your journey.

Posted on 2 Comments

The Revenant – Minolta XG-1 Restoration

Minolta XG-1 Restoration

The Minolta XG-1 was the second in the XG series launched in 1977 as a budget camera to complement the top of the line XD series. Unlike its predecessor the SRT series, the XG series was all electronic. By the time the XG series came to market the SRT series was looking tired but would soldier on until 1981. The XG series would continue to use the outdated CdS metering cells (unlike the XD which was using the latest silicon cells) but it had an all electronic shutter.
In the aperture-priority automatic mode, the electronically governed shutter provides stepless speeds from 1s to 1/1000s.


The XG-1, like others in the XG series was geared for those on a budget or the beginner and was designed to operate mostly in aperture priority auto mode. The XG series also introduced a touch sensitive shutter release which would be carried over onto the X-x00 range. With the camera turned on the lightest touch of the shutter button would activate its electronics which would turn off again after 15 seconds of no activity. All XG bodies featured an ±2 EV exposure compensation dual.


One of the oddities of the XG series was the fact that the meter was inactive in manual mode and only comes alive in Auto Mode. The flagship camera of the XG series would be the XG-M which allowed metering in all modes and was launched in 1981 to fully replace the SRT series. The XG-M would lead on to the biggest selling Minolta of all time, the X-700 which is basically a turbo charged XG-M.

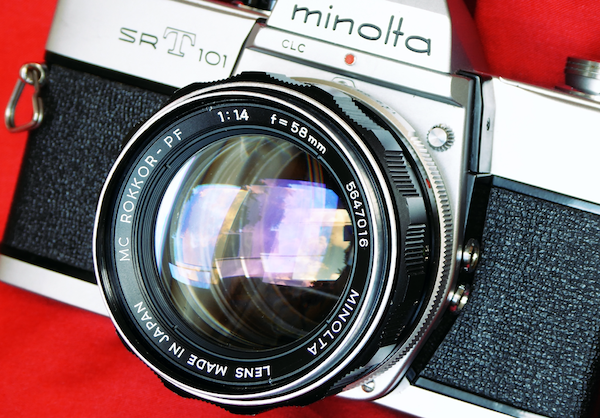
With the rise of a new generation of film users the humble XG-1 has been largely forgotten in the scramble for more prestigious cameras like its running mates like the SRT101, the X-700 and the glorious XD series BUT despite its humble origins the XG is still a very potent tool. This is the story of one rescued from near certain death which is why I think of this one as ‘The Revenant’.

Minolta XG-1
The XG-1 as it arrived on the bench, a quick look in a shop didn’t show up how much work would be needed.

Some time back I acquired a Minolta XG-1 from a charity shop, though its pretty typical of stuff sold on eBay by sellers who claim they found it in an attic or else it was dear old dads. The camera was low enough priced that I considered it worth it just for the lens so, ignoring the inner voice that said ‘it’s going to be a horror’ I parted with a few shekels and took it home.

While the XG-1 is not highly rated I thought it would be worth my time to bring this one up to par, plus it would provide valuable learning lessons.


A cursory examination at the shop had shown it to be in quite bad shape but once I got it on the bench it turned out to be far worse than I had imagined from a glancing examination. A picture tells a thousand words so here’s some pictures of it original state.

As you can see from the main picture at the start of the article a quick look seems to suggest its ok but a closer look reveals some real horrors. These included a jammed shutter speed lock button and what looked like 40 years worth of crud inside everything.

Minolta XG-1
Completely filthy case with rusted screws. The speed dial lock was jammed.
Minolta XG-1
More corrosion, spring detent for the mode switch not working and flash shoe cracked.
Minolta XG-1
Crack in rear of top cover, yet more issues to deal with.
Minolta XG-1
Cracked, scuffed, filthy and peeling leatherette. The least of the problems.

So in short the cosmetics were a mess, in the flesh it looked ten times worse than the pictures. More worrying was the badly gummed up shutter speed dial and the jammed shutter speed lock. The XG-1 has a small silver button to lock the camera in Aperture Priority mode and this was stuck fast. The mode selector dial was also not right – there were no detents on the dial. It should have clicked into each position but instead it just twirled round.

On top of the dreadful overall appearance the camera was completely filthy, it completely reeked of tobacco smoke, old farts and cat piss. This one was going to take some time but I do love old cameras and nothing gladdens my heart so much as getting them running again.

Surprisingly, when I got the shutter speed dial lock unglued and replaced the broken shutter speed dial, the shutter speeds were bang on to factory specification, so at least I wasn’t facing a complete rebuild.

Rotting light seals
Rotting light seals, the mirror bumper being in the same shape caused bigger issues.
Viewfinder
The viewfinder – most of this is rotting mirror bumper foam.

So this one sat on the bench for some time while I hunted for a suitable donor camera. Sure enough an XG-1 with completely blown electronics and a de-silvered prism turned up and so work could commence. One of the biggest horrors with the XG series is a delaminating prism caused by rotting foam. The first task was to get the lid off and take a look inside to find out why the shutter speed dial was jammed and its AP mode lock was stuck. This would also show why the mode selector switch detent was not working and may reveal other issues lurking under the surface.

Minolta XG-1
Donor camera and shabby XG-1 get the tops removed to see whats going on.
Minolta XG-1
Cleaning the mode selector tracks, the ASA and shutter speed dial also had the same treatment.

Sure enough, and as I suspected, someone had been messing in here before. The shutter speed and ASA dial were damaged and someone had applied something that looked like Bostik glue to repair them which had leaked onto the AP mode lock button gubbins. It took a very patient hour or so to remove the glue residue and lightly lubricate the lock so that it worked perfectly. The mode selector was missing its small ball bearing. Thankfully the rewind spindle (a common fail on these when handled by the clueless) was intact. What happens is people pull too hard on the rewind spindle to release the door, usually because the seals have gone gummy and jammed the door shut. Relentless pulling on the rewind capstan spindle eventually cracks the spindles shaft. Without the shaft intact theres not much to hold the top cover down or the mode selector so the ball bearing is often lost. Thankfully the donor camera had a full set of usable parts to replace the broken and missing parts on the XG-1 under refurbishment. Sadly the donors cameras leatherwork was in as bad a state as the original camera. The XG-1 used the Minolta soft vinyl leatherette and unfortunately this shrink over time and it’s seldom in a good condition.

Minolta XG-1
Another small detail – missing red index mark for the lens mounting.
Camera Body Rust Spots
More trouble in store. Rusty door hinge needs replacing.

With the shutter speed and mode dial working the camera was set up for shutter testing and amazingly returned results well inside factory specification so at least it would not need a full strip down. Even with the shutter going well a lot of work was needed cleaning the top PCB and cleaning out the various resistor tracks which had gummed up. The winding gears, where required, were lightly oiled or greased appropriately and then the remaining light seals and mirror bumper were stripped out ready for replacement.
It was now time to do the deep cleaning work on the camera to get its optics sparkling and also clean up the aperture resistor as the camera could be a little skittish when shifting aperture.

Cleaning the aperture resistor strip.
Minolta XG-1
Cleaning the aperture follower ring brushes.

Cleaning the aperture resistor strip is relatively straightforward using some contact cleaner or Isoprop but cleaning the follower ring brushes gives me the yips each and every time. I normally drop a bit of Isoprop or contact cleaner on with a Q-Tip and then VERY gently rub the brushes with a contact abrasive block. The brushes have to be supported during this by a small screwdriver to stop them from being bent. The brushes are incredibly fragile and breakage here is a disaster.

Now it was time to get to work on the optics…

Minolta XG-1
BEFORE – A huge amount of dirt and dust inside the mirror box.
Minolta XG-1
AFTER – This was taken when she was almost completed.

The optical train needed a lot of care. With the top off the eyepiece assembly was carefully cleaned with distilled water and Isoprop and then softly buffed. The prism surfaces were given a clean. Normally I would only use distilled water but in this case decaying muck form the mirror bumper had gotten between the focus screen and the prism. So a mild and very careful clean with dilute Isoprop was used. Similarly the prism surface facing the eyepiece was contaminated with what I assume was old tobacco smoke and this also needed cleaning with Isoprop and distilled water.

The focus screen was totally filthy with gum from light seals and tobacco smoke. Normally I clean focus screens with my favourite method of immersion in water with a very mild detergent before being flushed in distilled water and cold air blown dry. This screen was so bad I had to resort to a technique I adapted from cleaning telescope mirrors.
I apply a blob of mild washing up liquid, this has to be bleach free and ideally pH neutral or close to it. Focus screens don’t like harsh chemicals as they can melt or be otherwise ruined. I Apply a blob of the washing up liquid onto the screen and gently agitate it with my finger which has been softened with soap beforehand. The object is not to rub my fingers on the screen which will damage it but to gently roll the blob of liquid around – the finger just rides on the blob of liquid. Once done it’s flushed off with clean water. I like to do a final rinse with distilled water and then cold air blow dry with a rocket blower. The distilled water never leaves any residue. Done carefully and well this usually returns excellent results.

The mirror was cleaned with breath and gentle application of a Q-Tip. It’s best on a mirror to avoid any chemicals. During this process the mirror box was cleaned out of stray particles using low tack tape to adhere to the surfaces and then being pulled away before being carefully cleaned with a moist cotton bud and then finally vacuumed and blown out. The final finish was very pleasing and the view through the viewfinder was immaculate.

A new mirror bumper was installed after cleaning the optics out and then the focus screen was replaced.

Minolta XG-1
The state of the viewfinder as it was…
Minolta XG-1
…after cleaning of the prism, mirror and focus screen.

After a complete cleaning, some judicious lubrication and some slight tweaking the camera body came back onto form and handled like almost new. It was now time to get on with the lens and get some good quality light seals fitted. This camera provided a nice update to the light seals guide for any XG-1 owners who may need new seals.

The lens was in a state not too different from the camera with hazy elements, stiff focus and generally dirty both inside and out. Thankfully no oil was on its aperture and no fungus in its optics. This was an an early model MD 50mm f1.7 lens and was most likely the original lens with the camera. Wherever possible I try and keep all refurbishments accurate, using whatever lens would have been supplied with the camera. A great many XG-1s were supplied with the Rokkor 45mm f2 which, believe it or not, was a cheap lens back when the XG-1 was a budget camera for the aspiring photographer.

Minolta XG-1
Trimming the XG-1 – new light seals…plus new hinge and screws.
Minolta XG-1
…and a new red lens mounting index mark.
MD-Rokkor 50mm f1.7
Lens completely stripped and cleaned ready for reassembly and fresh lubricants.
Surrey Sculpture Park
Test shot taken with the restored XG-1 – Seems to be working just fine.

With the XG-1 and its lens fully refurbished it was time to get out and shoot with it to make sure that under real life conditions she would run reliably. I never sell a camera I wouldn’t be happy to shoot with myself and the XG-1 is no exception

The original poor quality leatherette was lightly glued into place and she was taken out for a run at the Surrey Sculpture park with some Ilford FP4.

I have to say for all the bad mouthing the XG-1 gets from camera snobs she shot wonderfully well and I found myself enjoying this most humble of Minoltas creations. For someone new to film this camera offers quite a bit. It has a very positive feel, a nice smooth film advance and a very smooth shutter pull off. It’s light and compact and its AP mode is spot on at getting a good exposure.

The lens returned some beautifully sharp images but I chose this one to illustrate the article as it kind of sums up how I felt at times getting this one going.

After film testing had produced some very satisfactory images the only challenge left was to get the leatherette sorted out. Normally I would stick with whatever the camera had originally but I felt after all the work that’s gone into this one she deserved a little something special so opted for a two-tone red leatherette from Hugo Studios. The original leatherette was removed and the camera surfaces cleaned of any residues with a mild Isoprop solution. Replacing leatherette has its risks. On many cameras it forms part of the light sealing. Under the back door of an XG there are numerous holes. I imagine these were originally for a film memo holder that was never fitted to the early XGs. To prevent any possible problems for a future owner I sealed these with some insulation tape under the leatherette and small patches of light flocking on the inner door beneath the film pressure plate.

With her new leatherette, new top plate and cleaned up body parts she really does look very beautiful.

Minolta XG-1
The new top cover and controls.
Minolta XG-1
New top cover fully cleaned and repaired mode selector.
Minolta XG-1
Ready for a new lease of life – very beautiful to look at and to shoot with.

So it’s journeys end. I think of this one as the revenant for good reason. She has literally come back from the dead! Few camera techs would consider an XG economic to repair and refurbish but on the journey through I learnt more about the XG series. I doubt I would do another one as it just isn’t economic to put this kind work and resources into a camera which I cant sell at a price that makes any sense but, for someone out there the revenant will be a beautiful camera to use and enjoy.
Whoever that person is I wish them happy shooting and may all of their pictures be as beautiful as the camera that took them.

My thanks to Eugene Pate of Learn camera Repair for his amazingly useful guide on the XG and to all of the folk on the Learn Camera Repair FB group for their help encouragement over the past few years which has helped give me the skills and confidence to tackle repairs to so many cameras.

Posted on 2 Comments

Olympus OM-1 Prism Foam Removal

Olympus OM-1 Prism

The Olympus OM-1 like some other cameras from the golden age of Japanese film cameras were fitted with foam around the prism.  The foam was there to protect the prism but paradoxically in the long run the foam has done more damage to old cameras than just about anything else.  Cameras susceptible to this include the Minolta XE and XG series, the Canon FTb, the venerable Nikon F and of course the Olympus OM-1 and OM-2 series.

This Olympus OM-1 Prism foam is now almost 40 years old in most cameras and like light seals decays over time. As it degrades it releases an acidic goo which will slowly dissolve the prism silvering.  If you are seeing blotches or dark streaks in your viewfinder that don’t clean off when you clean the base of the prism, the focus screen or the viewfinder this will be the first sign of decaying foam.  It’s a terminal diagnosis – once the prism silvering is gone there is no fix short of re-silvering (expensive and hard to find people who can do it) or prism replacement from another camera.

There is no obvious reason why Olympus added, removed and then added again foam from various production batches. Cameras with the foam removed show no obvious issues but if you are concerned and wish to retain the foam parts the best alternative is a good quality, non-shedding felt of an appropriate thickness.

Where the Olympus OM series are concerned a guide to whether your camera likely to need Olympus OM-1 Prism foam removal is as follows;

  • OM-1 – Serial numbers lower than 1110000 will have foam installed.
  • OM-1N – All versions have prism foam installed.
  • OM-2 – Serial numbers below 500000 will have foam installed.
  • OM-2N – All versions have prism foam installed.  


Bear in mind this data is only a guide – some OM-1 and OM-2 cameras may have prism foam even when the general opinion is they don’t. Olympus did not distribute serial numbers evenly, the top and bottom plates were stacked up in the factory and used when needed so a serial number alone is not a 100% guide as to the cameras internals. Throw in 40 years of spares, repairs and some OM-1 and OM-2 cameras may well show a serial number other than their original.

Removing foam from Olympus OM-1 Prism

For all these reasons above it’s best to get the lid off your OM-1 or OM-2 camera and take a look with a view to removing any degraded foam before your prism is wrecked. This guide will show you how…..

As ever the quality of any camera repair is down to your tools, your skill and your patience.  

Read the guide all the way through before starting so you know what to expect. 

OLYMPUS OM-1 PRISM FOAM REMOVAL ASA DIAL

Before starting set the Film Speed/ASA dial to a known speed and make a note of what you set…

OLYMPUS OM-1 PRISM FOAM REMOVAL METER SWITCH

…and set the meter switch to ‘OFF’ – I find it best to also remove any batteries to prevent any risk of shorts or other electrical problems while working.

Olympus OM1 Prism Foam Removal 21

First remove the trim cover on top of the advance winder. This is always a very hard one to get off.

Resist the urge to use a spanning wrench or a screwdriver in the slots – this trim cover is VERY thin and any undue pressure will cause it to distort or the slots to widen or worse, for the spanning wrench to slip and mar the finish on either the trim or the metal beneath it.
This one has had Mr Bodge working on it and shows with widened slot AND a nice scratch.

Olympus OM1 Prism Foam Removal 20

The factory had a specific tool – you will need to improvise.
The best approach is a soft rubber bung . These can be had easily enough for a few pennies from any place selling wine or beer-making gear.
Apply some Isoprop Alcohol around the edges of the trim and let leave alone for a few minutes.
Now apply pressure evenly downwards and turn using the rubber bung. if it doesn’t shift apply a bit more Isoprop and try again – it may take a few goes so patience is needed here.

Olympus OM1 Prism Foam Removal 19

Heres the cover removed from the camera. It’s only held on by a few threads but the factory appears to have used some kind of thread lock on it.

Before going further make sure you have set the Film Speed/ASA dial to a known value and make a note – this will make life easier later on.

Olympus OM1 Prism Foam Removal 18

With the trim cover removed the advance lever will just pull free.

Olympus OM1 Prism Foam Removal 17

Beneath the advance lever there is a nut which can be removed using a spanning wrench/lens spanner.

Remove this – it is a conventional thread.

Olympus OM1 Prism Foam Removal 16

Now it’s time to start working on the other side of the camera. Make sure to turn the meter switch to the off position – this will make life easier when you reassemble later.

To remove the film rewind and spool you ideally need an old film spool. Place that in the film chamber, push the rewind capstan down as if you were loading film and now wedge the film spool with a screwdriver and unscrew the film capstan counterclockwise.

Olympus OM1 Prism Foam Removal 15

Why use a film spool and not just a screwdriver? The film spool on the OM1 is quite soft and a screwdriver applied directly to it could cause one of its jaws to break off.

Heres the rewind capstan removed.

Olympus OM1 Prism Foam Removal 14

Under the rewind capstan there is a plate secured by two JIS screws.
This repair was one of the first camera repairs I ever did when I was ignorant of the risks of using Philips drivers on Japanese screws with a JIS head. It’s doable but it really is worth investing in a set of JIS screwdrivers and doing the work properly.

Olympus OM1 Prism Foam Removal 13

Remove the two JIS screws and the plate will simply pull free.

Olympus OM1 Prism Foam Removal 12

It’s now time to tackle the flash connector. This is a very fine threaded collar around the flash contact. It does have two small slots. This can be removed using a fine point on a spanning wrench or a small screwdriver to turn the small threaded collar. A pin vice will work as well or at a pinch some thin nosed pliers. Be careful here as its easy to damage the cameras finish.

Olympus OM1 Prism Foam Removal 11

Heres the threaded collar being removed.

Olympus OM1 Prism Foam Removal 10

The top cover of the camera will now come free – it may require a bit of wiggle to get it to come away…watch out for the following……

Olympus OM1 Prism Foam Removal 9

There is a spring under the cover just here – this can easily fly off and disappear…..

Olympus OM1 Prism Foam Removal 8

Also this small plastic piece which acts as an insulator for the flash contacts. It’s quite small and will be loose once the cover is removed so keep an eye out and remember to replace it AND the spring in the step above when re-assembling.

Olympus OM1 Frame Counter Repair 3

This OM-1 also had an issue with its frame counter not counting. This fell free when the cover was removed…..

Olympus OM1 Frame Counter Repair 2

…its held on using a rubber cement to the top of the counter mechanism. These cameras are now getting old and the cement may be failing. If you have one with counter issues this will probably be why.

Olympus OM1 Frame Counter Repair

Observe where the counter dial attaches to the counter mechanism and using just two or three tiny drops of glue reapply the counter. Make sure you open the rear door of the camera to ensure the counter is set to zero before doing this. The counter should align as per the picture with the ‘S’ almost exactly opposite the small mark being pointed out in the picture. If in doubt reapply the top cover briefly to get the positioning correct to the index mark before glueing

Olympus OM1 Prism Foam Removal 7

Now you can see the mess the foam is in. This is exactly why this OM-1 needs its foam removing. It’s already starting to deteriorate badly.
Left to its own devices the foam will degrade into acidic goo which will start eating the prism silvering.

To start cleaning first remove the flash contact plate by removing the screw shown in this picture….

Olympus OM1 Prism Foam Removal 6

…and now remove the screw on the other side.

Take note of the screws slightly closer to the rear of the camera. You will need to remove these later if you wish to remove the viewfinder lens for cleaning.

Olympus OM1 Prism Foam Removal 5

The flash contact plate is now removed. You need not desolder it.

Start by removing the foam from the flash contact plate using some Isoprop and cotton swabs. It’s best to apply the Isoprop and then give it a few minutes to work before removing it with a cotton wool swab.

If desired you can also remove the prism. It is retained by two screws on either side which attach to the prism retainer bracket.

Olympus OM1 Prism Foam Removal 4

And here you can see the Olympus OM-1 prism decaying foam has caused a huge mess around the flash contacts and the rear of the prism. This is exactly why you need to remove the foam from most Olympus OM-1 and OM-2s .

Along with prism damage the acidic decay will eat a great many metal parts if left alone and can cause electrical problems with the meter wiring.

Olympus OM1 Prism Foam Removal 3

careful application of some Isoprop using a cotton bud and a lot of patience is required to slowly tease all of the decaying foam out.
Try not to let fragments of the foam drop inside the camera, especially between the prism and the viewfinder lens.

Olympus OM1 Prism Foam Removal 2

This OM-1 was so bad that during prism foam removal from the prism the flash contacts were slightly depressed. These can be gently bent back to shape to ensure a good contact on reassembly.
The foam had also badly etched the plating on the flash contacts and these required some contact cleaner to get the contacts clean again and remove the corroded copper.

Olympus OM1 Prism Foam Removal 1

In this camera some of the Olympus OM-1 prism foam, while being cleaned out, got between the viewfinder lens and the prism. removing the viewfinder is simply enough by removing the two screws close to the flash contact bracket. be careful when you handle these piece as there are several thin wires running around it including the light meter cells.
You can also see a foam strip that may need replacing immediately below the viewfinder

Olympus OM1 Prism Foam Removal 8

Re-assembly is straight forward and simple. Remember to replace the flash contacts insulator piece…..

Olympus OM1 Prism Foam Removal 9

…and the spring to the rewind side of the camera.

OLYMPUS OM-1 PRISM FOAM REMOVAL ASA DIAL

On the top cover….Turn the ASA dial/Film Speed to the correct position – this will be the same as you set at the start of the procedure.
With the cover off the camera this will rotate freely

OLYMPUS OM-1 PRISM FOAM REMOVAL METER SWITCH

Set the meter switch to off as per when you started disassembly. With the cover away from the camera this will also rotate freely.

Olympus OM1 Prism Foam Removal 10

Replace the top cover, you may need to ‘jiggle’ the Film Speed/ASA dial a little to get it to engage properly. Likewise the meter switch but with a little fiddling it will go down. Make sure you do not trap or pinch any wiring when refitting the top cover.

Check operation of both the ASA dial and the on/off switch of and then simply reverse the process for dis-assembly to reassemble the top cover parts.

Posted on 2 Comments

Canon FTb Prism Replacement

Canon FTb Prism Replacement

This guide will show you how to check for decaying foam in the Canon FTb prism and how to manage its replacement.

For a full Canon FTb Service guide check out our full downloadable CLA Manual

If you’re considering buying a Canon FTb why not check out our dedicated review

You will need the following tools for Ftb Prism Replacement

Canon FTb Prism Replacement

The Canon FTb is prone to deteriorating foam on its prism. The foam was installed by the factory in the 1970s and in most FTb cameras is now starting to break down. As the foam degrades it releases an acidic substance which slowly but surely eats the prism silvering.

In the pic taken through the viewfinder of a Canon FTb purchased from eBay you can see clear evidence of an FTb prism being eaten by the decaying foam. The two vertical lines are in fact a single line of damage being reflected in the prism. These cannot be cleaned – the only way to repair this is a replacement prism from a donor camera.

You can in theory get a FTb prism re-silvered but the cost is usually prohibitive.

Canon FTbn

This work is being carried out on a Canon FTBn manufactured between 1973-1976 but all FTb models will have had foam applied to the FTb prism retainers and as such all of them are a liability if the foam is not removed. This problems is also common to some Nikon F models and most famously the Olympus OM-1.

Battery Compartment

First remove the battery cap and extract the battery. If you ever wondered what the two small holes at the back of the battery compartment are for they are for the meter booster accessory to allow the FTb meter to run in low light. The accessory had a power supply of its own and fed the FTb meter from that.

Spanner Wrench

Use a spanning wrench to remove the winder cover cap. This is conventionally right hand threaded. Be careful and use the correct tools as the alloy on this is rather soft and easily damaged.

Washer positions

Remove the winder cover cap and make a careful note of the washer positions underneath. Some of these are different from camera to camera. Pay close attention to the smallest washer which sits on top of the winder spindle. This part is easily lost unless you take care.

On reassembly, a tiny smear of a suitable grease on top of the wind lever where it meets the first washer (lithium is good) will improve the feel of the winder

Setting the Shutter Speed

Set the shutter speed to 1000th and the ASA dial to 25. This will take any pressure off the springs inside. It’s not strictly necessary for an FTb but with the FT version its essential. It’s good practice as well to avoid mistakes.

With the shutter speed and ASA set it gives you a ready reference should anything go wrong later.

Canon FTb prism replacement

You will need a spanning wrench again to remove the shutter speed dial retainer. This is again threaded conventionally with a right hand thread. If this is over-tight do not apply undue force. The thread underneath is very fine and it’s easy to shear these off. If its resistant apply a small dab of Isopropyl Alcohol and wait 10 minutes before trying again.

In this picture the retainer is now loose and is being unscrewed using a cocktail stick.

Canon FTb prism replacement

And now remove the shutter sped dial. You can see in this picture someone has been in here before. There is a pen marking on the spindle underneath. If there are no markings make a mark with an indelible pen on one of the slots on the spindle and make a note how it was orientated.

Canon FTb prism replacement

Here you can see the plastic spindle with its pen marking more clearly. This spindle connects to the meter so its important its correctly orientated when reassembled.

FTb prism replacement

Remove the rewind capstan by wedging the rewind spindle and then simply unscrewing the capstan. Be careful here with metal tools – you don’t want to mar the internal finish of the camera.

Canon FTb prism replacement

With the rewind capstan removed be careful of this tiny washer that sits on top of the rewind spindle.

Canon FTb prism replacement

Remove the two screws either side of the viewfinder – these are JIS screws NOT Philips and have a dome head. It’s best to use a JIS set so you don’t strip the heads.

Canon FTb prism replacement

Remove the screw at the end of the top cover. This usually has a flat head.

Canon FTb prism replacement

Remove the screw below the Canon logo.

The top cover will now come away. It may need a little wiggle to get it to come free and it will remain attached to the camer via some wires to the hot shoe. These need not be desoldered for this operation.

Be careful that the shutter release pusher pin is not lost during this.

Canon FTb prism replacement

Here’s the shutter release pusher pin. This can easily drop away as you remove the cover. When reassembling a tiny bit of grease applied to the shaft of the pin will help it stay in place during reassembly.

Canon FTb Prism Replacement

And now we can remove the prism retainer. There are two screws, one on either side. Simply unscrew these and remove the prism retainer. If the foam has not attacked the FTb prism and you are simply removing the foam this is as far as you need to go. Clean the retainer of any foam, remove the plastic prism cover and clean likewise. Both of these items can be cleaned with isopropyl alcohol. Clean any foam from the prism itself being careful not to damage the coating. A soft cotton wool ball moistened with isoprop will generally do.
Replace the foam with either replacement foam, or my preferred method, a good quality felt and replace.

If the prism is to be replaced you can now wriggle the prism free once the retainer is released. If removing the prism watch out for small plastic shims which are an oblong shape – these will need to be replaced later.

With the prism removed you can blow clean the top of the focus screen if you wish DO NOT USE Isoprop on the focus screen and be very careful of the meter needle and follower.

Note: You can see in this picture that some gears are plastic. The original FTb is all metal.

Canon FTB prism replacement

On this FTBn you can see the prism foam has degraded. The vertical lines shown in the viewfinder is where the foam has etched the FTb prism in a line formed by the gap in the prism plastic cover.

FTbn Prism Replacement

With the plastic cover removed you can see the damage caused by the decaying foam. Just a few small spots of acidic residue from the foam has ruined the FTb prism.

Canon FTb prism replacement

Here is the prism retainer and plastic cover cleaned up. The retainer will have some high quality felt applied to it. The replacement prism is from a Canon AE-1 which uses a slightly modified version of the FTb prism.

The AE-1 prism is compatible but normally had a resin plastic strip applied to its rear. This needs to be removed, its comes away quite easily. The Canon AE-1 itself has two possible prism types. The AE-1 Program has a prism with its corners clipped to allow for one of its viewfinder displays. Either will work fine in the Canon FTb or FTB-n

Reseat the prism, check that the viewfinder is ok (if the prism is not seated properly you will not get a good view) and then simply reverse back through this guide for reassembly.

Pay special attention to making sure that small washers are replaced, that the shutter release pusher pin is replaced and ensure that the shutter speed knob is correctly installed and aligned with the plastic spindle underneath.

Check out the foam removal guide for the Olympus OM-1, another camera notorious for prism de-silvering.

Posted on 10 Comments

Guide to Replacing Light Seals

Guide to Replacing Light Seals

Light seal overview

Really? You’re going to do light seals as a subject? Sheesh! This gets asked every week on camera forums. Yep! It does and rather than repeat myself, I wrote this guide to replacing light seals to help beginners out. This saves my fingers and the resulting RSI after typing the same answer out a few times a week.
Like most things on camera forums, there’s a lot of bad advice. So let’s deal with some of that right at the start…

“Why do I need to replace the seals anyway?”

Well the door seals and mirror bumpers in many cameras made from the 1960s onwards were made of foam. Over time the foam decays into dust or sometimes a tar like substance. As the foam degrades it basically turns back into its basic original chemistry which is usually some form of oil. The glue/tar like substance is the foam decaying back to dead dinosaur guts. These cameras are now usually at least 40 years old so way beyond their expected operating life. It’s really not surprising some stuff like foam materials and lubricants are starting to show issues.

“I didn’t bother replacing the light seals and the camera works ok”

Well pardon me but I prefer to believe that the manufacturer had their reasons for putting it in there. No manufacturer fits things that aren’t needed. If they thought they could save a few pennies on manufacturing with no downside they’d do it. If they are there they are there for a reason. In some cases the seals act to cut down dust and dirt.
Second answer to that one – if the old seals are decaying (and most are) then they will slowly scatter dust as well as nasty acidic tar like droplets all over the cameras insides including your film. The focus screen, mirror and shutter curtains all need to be clean. Precision parts don’t generally like being coated in fragments of foam or tar so your camera may be working. But for how long? Some nasty bits of semi congealed tar in the shutter curtains will cause problems soon enough.

“Don’t bother buying light seals, I just use a yarn and glue / a cut up mouse mat / some junk I found in the shed”

You are Scrooge McDuck and I claim my £5 prize! Seriously – you are going to invest in spending £10 a roll on film? Get it processed? Are too tight to spend time and money to make sure the camera works and gets good shots. If you love film you should be loving the equipment that allows you to shoot it. With no more film cameras being made, you might just want to rethink this. Start to see yourself as a conservator of the past rather than a consumer. It’s not like Nikon or Pentax are going to bring out a new one next week!
Some cameras did indeed use yarn/glue as a seal. If thats what your camera has thats what you should replace it with the same. Most Japanese cameras used foam.
So use the right materials. Bodges have consequences, meaning excess strain being placed on the door hinge, latches or channels which will CAUSE light leaks or cause other problems.

“Just buy a pre-cut set on eBay – they are easy to fit – no need to research a guide to replacing light seals”

No they aren’t, very often these pre-cut sets are very poor quality foam that will decay very quickly.

I had a Pentax KX set off eBay when I should have known better. Paradoxically pre-cut door seals turn out to be harder to fit. Plus the foam decayed into goop inside a few months. On top of that some of these sets are simply not right with the wrong density of foam. The correct foam is open cell type foam.

However, some of these kits use semi-open or closed-cell foam probably because it’s easier to cut. They often miss expensive felt or take an easy route for cutting rather than doing it right missing small details. Many of these people have no love in them for classic cameras. They just want to bang stuff out quick for your cash. If you are serious buy the right materials and do it right. With the right materials, you will be doing the job once in your lifetime. It’s worth spending a bit more and doing the job properly……

So what’s the right way? Read on for a general guide to replacing light seals. PLUS some specific guides for commonly found cameras. Some of them have their own special needs for light seal and mirror bumper fitting.

Guide to Replacing Light Seals

You will need the following tools and parts to replace light seals

Checking your seals

Camera Light Seal

How do you know if the light seals need changing at all ? Well you can generally tell by look and feel. The foam should be dark and dry to the touch. If it feels sticky or shows signs of crumbling when you touch it then it needs to be changed. Run your fingers around the door edges where it fits into the slots – they should be smooth. If they feel rough that’s decaying light seal glue – we’ll be dealing with that later.
Here’s a pic of a Minolta. You can see the seal on the hinge side of the door is crumbling. It’s sticking to the camera body side of the hinge – these need to be gone now and replaced. It may look harmless but crumbled up bits of light seal can cause major headaches. Shutter rollers and gears can be clogged. If any gets trapped into the shutter curtains you could be facing a hefty repair bill.

Getting started

Camera Light Seal

For this guide to replacing light seals, I will be using a Minolta X-700 with rotten seals. Almost all 35mm SLRs use a similar approach. At the end of the guide I will show some specific models. If in doubt replace like with like, you won’t go far wrong.
As with any camera repair patience and practice is always a good thing. Don’t rush this as a job and allow plenty of time.
This X-700 had badly degraded seals throughout.

Cameras Body and Back Door

For the Minolta X-700 and many cameras you can easily detach the door. If that’s possible it makes the job a tiny bit easier. If not it can be a bit more awkward. With the door detached exercise EXTREME CARE. Mind where you put your fingers and think about what you are doing at all times. You don’t want your fingers on the mirror or shutter curtains.

Here the lens is off and the camera has its body cap applied. This will keep it safe while it gets worked on.

Back Door Inspection

Here I am feeling the edge of the door where the door fits into the body slots of the camera. You may see it but if this feels rough then that’s a sure sign the slot seals are gone. That roughness is decaying foam, as it decays it turns into a tar like substance that often hardens over time. We’ll deal with that later.

Camera Light Seal

And here’s a visual giveaway – a chunk of the foam is missing on the door side of the hinge. Note also the foam has grey dust on it. That’s the foam getting sticky and attracting dust particles as a result. This stuff can easily get on your film and result in spots and other defects in the processed negatives.

Masking Up

Protecting Your Cameras Inner Workings

First job to do when replacing light seals is to protect the camera’s working parts. I normally apply a piece of card over the shutter opening and seal it down with some low tack tape. Masking tape is good as it’s waterproof and not too sticky. Don’t allow the sticky tape to get onto the shutter – that’s what the card is for.
Some camera body work can be adversely affected by Isopropyl Alcohol. Do a small test on that and if it is unlikely to have bad effects. If it does mask the camera body work off as well. I have only ever seen a single camera finish react badly (Chinon CE-5) but care is always good.

Isopropyl Alchohol

No guide to replacing light seals would be complete without cleaning products so here we go. I use a small dish to put some Isopropyl Alcohol (IPA) into.
You don’t need a lot.

When working with IPA make sure the area is well ventilated and avoid any ignition sources as its flammable.

Removing Old Light seals

Camera Light Seal

Using a cotton bud or a small ball of cotton wool apply some IPA to the slots. DON’T flood the camera you just want to dampen the foam with IPA. Be very careful around the top slot (nearest the top of the camera) as the seals there can lead directly inside the camera. You don’t want excess liquid washing around near the viewfinder or the frame counter reset lever.

Once seals are damped down with IPA leave alone for 15 minutes – let the IPA get to work.

Camera Light Seal

After around 15 minutes the IPA will have dissolved the glue holding the seals in. On many Minoltas the seals will stay with their backing tape. Using a small thin screwdriver its possible to get under the backing tape and bring the seal out in one piece. Other cameras wont be so kind and the seals will turn into a kind of sludge or worse dust.

The best tool to use is a bamboo skewer or cocktail stick especially if the camera body is metal and paint can be damaged easily. On the Minolta X-700 being plastic a thin jewellers metal screwdriver, if used very carefully – will work well and the Minolta seals can usually be relied on to stay in one piece.

Camera Light Seal

Here you can see the small piece of light seal from the hinge to the frame counter reset button being pulled out pretty much in one piece.

Camera Light Seal

Heres the frame counter reset lever. The light light seal goes either side of this.

You need to be careful extracting old foam here as otherwise it can drop inside the camera and gum stuff up. Be careful using IPA round this as well as you don’t want liquid inside the camera.

Getting ready to clean

Camera Light Seal

After an initial scrape the light seals on this one have come out almost in one piece though they have scattered crumbly stuff all over the camera rear. This is the reason the shutter is protected.

Camera Light Seal

Now it’s time to do some cleaning of the slots and hinge areas. The seals, as they decay, will have left some drek and gunge behind in the slots. For this part of the task I will be using some cotton wool balls and cocktail sticks with some more IPA.

Cleaning body seal residue

Camera Light Seal

My approach is to take a small piece of cotton wool, soak it in IPA and then run it along the slots using a cocktail stick. It will require a few goes to do this. While you don’t have to be obsessive it’s best to get as much of the gunk and sludge out as is possible. You don’t want the new seals being contaminated with the old decaying stuff. This can take quite a bit of time depending on the camera and the light seal condition. Minoltas are generally kind while Pentax light seals can often be horrific. Either way patience and some IPA WILL get the slots clean.

Camera Light Seal

Here you can see to get the bottom slot clean it needed about 7-10 applications of a soaked cotton wool ball being pushed through the slot. When doing this on the top slot be careful around the viewfinder – some cameras have an open area here were liquid can leak inside to the prism/viewfinder and also take care around the film counter reset lever.

Once the camera slots are clean, clean up the hinge area on the camera body. Some cameras will have foam attached to the body or in some cases decaying foam on the door will have created contamination on the camera body and left a sticky residue.

Cleaning door seal residue

Camera Light Seal

With the camera body clean it’s time to work on the door. As with the camera body slots apply some IPA using a cotton bud and then give it 15 minutes to get working on the adhesive.

Camera Light Seal

After around 15 minutes it should be easy to remove any decaying foam seals on the door. Here you can see one of the door slot seals has simply detached while the hinge seal can be picked at with a cocktail stick to remove it. While a small screwdriver will work well on a plastic bodies camera like the X-700 its best on painted metal surfaces like doors to use only wood or plastic tools.

Camera Light Seal

Here’s the main hinge seal being cleaned away by using a cotton bud soaked in IPA.

Minolta X700 Light Seal

Here’s the seal on the X Series Minolta everyone forgets. The latch end of the door has a sprung metal plate, beneath the plate is yet another light seal and these ones crumble badly. To clean these out use a cocktail stick to scrape away under the spring and then use some cotton wool soaked in Isoprop and pushed underneath the spring with a cocktail stick to clean out the residue.

Camera Light Seal

Use some cotton wool soaked in IPA to clean up any remaining residue along the hinge area of the door and don’t forget to clean the matching face on the camera of any residue or tackiness.

Cleaning down

Cleaning a Back Plate

Finally run a cotton wool ball soaked in IPA along the edges of the door, be careful not to let this get onto the leatherette on the rear of the door as IPA can damage the leatherette on some cameras and also cause the glue holding the leatherette in place to dissolve. Be mindful of any bits of cotton getting torn off on any projecting parts like the film pressure plate. Like other parts let the IPA have 15 minutes to work…

Back Plate

…before cleaning down with a cotton bud. Keep working this until any roughness has gone and the door edge feels smooth. You may need to consider whether any paint has been stripped by the decaying light seal (it can be acidic and dissolve paint as it decays) and make a judgement if it has as to how far to go here.

Cutting new seals

Cutting Mat

With camera body and door now clear it’s time to create some light seals. I always use Japan Hobby Tools foam. It’s what the cameras were mostly built with in the first place or at least a near perfect equivalent. The slots seals are normally 1.5mm deep foam but 1mm will suffice for most cameras, width of the slot is normally around 1.2mm but can vary. The first time you do this you will almost certainly cut these too thick so do a single cut and see what the fit is like. For this X-700 I am using 1.5mm thick open cell foam.

To cut these I use a cutting mat, an Exacto knife with a fresh blade and a metal ruler. Now you’re ready to start replacing light seals.

Camera Light Seal

Here’s a top slot light seal cut and ready for fitting. Cut it longer than you need, it will make it easier to place it (this is one of the headaches with precut seals – there’s nothing much to hold onto). Once cut remove the backing paper and lick the seal and make it quite wet, this will stop the glue gripping and allow you a chance to position it. Don’t worry about the wetness, it will dry and set just fine.
Now hold the seal out as shown, make sure it’s not twisted, you want the shiny side with the glue facing in to the slot so its sits facing into the camera (eg the glue side goes against the base of the slot). By very gently stretching the seal you should be easily able to get it glue side down along the slot.

You need sharp eyes and a good light to see the shiny side as you position it – just aim for getting the whole seal into the length of the slot – don’t worry about replacing light seals in the corners yet.

Fitting new seals

Camera Light Seal

Once in position gently press it down using a cocktail stick. If its slips and you realise there’s a twist in it, DON’T PANIC, if it was nice and damp with saliva the glue will take a good 5-10 minutes to get a hold, so if you get it wrong just extract it and try again, wet it down and start again from the top.

As you GENTLY tamp it down keep a close eye that it doesn’t twist or shift around – you need to very gently press on it to make sure it goes in flat and smooth and the run the cocktail stick along the slot to make sure its smooth.

Camera Light Seal

Take extra care as the light seal goes round corners, if it’s going to twist this will be where it happens. Gently pull on the seal to make sure it stays straight and correctly orientated. Use the cocktail stick as a guide to gently press it down around the corner.

Camera Light Seal

And now trim the latch ends before pressing down. On most cameras the ends of the light seal are NOT at the end of the slot on the latch side. The seal will normally stop just after exiting the corner. Going right to the very end of the slot may make the door a tight fit when closing.
The hinge side will almost always have the slot seal going to the very end of the slot.

Camera Light Seal

For the top slot seal you will need to trim the seal to stop at the frame counter reset lever…

Camera Light Seal

…and apply a short piece of seal between the other end of the frame counter lever and the end of the slot. Most cameras will have the slot seal on the hinge side running all the way to the end of the slot (not stopping short as per the latch side).

Camera Light Seal

Here is a finished seal on this X-700. You can see how the light seal stops either side of the frame counter reset lever and the foam stops just short of the full depth of the body slots.

Camera Light Seal

The bottom slot is the same process but easier to manage as there is no frame reset lever to worry about. This X-700 now has two new slot seals. Now set it aside and resist the temptation to mess about with for around 15 minutes to give the glue a chance to dry out and get stuck down.

Fitting door seals

Camera Light Seal

When it comes to replacing light seals the door seals can be a problem. Many cameras have different patterns of seals ranging from the simple to the very awkward. Minolta X series cameras have a variety of different seal layouts on the doors and its best to replace like with like.

The short article on each camera type at the end of this guide to replacing light seals discusses options and varieties. This particular X-700 had seals in the door channels at the hinge. These are normally 1.5mm foam and typically around 3mm wide. Length varies by X series so read the specific fitting information at the end of the article. Heres the lower seal on the door being measured for fitting…

Camera Light Seal

…and heres the upper seal being measured for fitting.

Camera Light Seal

As with the camera body slot seals once cut to size, peel away from the backing paper and lick well. Then apply and position. You see the lower door channel seal runs from edge of door hinge to around the curve of the door. The upper seal runs from the edge of the hinge to just past an indent in top of the door. It’s almost level with the metal structure before the film pressure plate.

Camera Light Seal

On an X-700 there is a vertical hinge seal made from 1.5mm foam. This is cut to run from top to bottom, OVER the door channel seals and run down alongside the hinge. Its typically around 5mm wide. As with the other seals once cut to size and shape, remove the backing paper, give it a lick and then apply and position it.

Minolta X-700 Light Seal Guide

Finally on an X-700 and most of the XG and X-x00 series there is a light seal strip under sprung plate at the latch end of the door. This is 2mm foam and occupies a space under the sprung plate as shown. You will need to make this quite moist to get it under the sprung plate and in position. It butts up to the curve of the door. This is the seal few people know about or replace.

Camera Light Seal

Here’s the door hinge seals now completed. Once applied set the door aside and give it a good 15 minutes to dry off.

Once it’s dry , test the seals by gently poking them with your finger to make sure they are stuck down.

Film Pressure Plate

Finally use a little IPA on a cotton ball to clean off the film pressure plate and use a puffer brush to blow both the door clean of any stray material

Camera Light Seal

Give the camera interior a blow out with a puffer brush and clean any stray particles out. Remove the masking tape and card protection from the shutter and replace the door. Once the seals are dry fully you can shut the door. Check it opens again easily. If you messed up and a light seal got twisted you may find the door gets stuck by the glue.


Get ready for the next job which is replacing the mirror bumper.

Replacing mirror bumper seals

SLR Mirror Bumper

A guide to replacing light seals is not complete without discussing bumper seals. If light seals are shot it’s a certainty that the mirror bumper will be on its way out as well. While lights seals are simple mirror bumpers are quite daunting for the the beginner.

Its not so much getting the new ones in – it’s the headache in getting the old ones out! The focusing screen, prism and mirror are all very fragile. They mostly cannot take being splashed with chemicals without risking damage. This is true of the focus screen which will more than likely melt if it comes into contact with IPA. The focus screen can also be easily damaged by tools and even your fingers so extreme caution is needed here.

Minolta X700 Focus Screen

On any camera with a removable focus screen I normally remove the screen. The prism may be fragile but it’s generally tougher than the focus screen at least. Removing the focus screen for a beginner is itself a hazard.

Getting them out of an X series is tough. Getting them back in is even tougher with a big risk of damage. In order to get an X series screen out there is a small clip as indicated in the picture. It’s almost invisible under the foam. Pull towards the front of camera while using a small pick to lift screen away using small slot in screen. You can see to the left of the circle. Very often decayed gummy mirror bumper foam may cause the screen to be stuck downs. This makes it hard and the slightest slip onto the screen even with a soft tool will mark the screen. If this is spooking you out then leave the focus screen in and just be careful.

Minolta X700 Focus Screen

With the focus screen out of the way (or not if left in the way) use a cotton bud. Slightly dampen with IPA to gently apply to the mirror bumper. Leave camera facing up and with cap off to reduce any risks of IPA fumes damaging the focus screen. Give this a good 15-30 minutes. Thanks to the internal light shield Minoltas are harder than most. Access is quite limited especially at the edges of the mirror bumper so maximum patience here.

Minolta X700 Focus Screen

And now gently clean off the foam bumper and residue. This can take a long time with damp cotton buds and cocktail sticks. Be VERY careful not to get any muck on the prism or the focus screen. Periodically I use a mini vacuum to clean any muck out as I go. A household vacuum cleaner will do as well if you are careful. Here’s this X-700 cleaned up. You can now see the focus screen retaining clip at the centre at the front of the prism.

Minolta X700 Focus Screen

The X-700 like most Minolta X series uses a 1mm thick mirror bumper. Early ones had a thicker 1.5mm bumper. It’s normally around 2mm deep (front to back). Its length will be the same as the focus screen. Here’s a bit of foam cut to the right depth and being squared up against a focus screen for sizing the width.

Early X series used foam but thanks to the internal light baffle making life tough Minolta changed later ones to use felt which is unlikely to have any issues like decay or rot. With that said I have seen a few where the felt was just rotten and threadbare so I normally replace with 1mm or 1.5mm foam.

Minolta X700 Focus Screen

As with the light seals, remove the backing paper, give the bumper a nice lick of spit and get it nice and wet and then apply. As you wont easily be able to see the ends on many cameras I usually grab the bumper with some tweezers at its centre and use that as a positioning guide.

Here’s this one being applied.

Minolta X700 Focus Screen

Once roughly in position use a cocktail stick to get a perfect position. Gently tamp down and leave the camera upside down to dry alone for 20 minutes.

Once you’re sure its settled ok it’s time to put the focus screen back in if it was removed.

Cleaning focus screen

Minolta X700 Focus Screen

While not a dedicated part of a guide to replacing light seals, I recommend cleaning the focus screen if it was contaminated with dust from the old bumper by running it under cold water and then cold air blowing it dry to remove any water marks. That will generally remove loose debris. Heres the screen being readied for re-insertion.
The shiny side faces down towards the mirror the matt side faces towards the prism.

Minolta X700 Light Seal

It’s hard to see in photos but on X series Minoltas the screen is held in place by a torsion bar spring at the rear of the camera. This forces the focus screen forward against the retaining clip and these are often hellish to get back in place. The trick is to get the focus screen rear edge into the guides highlighted in yellow and then press it backwards and down against the prism until it locks in place with the latch at the front.

This is the cause of many a scratched screen so be careful and if you are inclined to being hamfisted best to leave the screen in – just be careful with the chemicals while cleaning.

Minolta X700 Light Seal

Here is the finished job. A nice new mirror bumper and a sparkling focus screen. I also normally clean down the prism and mirror while the screen is out just using breath and a very gently cleaning with a cotton bud.

Blow out and vacuum the camera to get rid of any possible debris that may have dropped while working on the bumper.

specific Guides to Replacing Light Seals in Common Cameras

The basics of fitting light seals are covered in the main guide. This section discusses a different guide to replacing light seals applied in some of the more common (New age of Film) cameras.

CANON AE-1

Canon AE-1 Light Seal

Guide to Replacing Light Seals in a Canon AE-1

The AE-1 uses felt rather than foam for its hinge seals. These are fitted as per the picture with a felt pad on the camera body. It also includes a matching felt pad on the door hinge. The door channels also have felt applied that runs around the curve of the door. This layout is nearly identical to the Canon FTb.

This is my own AE-1. It shows damage near the seal caused by the previous owners bodged fitting of light seals using contact adhesive. The body slot seals are most normally 1.5mm foam.

Canon AE-1 Mirror Bumper

The AE-1 mirror bumper is conventional and uses 2mm thick foam. Again this is identical to an FTb.

FUJICA ST/AZ Series

Fujica Light Seal

Guide to Replacing Light Seals in a Fujica/AZ Series

The ST-705, 605 and AZ-1 all have identical light seals. Slot seals on the body are 1 or 1.5mm thick foam.
The door has a slightly thicker 1.5mm foam block on the door at the hinge end and..

Fujica Light Seal

…a deep 2mm foam block insert at the latch end.

Fujica Light Seal

The body also has 1mm deep foam inserts in the slots either side of the body latch mechanism.

Fujica Light Seal

The mirror bumper is conventional and has a 2mm foam mirror bumper.

MINOLTA SR/SRT series

Minolta SRT 101 Light Seal

Guide to Replacing Light Seals in a Minolta SR/SRT Series

Slot seals on the body are a conventional 1.5mm foam. The hinge end of the body has a felt insert as shown. Note that the door channels at the hinge end also have small 1.5 foam inserts. On very early models these were made of felt.

Interestingly the SR7, the immediate predecessor to the SRT has no seals at all other than a felt strip on the camera body at the hinge end. I can be sure of this as I acquired a mint never used SR7 and its lack of seals was surprising. It does tend to indicate Minolta had a rethink and added the extra seals to the SRT and they must have had good reasons to do that.

Minolta XD7 Light Seals

Later SRT models like the 303 also had a foam pad of 1.5mm thickness added to the door end hinge seal.

Minolta SRT303 Light Seal

Mirror bumpers on most SRTs are often felt but some later models have 1mm foam on the mirror bumper. These are often awkward as the bumper is on the face of a spring loaded light trap/baffle. Be careful when you remove old foam or felt from these. There are two slots under the foam which are the grip points for a spring. If this becomes dislodged its very awkward to get it back into place.

Minolta SRT101 Light Seal

SRT101 and similar – additional seals

There are various versions of the Minolta SRT101. If the name plate of the camera looks like this one then there is a thin light seal that runs under the top cover around the front of the cover as indicated. You would need to get the top cover off to see this. This seal acts as a light seal and dust seal and also acts to hide the gap between the front of the prism bulge and the lens mount surround. These are almost always disintegrating in SRTs and a cause of debris on the top of the focus screen.

Minolta SRT303 Light Seal

SRT303 and similaradditional seals

The later SRT303 and similar marks have a different name plate. On these there is a strip of foam that runs as indicated over and around the aperture indicator mirror. This can be accessed simply by undoing the screws either side of the name plate. This seal failing causes the same problem as the top plate seal on the SRT101 – namely debris being scattered onto the top of the focus screen.

Minolta SRT101 Light Seal

SRT – most versions – additional seal

In addition to the top cover seals many SRTs have a light seal in the position indicated under the base. These are often the cause of issues with meters as the seal can disintegrate and scatter debris and tar like material onto the variable resistors/trimmers in the base of the camera. The acidic breakdown of the foam here can also cause other electrical issues as the seal is directly next to the electrical junctions in the base of the camera.

MINOLTA XD

Minolta XD7 Light Seal

Guide to Replacing Light Seals in a Minolta XD

Camera body slot seals are the standard 1.5mm foam. The door hinge arrangement is as shown in the picture also using 1.5mm foam. The door channels have foam as shown which runs from the hinge to the edge of the film pressure plate, while the hinge seal fits BETWEEN the channel seals and does NOT run over the top of them like the X series.

Minolta XD7 Light Seals

The XD body shape does present some awkwardness as the body slots have steps in them. This is common on some smaller bodies cameras and makes fitting the slot seals a little awkward. It’s easy to pick up a twist in the seal as the seal runs round the angles so be careful when doing these.

Minolta XD7 Mirror Bumper

The XD mirror bumper is most often fitted in two halves of 1.5mm foam to allow the triangular focus screen retainer to be visible and removable. The triangular retainer needs to be free as part of the focus screen removal process. If you run mirror bumper foam over the triangular fitting the foam will be torn if you ever need to change focus screens. Some XD7s had a the foam strip running all the way across when they were built and at least two have seen have had felt applied in a single strip at the factory.

OLYMPUS OM-1

Olympus OM-1 Light Seal

Guide to Replacing Light Seals in an Olympus OM-1

The slot seals are standard 1.5mm foam but the hinge seal needs special attention. The OM-1 is notorious for light leaks here. The hinge end light seal is comprised of three pieces.
The first piece (A) is 1.5 mm foam and it is set in place closest to the hinge (you will see if you remove the old seal there is a ‘step’ at the hinge end of the camera). This piece runs the full height of the hinge between the two hinge points. The second strip (B) is only 1mm thick and butts against the first strip and is slightly shorter stopping at the start of the body slots. The seals create a small .5mm step in the foam.

Once the two foam pieces are fully set and dried a felt strip cut to the size of the combined sizes of the two foam strips is applied over the top of the foam strips. The felt part should stop slightly short of the lip of the camera body. In the picture at the top edge of ‘B’ you can see the very edge of the camera body above the felt . This arrangement creates a nice light tight seal around the hinge.

Olympus OM1 Mirror Bumpers

The mirror bumpers are also awkward with the OM-1, these are made from two blocks each side to create an ‘L’ shape and have to be fitted so that they do not foul the focus screen cradle when it’s released to change focus screens. Getting this right is fiddly work, so if your OM needs these allow plenty of time. The blocks are made from 1mm foam.

PENTAX KX/KM/K1000

Light Seal

Guide to Replacing Light Seals in a Pentax KX/KM/K1000

The easiest of them all to do. The K series use standard 1 or 1.5mm foam in the camera door slots.

The hinge end seal is a fitted piece of felt as shown.

Pentax K1000 light seal

Watch out with Pentax for two small bits of felt that are normally installed at the very end of the door channels at the latch end. These almost never need replacing so if they look good then leave them alone.

Pentax Light Seal

The Pentax mirror bumper is conventional. Most usually 2mm foam but note the small ‘V’ cut out which allows access to one of the adjustment screws. DO NOT MESS WITH THIS SCREW it controls the angle of the focus screen and should be left well alone.

CANON FTb

Canon FTb Light Seal

Guide to Replacing Light Seals in a Canon FTB

The Canon FTb is another awkward camera. The body slot seals are the standard 1.5mm thick foam but the hinge end is all made from felt. This is awkward to fit thanks to the Quick Loading (QL) mechanism being in the way. There is a felt body side hinge seal and a felt door side hinge seal. Two door channel seals in the door are also felt and run under the door side hinge seal. When you remove the old seals you will see there is an impression in the door which the channel seals should conform to. These run from just under the hinge seal to the flat back part of the door.

Canon FTb Light Seal

Similar to the Pentax K series the Canon FTb has small felt seals at the end of the channel at the latch end of the door. These are slightly longer than the Pentax K series arrangement and fit from the edge of the latch and run to the start of the flat back of the door. One of them is indicated in the picture.

MINOLTA X SERIES (300, 500, 700), XG & XG-M

Minolta X Series Light Seal

Guide to Replacing Light Seals in a Minolta X Series (300, 500, 700), XG & XG-M

Minolta constantly changed the light seals in the X series doors. Some of them have a short lower channel seal and longer upper channel seal, some have two short seals and some reportedly had no seals in the channels at all. Its generally best to replace like with like. If however you are dealing with a camera where its not possible to determine what was fitted my advice is go with the short lower channel seal and the long upper channel seal IF it’s an X-x00 series but go with two shorter seals if it’s from the XG series like the XG-M – based on cameras I have worked on this seems to be the most common arrangement. These seals are 1.5mm.
The only XG I have seen had only the vertical hinge side slot with no door channel seals. Mirror bumper as per all other Minolta X types.

Minolta X series Light Seal Guide

XG and other X series also have a light seal under the sprung plate on the latch end of the door – the picture illustrates where this is located UNDER the sprung plate. This is typically 2mm foam and is applied to run from each end of the sprung plate. It’s around 5 mm wide and is butted up at between the sprung plate and the curve of the door.
This seal is almost always forgotten but is critical to stop crud from flaking into the camera.

Pentax MX

Pentax MX Hinge Seal

Guide to Replacing Light Seals in the Pentax MX

he Pentax MX is a tough one for replacing light seals. It’s quite a complex set of seals and mirror bumpers. The hinge end of the body has two seals in a stepped arrangement. The section that will be under the door hinge is made of felt and runs between the two hinge points. Butted next to it is a 1.5 strip of open-cell foam that runs from the lip of the camera to join with the felt and runs over the two slot seals in the body. The body slot seals are conventional 1.5mm open cell foam but are tricky to apply thanks to the bends in the slots and the fact the slots are slightly obscured by the top and bottom plates of the camera. Like most SLRs there is a small gap where the frame counter reset lever is located.

Pentax MX Door Seal

Like most Pentax SLRs the MX has two small felt seals at the catch end of the door. These are small and approximately 4mm square. Unless these have been damaged it is as well to leave these alone.

Pentax MX Door Seal

The door also has a strip of 1.5mm open-cell foam that runs along its top edge in the door channel which faces the frame counter reset lever in the body.

Pentax MX Mirror Buffer

The mirror bumper in the MX is torturous and needs a huge amount of patience. The bumper is made of two very thin strips of 1.5mm foam that run front to back. These extend to the rear of the mirror cage and stop at the front edge where they join a separate bumper at the front. Exercise EXTREME care when removing the old ones as the shutter speed indicator extends into the space – this can easily be broken or melted by Isoprop Alcohol AND the cameras internals are open to this space so you need to be very careful not to let old seal foam get into these spaces. You have to remove the focus screen to do this and make sure after fitting that the side bumpers do not foul the focus screen holder when closing and opening it.
With the side bumpers installed you need to install two bumpers with cutouts as per the picture. These can be made of a single piece each if you are careful or can be assembled from two pieces.

Pentax ME and ME Super

Pentax ME hinge seal

Guide to Replacing Light Seals in the Pentax ME and ME Super

The ME and ME Super use a felt block on the hinge side of the camera. This is usually in good condition and is best left alone

Pentax ME and ME Super latch side seals

Like most Pentax SLRs the ME and ME Super have two small felt seals at the catch end of the door. These are small and approximately 4mm square. Unless these have been damaged it is as well to leave these alone.

Pentax ME and ME Super Door lightseals

The body slots use a 1mm foam. Unlike the MX there are no matching seals on the back of the door.

Pentax ME and ME Super Mirror Bumper

The ME and ME Super use quite a deep mirror bumper at 2mm or 2.5mm. Note there is a small ‘V’ cut out to allow access to the viewfinder collimation screw (DO NOT MESS WITH THIS). This is typical with most Pentax SLRs.

You may notice a foam seal to the rear of the focus screen. To replace this requires a strip down of the camera as it is a seal between the shutter and the mirror box.

Any questions relating to this guide to replacing lights seals or improvements? Please let us know in the comments below Mel

Posted on Leave a comment

Minolta MD 50mm f1.7 / f2.0- Lens Repair Guide

Minolta MD 50mm f1.7 Lens Repair

A step by step guide to repairing the underated  Minolta 50mm f1.7   This Minolta MD Lens Repair Guide can also be used for many other short focal length MD series lenses such as the 50mm f2 (which is identical in construction) and the 28mm, 35mm and 45mm MD types.  Most short focal length Rokkors share a very similar construction and while there may be minor differences the essentials will be almost identical.  

This is NOT true of long focal length and zoom MD lenses which will be very different in design and construction.  

The guide covers the late model MDIII series but the earlier MD series with 49mm filter threads will be identical. The earliest MD type with 55mm filter threads is somewhat different.

Copyright 2021 High5Cameras,
Free to use, copy and distribute so long as no charge is made for use,
distribution or access and authorship and web address is freely acknowledged.

NOTES BEFORE YOU START

The Minolta MD 50mm f1.7 is a relatively easy lens to work on but does have some small challenges – please bear in mind that this is a Minolta MD Lens Repair Guide, you may well face challenges inside the lens that you will need to work out.  These can include stripped screws, deformed parts etc.
Read through the entire guide before you start to make sure you understand the basics and are aware of hat you may need in the way of tools and are prepared for any possible problems that may arise.

When working on one side of the lens (eg the front) always be mindful about what’s happening at the other side (eg the back).  I always keep caps on as much as possible to prevent any accidents.  The classic mistake is for people to press on the lens while it is on a workbench and break things on the downside of the lens like the aperture lever.

There is no such thing as luck in repairing optical equipment, if you do it right, using skill and patience you will be rewarded with a perfectly operating lens. A rushed or bodged job will result in the lens being devalued, unpleasant to use and possibly unusable so…..take your time, get the right tools and materials, don’t take shortcuts or advice from people who know less than you (check out my camera history here).

There are no prizes for fastest or almost working in the world of lens repair so read the Minolta MD Lens Repair Guide from end to end before starting to familiarise yourself with the process.

Minolta MD 50mm f1.7 Lens Repair

Start by putting a rear lens cap on while you work on the front part of the lens.

The quality of any repair is down to your skills, your tools, patience and most of all mindfulness.

Good servicing is taking your time, there are no prizes for the fastest lens strip down and rebuild.

Phase 1 Minolta MD Lens Repair Guide
Minolta MD Beauty Ring

Remove the lens beauty ring.  This will require a rubber cup as there are no spanner slots on the beauty rings of most MD series lenses.

With the beauty ring removed all of the essential screws and fittings for the front part of the lens are exposed.

Filter Ring

Start by removing the filter ring retaining screws using a JIS screwdriver. 

There are three of these around the filter ring. One of these is indicated in the picture.

Filter ring fittings differ between various versions of the lens.  Some have three tabs, some have a fourth tab which sits over and around one of the optical element retainer screws.

Remove the three screws retaining the filter ring.  Keep these separate as they are sometimes a different size to the optical element screws which will be removed next.

Remove the three screws retaining the front optical group.  One of these is indicated in the picture.

Remove the three screws and keep these separate from other parts.

Exercise caution as these screws are tight, a slip with a screwdriver here can impact the lens.

Front Optical Unit

The front optical unit can now simply be pulled free.  Its very common for vaporised grease to have gotten behind this and it may cause the unit to stick.  It can be gently pried up using a fine screwdriver or cocktail stick gently under its edge.

Store the front optical unit safely.

With the front optical unit removed the aperture diaphragm blades are exposed.  In an MD series these are very thin and very fragile.  It’s best to open the diaphragm to maximum to reduce any risks to the diaphragm blades as you move forward.

Phase 2 Minolta MD Lens Repair Guide

You now need to remove the focus barrel.  This is retained by three screws around its front edge.  These hold in place a brass ring which in turn holds the focus barrel by a ridge around its circumference.

Set the lens at infinity BEFORE removing these screws.

Minolta MD Brass Ring

Here’s the brass ring and screws removed.  Once these are removed the focus barrel simply slips off of the lens.
The brass ring is sometimes made of thin steel.  Keep this safe as it is easily damaged. Before removing the screws set the lens to infinity focus. It’s assumed the lens worked ok at infinity focus prior to strip down, if not the process at the end of this guide will set infinity for the lens.

Minolta MD Measure Gaps

Measure the gaps between the slots of the two helicoils and make notes as to the gap sizes.  In this picture the outer helicoil is to the left and the inner helicoil to the right.  I normally use some jewellers screwdrivers to gauge the distance. Its not super critical but it will help with reassembly to know the measurements.

Phase 3 Minolta MD Lens Repair Guide

Turn the lens over and remove the three screws surrounding the rear optical unit with a JIS driver. Exercise caution, these can be tight and you don’t want a screwdriver skating across the rear lens surface.

These screws are usually quite long.

Minolta MD Small Black Plate

With the three screws removed the small black plate can simply be removed. Note it has a flat side near the aperture control lever.

SPECIAL NOTE: Some very early versions of the MDIII lens do not have this plate.  They have shorter screws that fasten directly to the rear optical unit.

Minolta MD Rear Optical Unit

With the rear plate removed the rear optical unit will simply be free.  I normally use some angled tweezers to grab it by its fitting lugs and extract it.

Store the unit safely.

Phase 4 Minolta MD Lens Repair Guide

Remove the 4 screws around lens mount and store separately.

Minolta MD Lens Mount

Once the screws are removed you can simply pull the lens mount free.  It’s a good idea to hold onto the aperture ring and keep it pressed down while you do this to avoid any risk that the aperture ring comes off at this point which can result in the loss of the small ball bearing.

Observe the rear of the lens mount assembly.  Note the cut out which engages with the diaphragm actuating lever.

Also note the brass liner which runs around the base.  Be very careful as the brass liner is not attached, it will normally be held on by grease but can come free very easily.  Its is extremely thin and very easily damaged so clean this very carefully with a cotton bud dipped in IPA.

With the lens mount removed you can now see the lens focus lock tabs. Note that one has open sided holes for its fitting while the other has closed holes

Be careful from here on with the strip down.  The aperture mechanism in an MD is mostly plastic and the aperture lever is very fragile.

While holding the aperture ring to the lens very carefully set it to about a mid position.  This will make it easier to remove in the next step.

Cup the rear of the lens in your hand, preferably inside a Tupperware box or clear bag and gently pull the aperture ring free. Inside the ring there is a tiny spring and ball bearing and these can easily fly out and be lost.

Sometimes the bearing will stay with the lens, sometimes it will fall into your hand.  Sometimes it will simply vanish – take this step easy.  If you don’t see the ball bearing examine your hands carefully.  It’s so small it may be stuck to your hand.

The pic shows how small the bearing and its pusher spring are. The bearing is 1.2mm in most MD lenses.

This is why I generally remove the aperture ring  inside a large clean bucket or Tupperware box.  It minimises the risk of a loss.

The spring will most normally stay stuck inside the aperture ring but to be sure it is not lost I normally extract it using a cocktail stick to ease it free and store the spring with the bearing inside a secure container.

When I clean/refurbish a lens EVERYTHING gets cleaned, to avoid loss of small parts everything is removed.  This is the aperture locking tab being removed.

With the aperture ring removed this will simply push out. It’s ‘keyed’ so will only fit one way on reassembly.

Phase 5 Minolta MD Lens Repair Guide

Before removing the focus helicoil locking tabs note how they are fitted.

They do not press too hard against the side of the helicoil.  If these are replaced to tightly they will cause the lens focus to be stiff.

Remove the helicoil locking tabs with a JIS driver making a note of how they are arranged.

The open sided one is away from the aperture lever.

If you are going to face a headache in an MD series lens this will be it.  The lock tab retaining screws can be tough to extract.

Chemicals are not an option here except sparingly as they can easily leak into the diaphragm. A Good set of JIS drivers is the only real option for safe extraction of these screws.

Heres one of the lock tabs being extracted.

With both lock tabs extracted the inner and outer helicoils can simply be unscrewed from each other.

The picture shows L-R the inner helicoil, outer helicoil, lens body.

This completes the strip down of the lens.

MECHANICAL CLEANING

All components APART FROM the inner helicoil are now cleaned with hot soapy water and/or IPA. All threads are chased out with a fine bamboo skewer or pin.  The outer helicoils threads are very fine and the smallest bit of dirt or dried grease will give the lens a lumpy or gritty feel.  A lens shouldn’t be cleaned more often than necessary so you should take pains to get this right.

The inner helicoil is a challenge.  On the MD series the diaphragm forms part of the inner helicoil and the diaphragm can not be removed easily. In order to clean the helicoil I place the helicoil on its side on a clean cloth and then gently wipe the old grease off with cotton wool balls.  When most of the grease is removed I then use a cotton wool ball moistened with IPA to run around the threads.  Too much liquid on the wool ball can easily seep into the diaphragm and cause problems so go easy on liquids and be VERY CAREFUL of the aperture lever

The diaphragm of most MDs seldom suffer with oil contamination so its unusual to have to deal with stuck diaphragms in this series of lenses. If contamination is slight you can immerse the diaphragm in IPA and then air dry.  For serious contamination, which is rare, you will need to dissemble the diaphragm which is not covered in this guide.

OPTICS CLEANING

The Minolta MD series usually show haze caused by oil vapour on the lens group inner surfaces.  These are the optical surfaces that face inside the lens in each of the two optical groups.  These can be cleaned with a mild IPA solution and a lint free soft cloth.  You need to exercise extreme care here and do not apply pressure to the glass. Apply a mild IPA solution to the cloth just so the cloth is damp and then apply lightly.  Use a puffer brush to blow off any moisture and then use a clean cloth to clean out any evaporation marks by gently breathing on the lens surface.

In the MD series the front and rear optical groups are encapsulated and cannot be removed as individual components. If your lens has fungus or issues between elements in a group there is no repair possible

I normally clean the optics just prior to their reassembly into the lens and make sure the lens interior is blown clean with a puffer bulb.  You will always find some dust is present on reassembly – do not worry – they were no different when they came from the factory.

After cleaning the helicoils should be lightly greased using a suitable lubricant.  I prefer Helimax XP for most Minolta lenses.  This is applied thinly using a fine sable brush. On a Minolta MD series the lubrication needs to be slightly thicker on the inner helicoil thanks to its plastic surface. The outer helicoil needs to be very thinly lubricated or else the lens focus will be too stiff.

Notes on lubrication – The first time you so this you will need to work by trial and error to get the right feel.
Too much lubricant will result in the focus being stiff, too little and it will grind or be too light. You can test the ‘feel’ while the helicoils are assembled but it will be hard to assess without practice as to what the lens will feel like with its focus barrel mounted.

Phase 6 Minolta MD Lens Repair Guide

On reassembly the object is to get the helicoils spacing for focus the same as you measured at the end of Phase 2 and…

…with the lock tab locating holes in the right position for the lock tabs to engage with their slots.

You may need to unscrew the lens a few times and reassemble to get this correct.

You can see in the picture that the locating holes for the tabs are correctly orientated for the tabs to fit into the slots.

Replace the lock tabs.  This is the most fiddly thing with an MD series and supercritical on the 45mm f2 lens.

Here I am using a bamboo skewer to keep the tab in position while the first screw is put in.  The tabs can easily twist and turn while being replaced…

…and can impact the side of the lens. The tabs do not need to be in close contact with the edge of the lens or else they will cause the lens to jam. They also need to be flush with the top surface of the lens body when the lens is fully pulled back.

If the helicoil gaps are set correctly at the start of Phase 6 then it may be the tabs stand a little proud with the focus pulled back as far as possible.  This is not usually a problem but you must remember not to reassemble the rear of the lens with the tabs proud of the rear surface or the aperture mechanism can be jammed.

Phase 7 Minolta MD Lens Repair Guide

Replace the aperture lock tab if you removed it earlier.

Replace the aperture ball bearing spring if you removed it at the end of PHASE 4.  Seat the ball bearing on the top of the spring using a small blob of Helimax XP grease

While keeping a close eye on the bearing (and preferably doing this step inside a large Tupperware box or bucket)…

…trap the bearing in place by applying the aperture control ring at a slight angle to trap the bearing and then ease the rest of the aperture control ring down over the body of the lens.

NOTE: You will find it easiest if you trap the bearing under the aperture ring with the aperture control ring set at about a mid point.

Before attempting to refit with the bearing do a couple of dry runs so you know what to expect.

Immediately after fitting the aperture ring test the aperture ring f stops are nicely clicking.

Making sure the aperture control ring doesn’t slip off turn the aperture ring to its highest value the highest value (smallest aperture)

NOTE: Some versions of the 50mm MD series only go as high as f16 but the MDIII will go to f22.

Double check that the helicoil lock tabs are flush with the top edge of the lens body as described at the end of Phase 6

Phase 8 Minolta MD Lens Repair Guide

Place the lens mount over the lens and check that the diaphragm actuating lever is captured by the cut out in the mounting rings lever mechanism and place the lens mount onto the rear of the lens……

…. Now rotate the lens mount until the screw holes align with their fixing points.  If all is well the lens diaphragm will stop down as you turn to the lens mount around to match the F16 or f22 setting.

In the picture a skewer is being used to hold the mount in place at the correct position.

Secure the 4 screws that retain the lens mount to the lens body.  Do not overtighten these as the threads can strip quite easily.  They need to be firm but not gorilla tight.

Generally I leave these quite loose at this stage and only tighten down once I am happy the lens is working correctly. Check at this stage that the aperture is working correctly by activating the lever.  Check also that the lens focus is working by turning the outermost helicoil.  Do not wind the lens too far out or it can slip off the lock tabs at this point just turn it a quarter turn at most to ensure the focus is free and operating.

Phase 9 Minolta MD Lens Repair Guide

Replace the rear optical assembly making sure its screw hole are aligned with the fixing points beneath.  I use a cocktail stick to move the optical unit around and check that the holes are aligned to their fixing points.

Blow the lens clean before reinserting it.

Minolta MD 50mm f1.7 Lens Repair

Replace the rear plate making sure the flat side is located against the aperture lever and the blackened side is facing outwards (eg would face into the camera when mounted).

Minolta MD 50mm f1.7 Lens Repair

Replace the three screws that secure the plate and the rear optical group and then secure a rear cap to protect the rear of the lens.

Phase 10 Minolta MD Lens Repair Guide
Minolta MD 50mm f1.7 Lens Repair

Replace the front optical group. The lens should be blown clean prior to replacement.

Minolta MD 50mm f1.7 Lens Repair

Replace the 3 screws that secure the front optical group.

Phase 11 Minolta MD Lens Repair Guide
Minolta MD 50mm f1.7 Lens Repair

Attach the lens to a known good camera, look through the viewfinder and use the outer helicoil to bring the lens to infinity focus. 

I normally aim at a pair of radio towers around 8 miles away and use a camera with a split field focus.

Minolta MD 50mm f1.7 Lens Repair

If all is well with focus gently put the focus barrel over the lens and make sure the infinity mark is against the index line.  The barrel will also be set against the focus stop.

Minolta MD 50mm f1.7 Lens Repair

Carefully position the focus barrel locking ring to align with the three fixing positions.

A bamboo skewer is helpful for positioning this.

Minolta MD 50mm f1.7 Lens Repair

Fix the focus barrel locking ring with the three screws.  Do not overtighten as these will shear easily.

A good test of tightness is to hold the screwdriver between thumb and forefinger and roll the screwdriver between your fingers.  This will take it to just tight enough.

Recheck focus at the end of this and if needs be release the screws a little and shift the focus barrel around.  This can be fiddly to get perfect – take your time and don’t rush.

Minolta MD 50mm f1.7 Lens Repair

The filter rings come in differing styles for MD lenses.  This one has a position that fits over one of the lens fixing screws as shown.

Minolta MD 50mm f1.7 Lens Repair

Replace the filter ring and replace the screws holding it in place. You can see in this picture the short tab which simply goes over one of the front element retaining screws.

Minolta MD 50mm f1.7 Lens Repair

Cosmetically when the lens is at infinity the edges of the focus barrel and the filter ring shoulder should be almost flush.  So long as the helicoil measurements were correct on reassembly this will be as close as you can likely get.

Minolta MD 50mm f1.7 Lens Repair

Replace the beauty ring….

Minolta MD 50mm f1.7 Lens Repair

…and use a rubber cup to tighten down.  Take care with this as the filter ring is metal while the beauty ring is plastic.  Make sure it is correctly threaded before attempting to tighten down.

Minolta MD 50mm f1.7 Lens Repair

Take a final check and make sure the lens is operating correctly, focus at infinity is ok and all f stops and stop down are working correctly.

Notes on The Minolta MD 50mm f1.4 Lens

The f1.4 version of the MD lens is somewhat different. The basic process described for the f1.7 or f2 versions is the same but there are some differences in construction.

1/ The Filter Ring
The filter ring on the f1.4 version is part of the front lens body. With the beauty ring removed you will see two small grub screws. Remove these and then simply twist the enire front of the lens away which includes the filter ring.

2/ The Front Optical Element
The front element is retained by three JIS screws.

3/ The Rear Optical Element
Unlike the f1.7 and f2 versions the rear optical element is not retained by the  use of screws. It is screwed to the rera of the diaphragm assembly. You will find this easiest to remove with the lens mount and aperture ring removed. You may need to use some Isoprop to break down the thread lock.

4/ The f1.4 most usually only has a single helicoil lock tab.

The actual process for stripping down, rebuilding and setting infinity focus is otherwise identical in most respects.

Posted on 3 Comments

Minolta MC ROKKOR 58mm f1.4 – Lens Repair Guide

Lens Repair Minolta Rokkor 55mm f1.4

This Minolta MC Lens Repair guide can also be used for many other short focal length MC series lenses such as the 55mm f1.7. Most short focal length Rokkors share a very similar construction and while there may be minor differences the essentials will be almost identical. For our guide on Minolta MD 50mm f1.7 / f2.0- Lens Repair Guide click here

This is NOT true of long focal length and zoom Rokkor lenses which will be very different in design and construction.

This Minolta MC Lens Repair guide covers the MCII series but MCI series will be identical.

This guide will NOT be appropriate for MC-X Series, MD Series or the earlier Auto Rokkor models which all employ very different construction.

Copyright 2021 High5Cameras,
Free to use, copy and distribute so long as no charge is made for use,
distribution or access and authorship and web address is freely acknowledged.

NOTES BEFORE YOU START

The Minolta Rokkor 58mm f1.4 is a relatively easy lens to work on.  Please bear in mind that tis is a guide, you may well face challenges inside the lens that you will need to work out.  These can include stripped screws, deformed parts etc.
Read through the entire guide before you start to make sure you understand the basics and are aware of hat you may need in the way of tools and are prepared for any possible problems that may arise.

When working on one side of the lens (eg the front) always be mindful about what’s happening at the other side (eg the back).  I always keep caps on as much as possible to prevent any accidents.  The classic mistake is for people to press on the lens while it is on a workbench and break things on the downside of the lens like the aperture lever.

There is no such thing as luck in repairing optical equipment, if you do it right, using skill and patience you will be rewarded with a perfectly operating lens. A rushed or bodged job will result in the lens being devalued, unpleasant to use and possibly unusable so…..take your time, get the right tools and materials, don’t take shortcuts or advise from people who know less than you.

There are no prizes for fastest or almost working in the world of lens repair so read the Minolta MC Lens Repair guide from end to end before starting to familiarise yourself with the process.

Lens Repair Minolta Rokkor 55mm f1.4

Start by putting a rear lens cap on while you work on the front part of the lens.

The quality of any repair is down to your skills, your tools, patience and most of all mindfulness.

Good servicing is taking your time, there are no prizes for the fastest lens strip down and rebuild.

Phase 1 Minolta MC Lens Repair
Lens Repair Minolta Rokkor 55mm f1.4

Remove the lens beauty ring.  This can be done with a lens spanner but a rubber cup is a better solution.  A lens spanner can easily mar the finish on the beauty ring.

Lens Repair Minolta Rokkor 55mm f1.4

With the beauty ring removed all of the essential screws and fittings for the front part of the lens are exposed.

Phase 2 Minolta MC Lens Repair
Lens Repair Minolta Rokkor 55mm f1.4

Start by removing the front optical element group.  You will see there are two sets of lens spanner cut outs.  You need only the outer pair.

Apply the lens spanner and gently but firmly turn the lens while keeping downward pressure on the spanner. 

Lens Repair Minolta Rokkor 55mm f1.4

The front optical group after being unscrewed can be simply lifted out of the lens body.

Store this somewhere safely.  I usually store lens groups in a Tupperware box lined with lint free cloth pending cleaning and reassembly.

You are advised not to disassemble this group but cleaning will be discussed later.

Lens Repair Minolta Rokkor 55mm f1.4

With the front optical group removed the aperture mechanism is now exposed…….

Lens Repair Minolta Rokkor 55mm f1.4

It’s safest at this point to open the aperture to its widest.  This will minimise risk of damage to the very fragile aperture blades as you move forward in the disassembly.

Phase 3 Minolta MC Lens Repair
Lens Repair Minolta Rokkor 55mm f1.4

Using a JIS screwdriver remove the three screws that retain the filter ring…..

Lens Repair Minolta Rokkor 55mm f1.4

…and simply lift the filter ring away. Make sure the screws are stored safely and not mixed up with other screws.  I normally allocate small dishes for the various screws and fastenings to avoid confusion later.

Phase 4 Minolta MC Lens Repair
Lens Repair Minolta Rokkor 55mm f1.4

You now need to remove the diaphragm assembly.  This is retained by 4 screws around its edge. 

One of them is highlighted in the picture….

Lens Repair Minolta Rokkor 55mm f1.4

Using a JIS screwdriver remove the four screws around the aperture mechanism….. 

Lens Repair Minolta Rokkor 55mm f1.4

….and remove the diaphragm assembly carefully. The rear optical group is still attached to this so extract this with great care so that the rear optics are not damaged.

Lens Repair Minolta Rokkor 55mm f1.4

Here is the diaphragm assembly rear view after removal.  You can see that the rear optical group is still attached.  It is far easier usually to remove this group with the diaphragm removed.

Take great care of the diaphragm assembly, it is fragile and easily damaged by rough handling. 

Take note of the fact that the assembly has a flat edge on one side.  You will see why later.

Phase 5 Minolta MC Lens Repair
Lens Repair Minolta Rokkor 55mm f1.4

With care unscrew the rear optical group.  Be careful here as the diaphragm assembly has a number of small parts at the rear and the pins and springs can be easily damaged. Remember to stay mindful, keep focused, and THINK before you act.

Store the optical groups somewhere safe while you move forward with disassembly.

Here are the two optical  groups from this lens being stored in a small Tupperware box line with lint free cloth.

Phase 6 Minolta MC Lens Repair
Lens Repair Minolta Rokkor 55mm f1.4

Check the diaphragm assembly for correct function and see whether there is oil contamination. If the oil contamination is light I usually spray the diaphragm out with a Freon free cleaning solvent and then let it bath in Isoprop Alcohol for around an hour before leaving it to dry thoroughly at room temperature.

Lens Repair Minolta Rokkor 55mm f1.4

If the unit is heavily contaminated it will require stripping down completely. 

Diaphragm strip down and rebuild is not usually required and this guide will not cover this aspect.

Phase 7 Minolta MC Lens Repair
Lens Repair Minolta Rokkor 55mm f1.4

Now it’s time strip the focus mechanism for cleaning and lubrication. 

Set the lens focus to infinity.

It’s assumed that the lens focused correctly prior to stripping down but if not don’t worry it will be corrected later.

Lens Repair Minolta Rokkor 55mm f1.4

Start by removing the three screws around the edge of the focus barrel with a JIS screwdriver.  These are on top of the brass coloured ring. Take care to extract each screw after removal and be careful – each of these screws has a tiny washer – DO NOT LOSE THEM.

Once removed, store them safely.

Lens Repair Minolta Rokkor 55mm f1.4

With all three screws removed the focus barrel will simply slip off from the lens body….this reveals the two focusing helicoils.

These go by different names but to keep life simple the guide will refer to the brass colored one as the outer helicoil and the silver colored (inside the brass one) one as the inner helicoil.

Lens Repair Minolta Rokkor 55mm f1.4

Measure the distances between the inner helicoil to the brass helicoil – normally on an MC lens the inner helicoil will be almost flush with the brass outer helicoil.

Measure also the gap between the brass helicoil and the lens base.  Normally I use a collection of fine screwdrivers to assess distance.  In this case a 1mm driver is being used and it is an exact fit. Make a note of these measurements.

Phase 8 Minolta MC Lens Repair
Lens Repair Minolta Rokkor 55mm f1.4

Now remove the lens mount assembly from the rear of the lens body. Start by removing just a single screw.  If the screw is short then replace it.  If it is long remove it.

DO NOT REMOVE THE SHORT SCREWS

Here is a picture to give you an idea of scale of the short and long screws. 

These alternate around the lens mount plate.  You only need to remove the 4 long screws for servicing of the lens. Removing the short screws will release parts of the lens that are difficult to reassemble and generally there is no need to remove these parts.

Lens Repair Minolta Rokkor 55mm f1.4

With the four screws removed, as before store them safely and then simply pull the lens mount assembly from the body of the lens.

Take care also at this point NOT to remove the aperture ring.  I usually tape the aperture ring to the body prior to this step to make sure it does not come away with the lens mount due to stuck grease.

Phase 9 Minolta MC Lens Repair
Lens Repair Minolta Rokkor 55mm f1.4

Cup the rear of the lens in your hand, preferably inside a Tupperware box or clear bag and gently pull the aperture ring free. Inside the ring there is a tiny spring and ball bearing and these can easily fly out and be lost.

Lens Repair Minolta Rokkor 55mm f1.4

Sometimes the bearing will stay with the lens, sometimes it will fall into your hand.  Sometimes it will simply vanish – take this step easy.  If you don’t see the ball bearing examine your hands carefully.  Its so small it may be stuck to your hand.

This is why I generally do this inside a large clean bucket or Tupperware box.  It minimises the risk of a loss.

The previous picture and this one give an idea of size – the bearing is most normally around 1.2mm.  

In the previous picture the bearing is sitting on top of a small spring.  This bearing and spring provide the click stops.

Store the bearing somewhere safe.

Place some low tack tape over the hole with the small spring to prevent loss or remove the spring entirely.

A small needle, needle nosed tweezers or a cocktail stick can be used to extract it.  Store this safely with the bearing. The spring is very tiny barely larger than the index numbers on the lens, take care when handling it as it is prone to flying off and getting lost.

Phase 10 Minolta MC Lens Repair

Remove the three screws from the helicoil key/lock tab.

Be careful here as these are sometimes lacquered in place.  If they don’t turn out easily apply some heat or isoprop alcohol.

It’s very easy to strip the heads on these so take care.

Remove the helicoil key/lock tab.

Unscrew the helicoils from the lens body.
Its good practice to count the turns before the parts separate and mark the separation point on the two parts.
Its not necessary for the 58mm f1.4 MC but it is good practice – not all lenses are kind to technicians.

L-R in picture – lens body, outer helicoil, inner helicoil.

Note: The inner helicoil has screw holes in its top part – this faces the front of the lens when assembled.

This completes the strip down of the lens.

We now have to consider cleaning the components and reassembly.

MECHANICAL AND BARREL PARTS – NOT INCLUDING DIAPHRAGM MECHANISM

For cleaning you will need a soft toothbrush, cotton wool balls and Isopropyl Alcohol (IPA)  and a lot of patience.  I generally clean down with hot soapy water first and then soak the helicoils in IPA for a few hours before wiping down with cotton wool. The threads on the helicoils are extremely fine and the smallest piece of grit or dried grease will cause problems later on.  Usually these are chased out with a fine needle before cleaning again.

My own view on cleaning is to get the parts absolutely spotless prior to reassembly to give the lens the longest life before any further servicing is needed.

Normally when I rebuild a lens I will strip and clean EVERYTHING.  The lens mount assembly can be flushed with IPA, all of the barrel components such as the aperture control ring, filter ring and focus barrel will be thoroughly cleaned.  Index marks with their numbers can be scrubbed with a soft toothbrush to remove dirt and grime.

OPTICS CLEANING

The Minolta MC series can show haze caused by oil vapour on the lens group inner surfaces.  These are the optical surfaces that face inside the lens in each of the two optical groups.  These can be cleaned with a mild IPA solution and a micro fibre or lint free soft cloth.  You need to exercise extreme care here and do not apply pressure to the glass. Apply a dilute IPA solution to the cloth just so the cloth is damp and then apply lightly.  Use a puffer brush to blow off any moisture and then use a clean cloth to polish out any evaporation marks.

CAUTION

You are advised NOT to remove the lenses from within each group.  Minolta used a very soft coating formula in almost all of the MC series lenses and this can be damaged by even very mild cleaning and careful handling.


I normally clean the optics just prior to their reassembly into the lens and make sure the lens interior is blown clean with a puffer bulb.  You will always find some dust is present on reassembly – do not worry – they were no different when they came from the factory.


Lens Repair Minolta Rokkor 55mm f1.4

After cleaning the helicoils should be lightly greased using a suitable lubricant.  I prefer Helimax XP for most Minolta lenses.  This is applied thinly using a fine sable brush. On a Minolta MC series the lens is semi self lubricating thanks to the material used in construction of brass to aluminium so the lubricant needs to be quite thin and very evenly spread.

Notes on lubrication – The first time you so this you will need to work by trial and error to get the right feel.


Too much lubricant will result in the focus being stiff, too little and it will grind or be too light. You can test the ‘feel’ while the helicoils are assembled but it will be hard to assess without practice as to what the lens will feel like with its focus barrel mounted.

Phase 11 Minolta MC Lens Repair

On reassembly the object is to get the helicoils spacing for focus the same as you measured at the end of PHASE 7 and with the lock tab recess aligned to the threaded holes for the lock tab. You don’t have to be super precise but its best to get it as close as possible.  You may need to unscrew the helicoils a few times and try at different entry points to the threads to achieve this.

Replace the focus lock tab.  Take care not to overtighten the screws.

After replacing check that the helicoils will rotate correctly.  The lock tab, if not centred can cause the focus to jam or be stiff. I normally apply a very thin smear of Helimax XP to the sides of the recess.

Phase 12 Minolta MC Lens Repair

Do a trial run of fitting the aperture ring to the rear of the lens.  Some MCs will be fussy about what position the ring needs to go back on (eg will only easily fit at the f5.6 position) Do a dry run if needs be BEFORE replacing the small ball bearing.

The trick to get the bearing back into position is to replace the spring and then apply a small dab of lubricant/grease to the top of the spring.  Apply the bearing to the grease to hold it in place.

I normally position the bearing by using a cocktail stick with a small dab of grease on its end to retain the bearing….

…keep the lens body in position while you keep an eye on the bearing and the apply the aperture ring at a slight angle to trap the bearing in place and then ease the aperture ring down over the rest of the lens body.

This is why you do a dry run earlier at the start of Phase 12 to make sure the ring will fit easily as some MC lenses will be awkward to fit the aperture ring at some positions.

Lens Repair Minolta Rokkor 55mm f1.4

While making sure the aperture ring does not slip off apply the lens mount to the rear of the lens body making sure the aperture actuation  lever is at the base of the lens and on the opposite side of the lens to the aperture index mark.

You can see in the picture the aperture index mark is on the opposite side to the aperture actuation lever.

Lens Repair Minolta Rokkor 55mm f1.4

Replace the four long screws into the lens mount ring.  Do not overtighten these for now.


This is in case anything is wrong and requires a quick strip later. Just tight enough is good enough for now.

Phase 13 Minolta MC Lens Repair
Lens Repair Minolta Rokkor 55mm f1.4

In order to replace the diaphragm mechanism you need to be aware of some elements of assembly.

Th diaphragm barrel has a flat side as shown in the picture.  This has to locate against the lens body where the focus lock tab sits…..

Lens Repair Minolta Rokkor 55mm f1.4

….here is the focus lock tab and the flat part of the diaphragm barrel needs to be aligned with this PLUS…..

The diaphragm actuating lever shown needs to locate into the aperture control ring slot on the lens body……

Lens Repair Minolta Rokkor 55mm f1.4

….The aperture control locating slot is shown here.  This is where the Diaphragm body lever needs to mate to.

It seems tricky but in fact its quite easy.  Here’s how to do it…

Lens Repair Minolta Rokkor 55mm f1.4

First set the aperture control ring to f2…..and by using the diaphragm barrel lever at its rear open the diaphragm to its widest aperture.

Place the diaphragm barrel into the lens making sure the flat side is aligned with the focus lock tab.

Look through the rear of the lens body – this is why you leave the rear lens element out during reassembly until this step…..

Lens Repair Minolta Rokkor 55mm f1.4

..and maneuverer the diaphragm and the aperture ring until the diaphragm lever is located into the aperture control ring slot.

This seems hard at first but you will see it is actually quite easy in practice. 

Once diaphragm is installed hold it gently in place and rotate it slightly so that the screw holes align.

Lens Repair Minolta Rokkor 55mm f1.4

Cap the rear of the lens to protect the aperture lever and replace the screws that retain the diaphragm barrel to the lens body.  Do not overtighten as these can shear off under too much torque.

Once secured check that the diaphragm is behaving normally by selecting f16 and operating the aperture actuating lever.  The aperture should stop down and reopen quite normally. Check also operation at f1.4

Phase 14 Minolta MC Lens Repair
Lens Repair Minolta Rokkor 55mm f1.4

Replace the rear optical group…..

I would normally clean the group before reinsertion and blow the inner surface clean.

Lens Repair Minolta Rokkor 55mm f1.4

….and secure the group with a lens spanner.

Lens Repair Minolta Rokkor 55mm f1.4

Replace the front optical group…..

These would be cleaned at this point and the inner surface blown clean with a Rocket Blower.

Prior to securing the front lens it’s a good idea to run a quick torch test before the lens is fully secured down.  This may catch any pieces of dust or lint prior to final assembly.

Lens Repair Minolta Rokkor 55mm f1.4
…and secure with a lens spanner.
Phase 15 Minolta MC Lens Repair

Attach the lens to a known good camera look through the viewfinder and use the brass inner helicoil to bring the lens to infinity focus. 

I normally aim at a pair of radio towers around 8 miles away and use a camera with a split field focus.

Lens Repair Minolta Rokkor 55mm f1.4

Once you are happy that the lens is focusing correctly set the lens at infinity and then very carefully replace the focus barrel making sure the barrel indicates infinity against its index mark. Replace the focus barrel retainer screws with their washers and lightly tighten.  Recheck focus and once happy tighten down – do not over-tighten as these screws will shear easily.

Lens Repair Minolta Rokkor 55mm f1.4

Replace the filter ring.

Replace the beauty ring. Take care to ensure this is correctly threaded before tightening down with a rubber cup or lens spanner.

Lens Repair Minolta Rokkor 55mm f1.4

Check lens for all functions and do a final tighten on the mount ring if you left this loosely dogged down at the end of Phase 12

Fully check lens focuses correctly and that all f stops are working correctly.