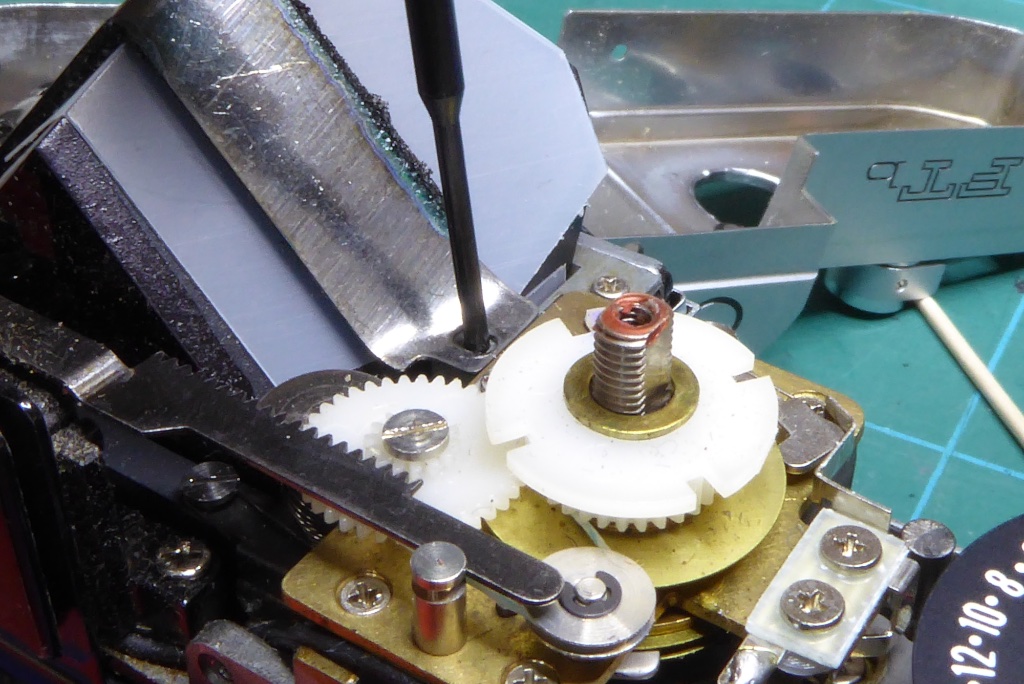
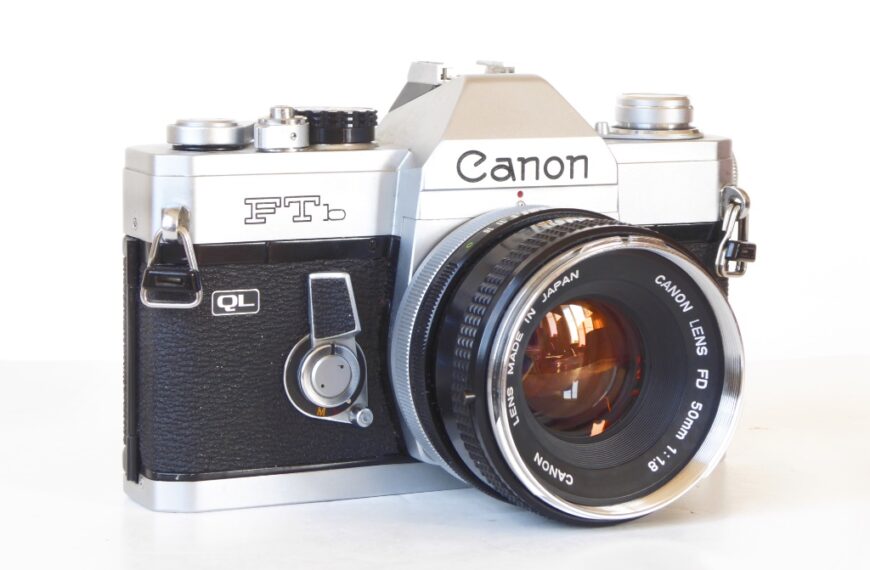
This guide will show you how to check for decaying foam in the Canon FTb prism and how to manage its replacement.
If you’re considering buying a Canon FTb why not check out our dedicated review
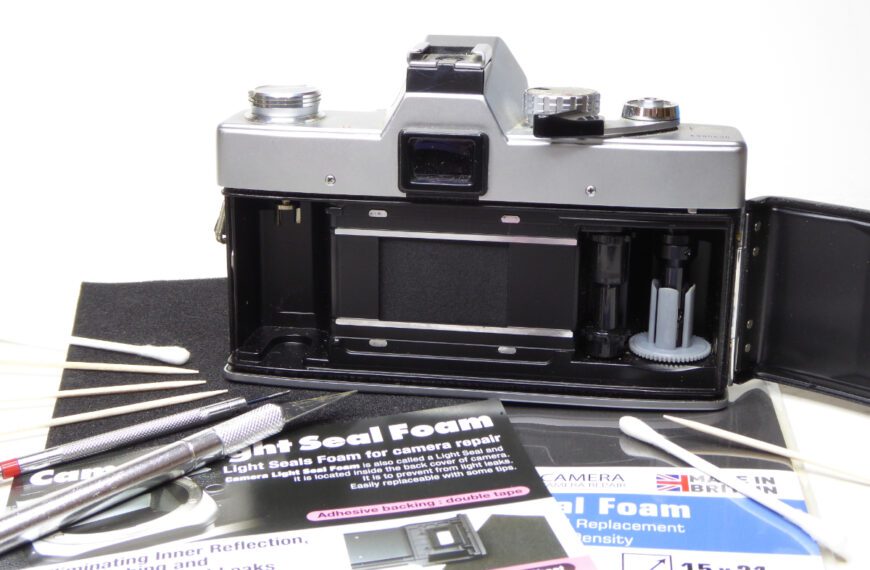
You will need the following tools for Ftb Prism Replacement
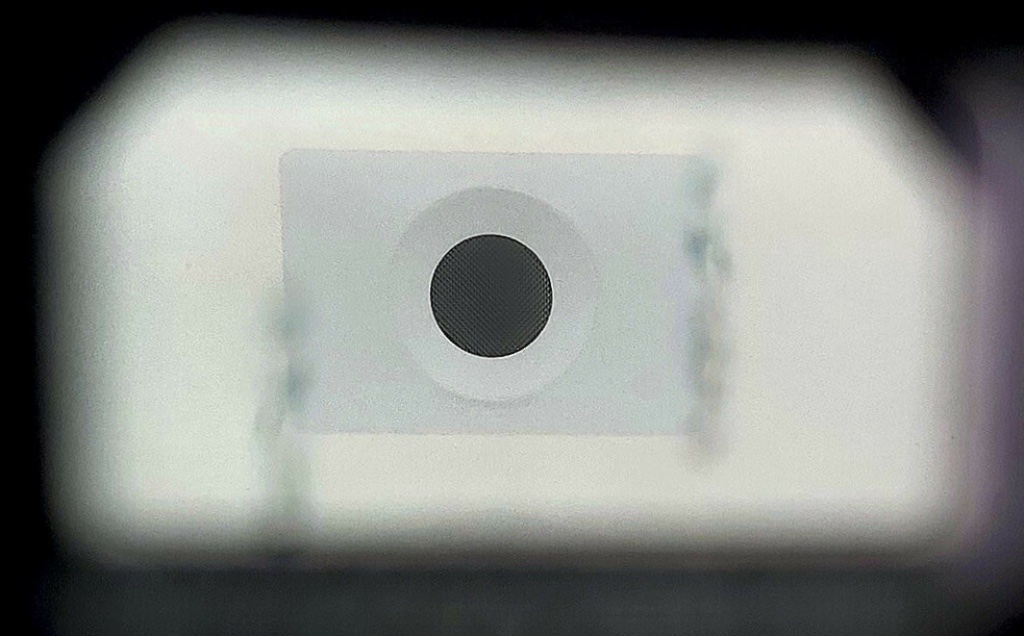
The Canon FTb is prone to deteriorating foam on its prism. The foam was installed by the factory in the 1970s and in most FTb cameras is now starting to break down. As the foam degrades it releases an acidic substance which slowly but surely eats the prism silvering.
In the pic taken through the viewfinder of a Canon FTb purchased from eBay you can see clear evidence of an FTb prism being eaten by the decaying foam. The two vertical lines are in fact a single line of damage being reflected in the prism. These cannot be cleaned – the only way to repair this is a replacement prism from a donor camera.
You can in theory get a FTb prism re-silvered but the cost is usually prohibitive.
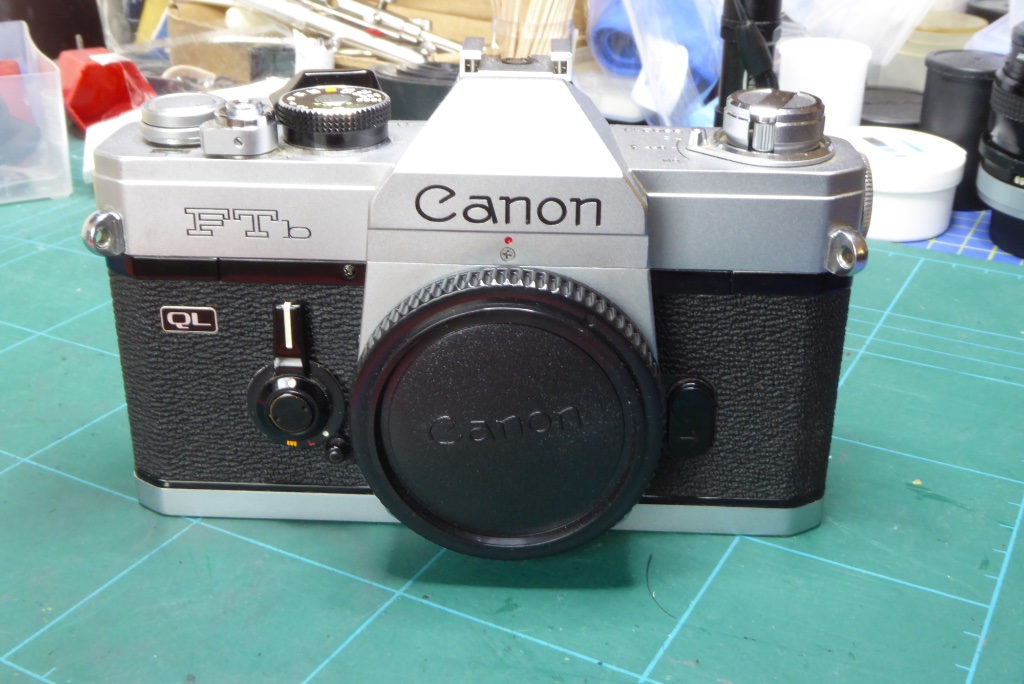
This work is being carried out on a Canon FTBn manufactured between 1973-1976 but all FTb models will have had foam applied to the FTb prism retainers and as such all of them are a liability if the foam is not removed. This problems is also common to some Nikon F models and most famously the Olympus OM-1.
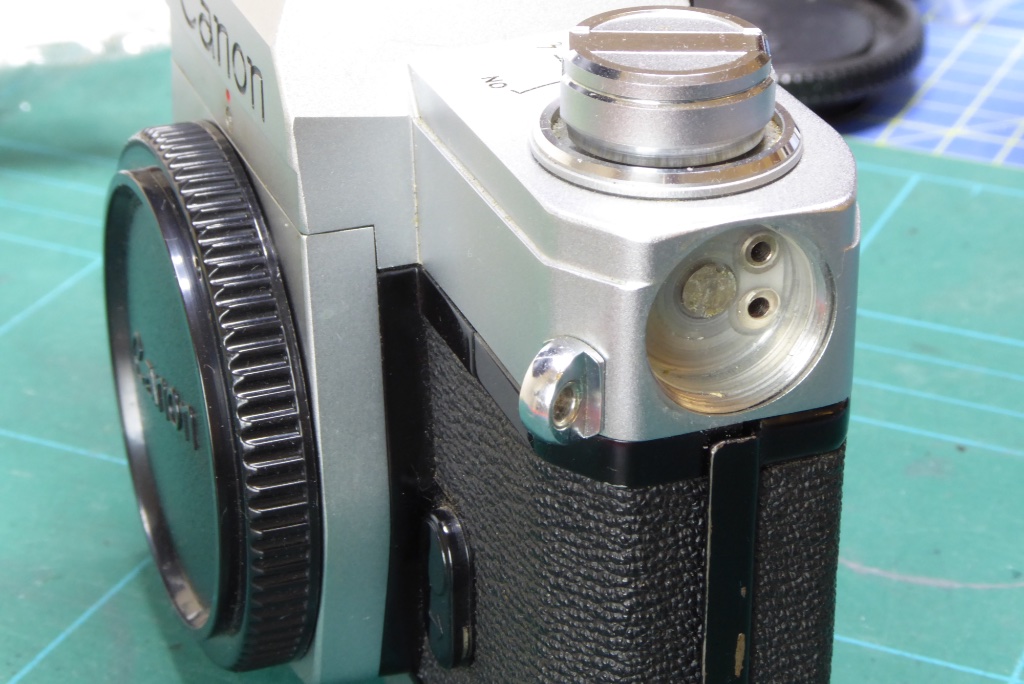
First remove the battery cap and extract the battery. If you ever wondered what the two small holes at the back of the battery compartment are for they are for the meter booster accessory to allow the FTb meter to run in low light. The accessory had a power supply of its own and fed the FTb meter from that.
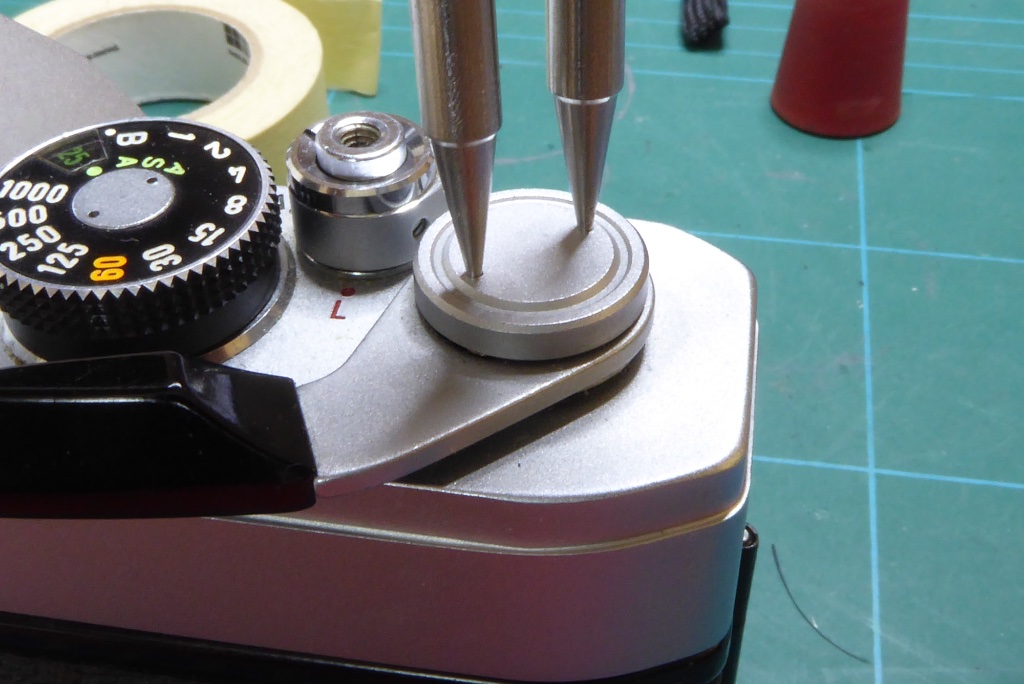
Use a spanning wrench to remove the winder cover cap. This is conventionally right hand threaded. Be careful and use the correct tools as the alloy on this is rather soft and easily damaged.
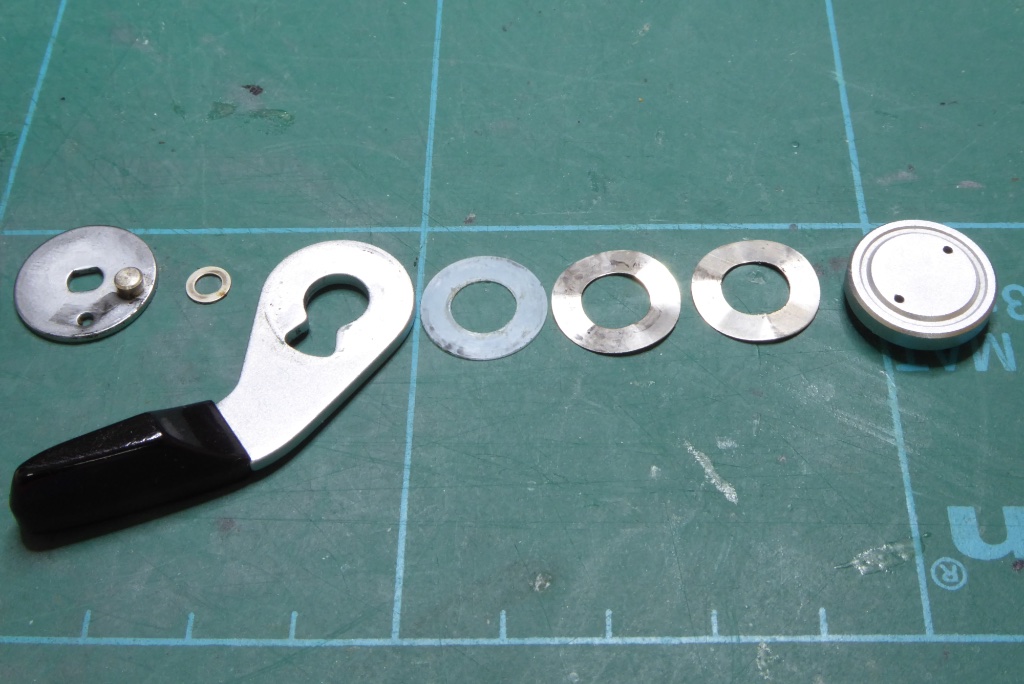
Remove the winder cover cap and make a careful note of the washer positions underneath. Some of these are different from camera to camera. Pay close attention to the smallest washer which sits on top of the winder spindle. This part is easily lost unless you take care.
On reassembly, a tiny smear of a suitable grease on top of the wind lever where it meets the first washer (lithium is good) will improve the feel of the winder
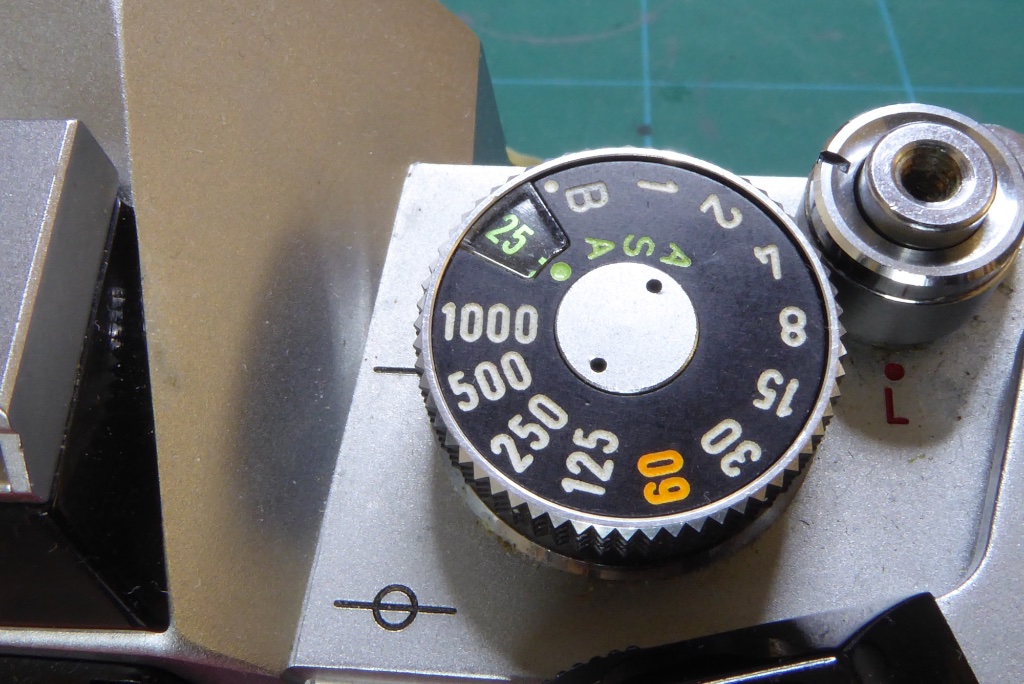
Set the shutter speed to 1000th and the ASA dial to 25. This will take any pressure off the springs inside. It’s not strictly necessary for an FTb but with the FT version its essential. It’s good practice as well to avoid mistakes.
With the shutter speed and ASA set it gives you a ready reference should anything go wrong later.
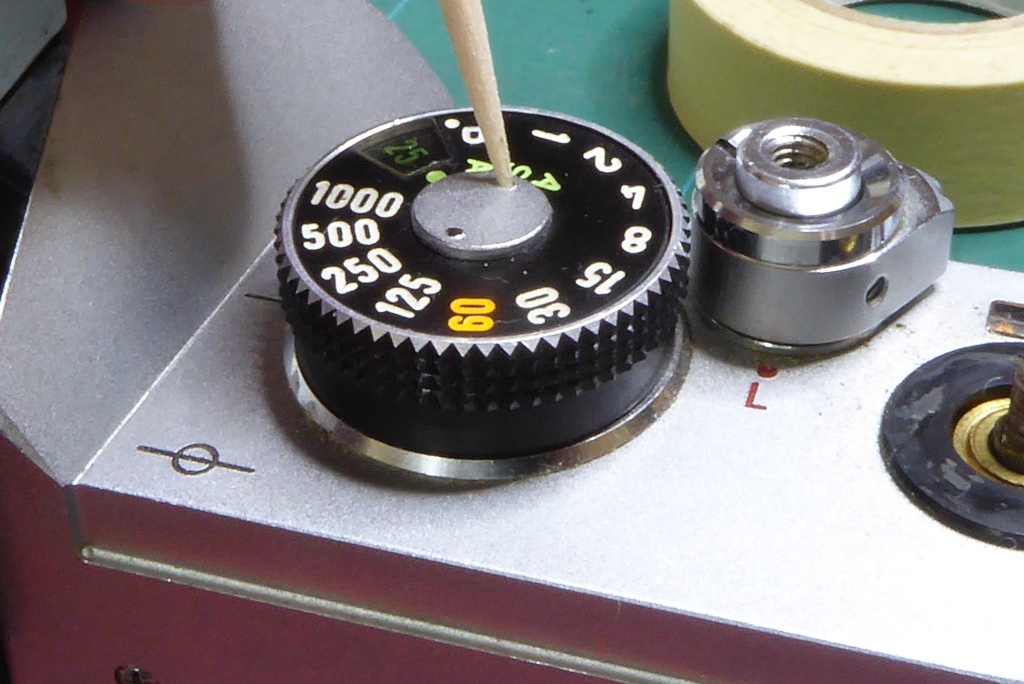
You will need a spanning wrench again to remove the shutter speed dial retainer. This is again threaded conventionally with a right hand thread. If this is over-tight do not apply undue force. The thread underneath is very fine and it’s easy to shear these off. If its resistant apply a small dab of Isopropyl Alcohol and wait 10 minutes before trying again.
In this picture the retainer is now loose and is being unscrewed using a cocktail stick.
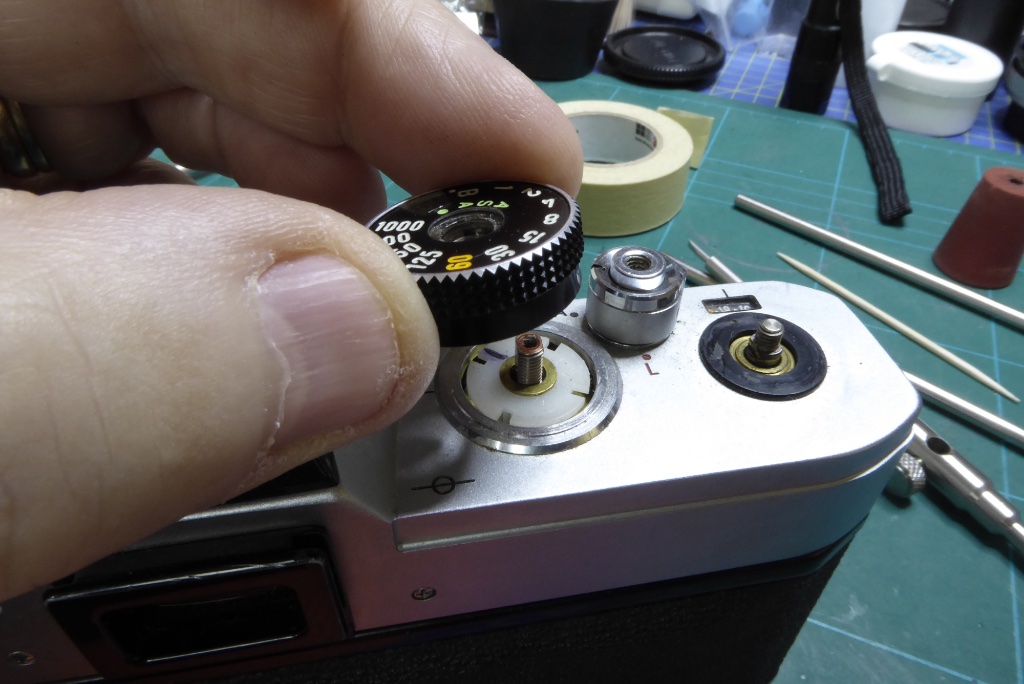
And now remove the shutter sped dial. You can see in this picture someone has been in here before. There is a pen marking on the spindle underneath. If there are no markings make a mark with an indelible pen on one of the slots on the spindle and make a note how it was orientated.
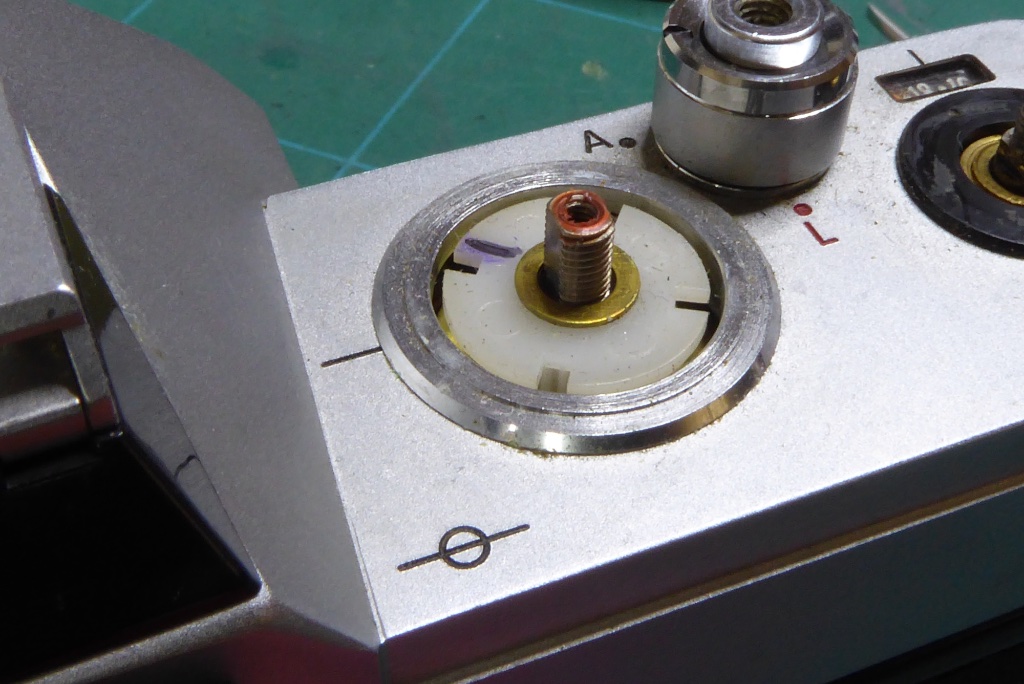
Here you can see the plastic spindle with its pen marking more clearly. This spindle connects to the meter so its important its correctly orientated when reassembled.
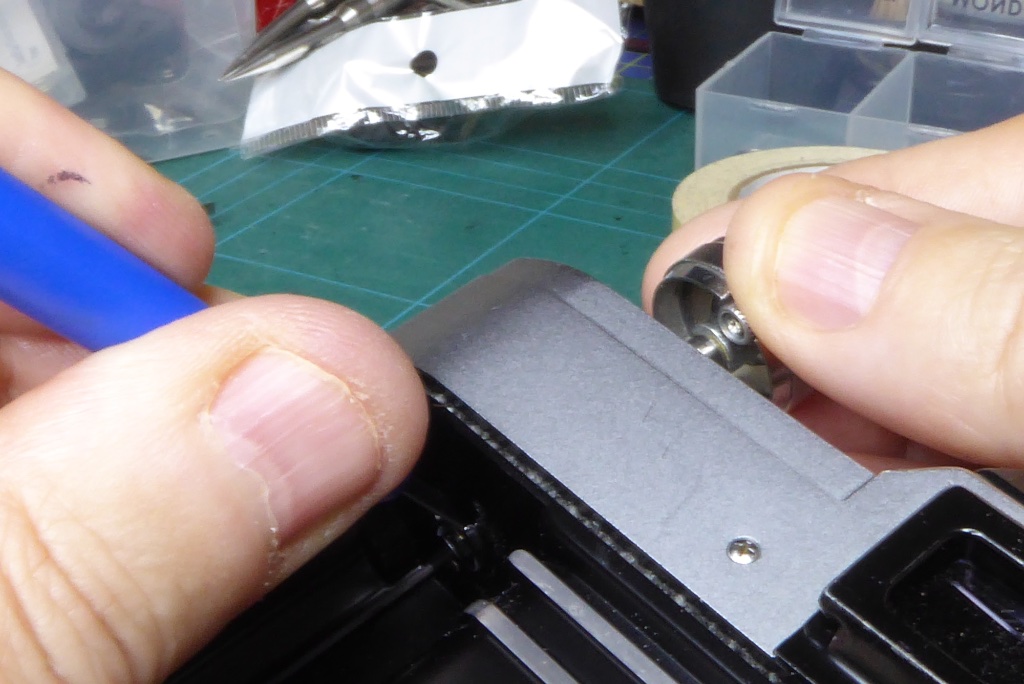
Remove the rewind capstan by wedging the rewind spindle and then simply unscrewing the capstan. Be careful here with metal tools – you don’t want to mar the internal finish of the camera.
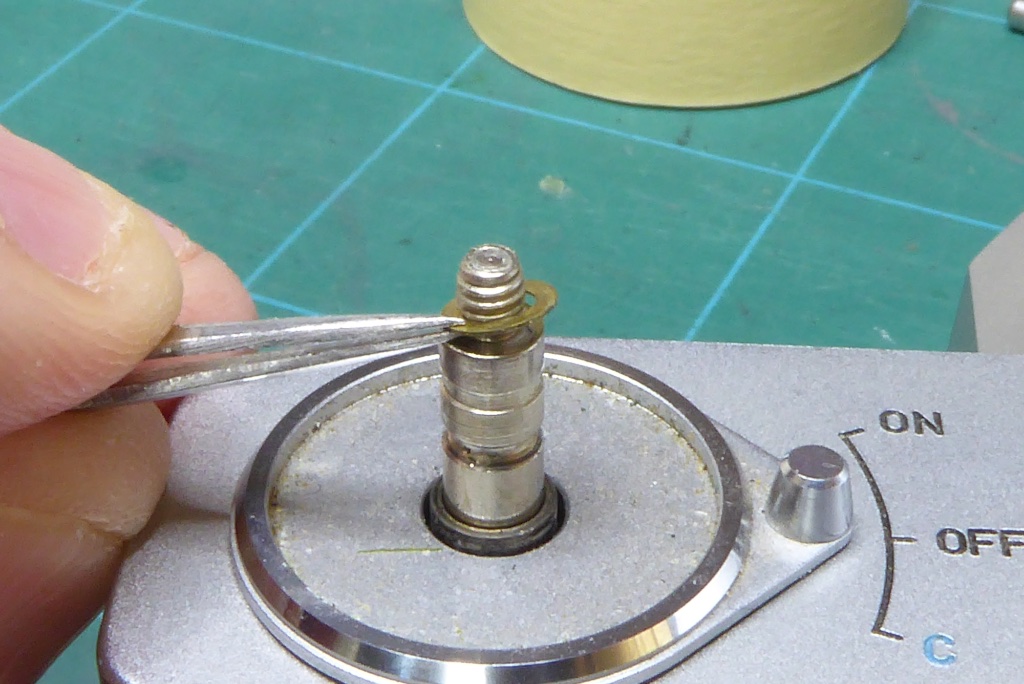
With the rewind capstan removed be careful of this tiny washer that sits on top of the rewind spindle.
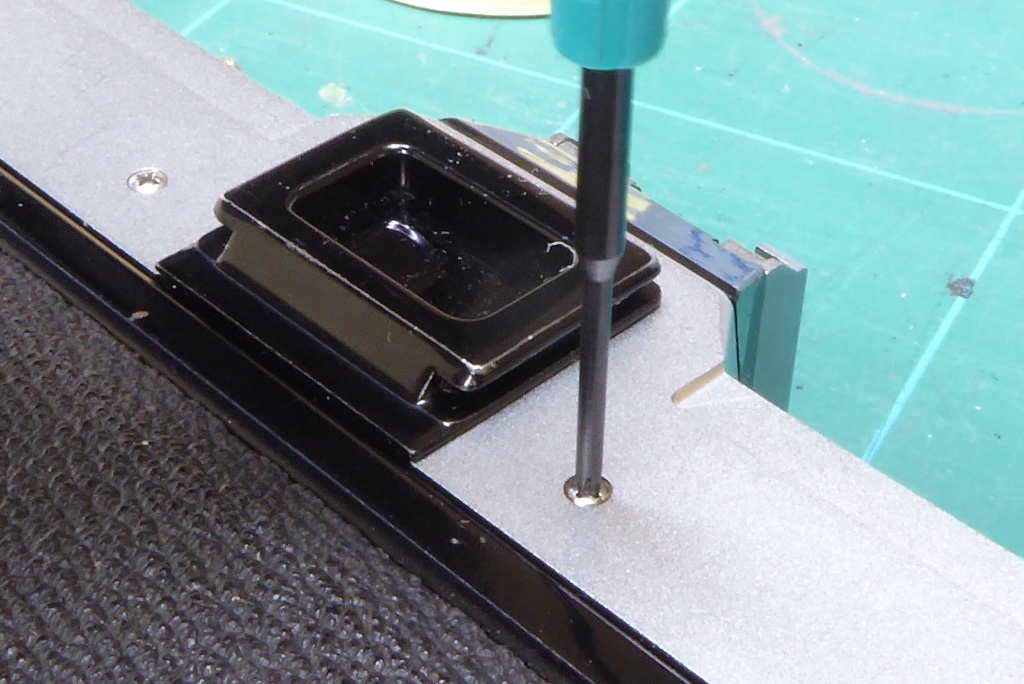
Remove the two screws either side of the viewfinder – these are JIS screws NOT Philips and have a dome head. It’s best to use a JIS set so you don’t strip the heads.
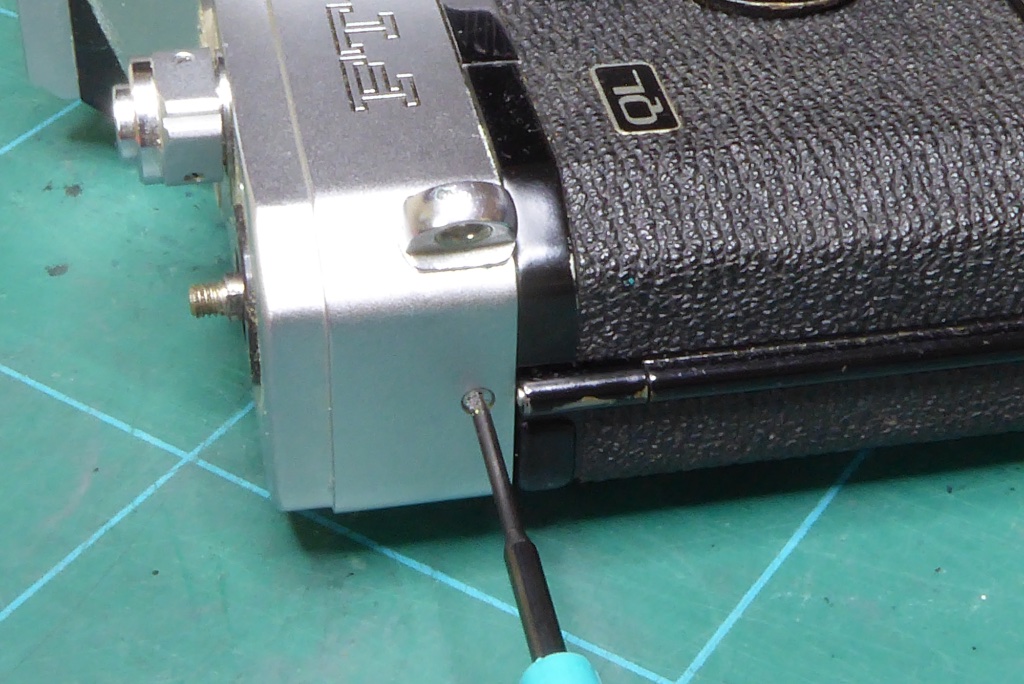
Remove the screw at the end of the top cover. This usually has a flat head.
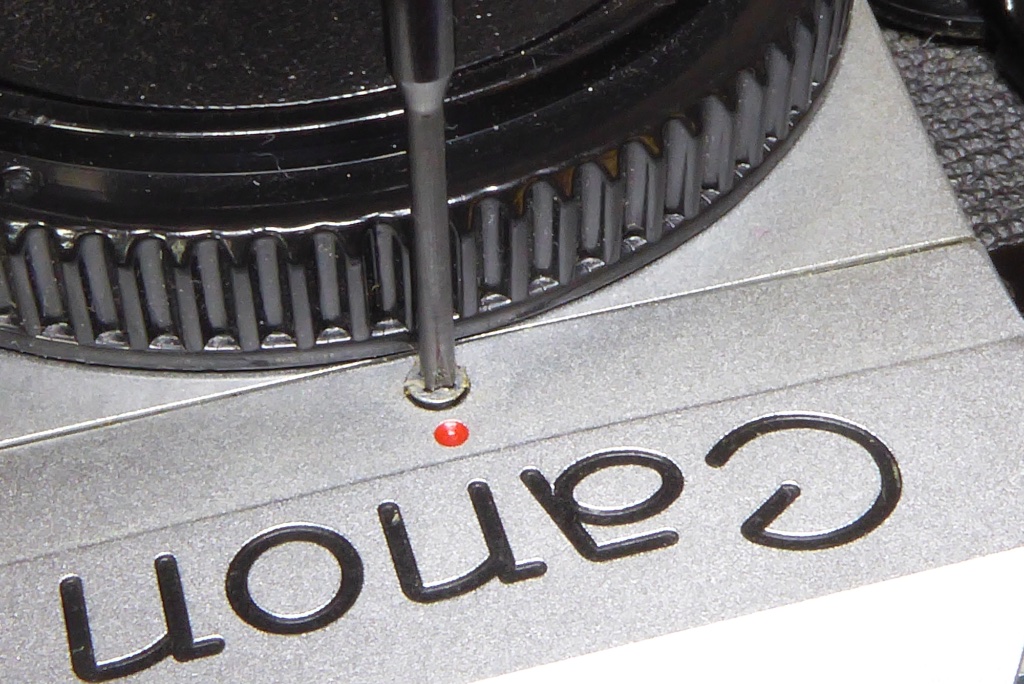
Remove the screw below the Canon logo.
The top cover will now come away. It may need a little wiggle to get it to come free and it will remain attached to the camer via some wires to the hot shoe. These need not be desoldered for this operation.
Be careful that the shutter release pusher pin is not lost during this.
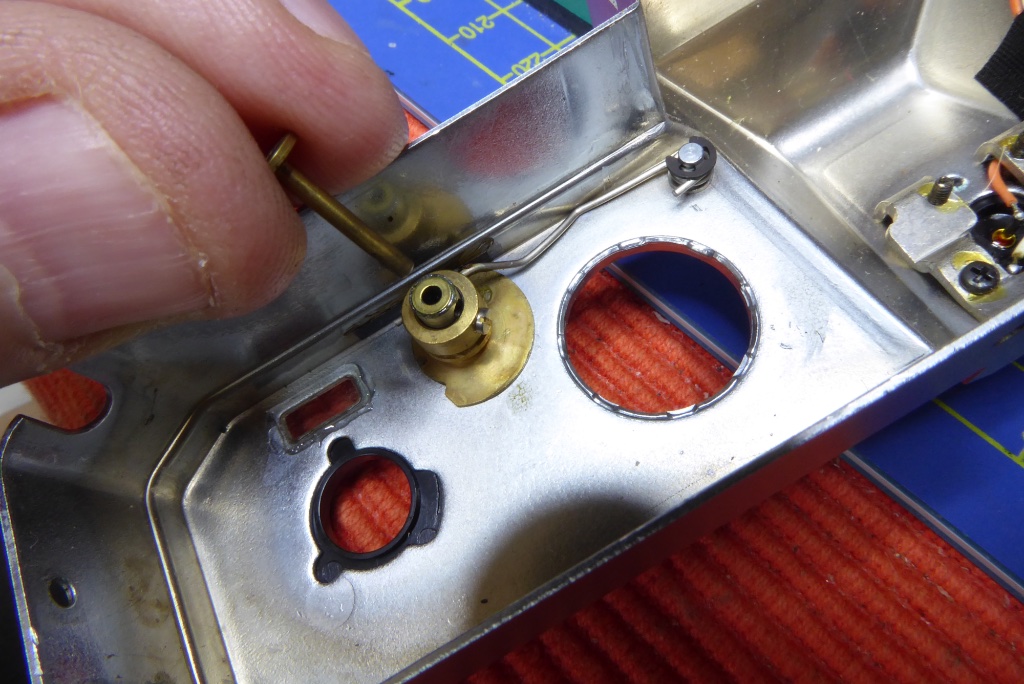
Here’s the shutter release pusher pin. This can easily drop away as you remove the cover. When reassembling a tiny bit of grease applied to the shaft of the pin will help it stay in place during reassembly.
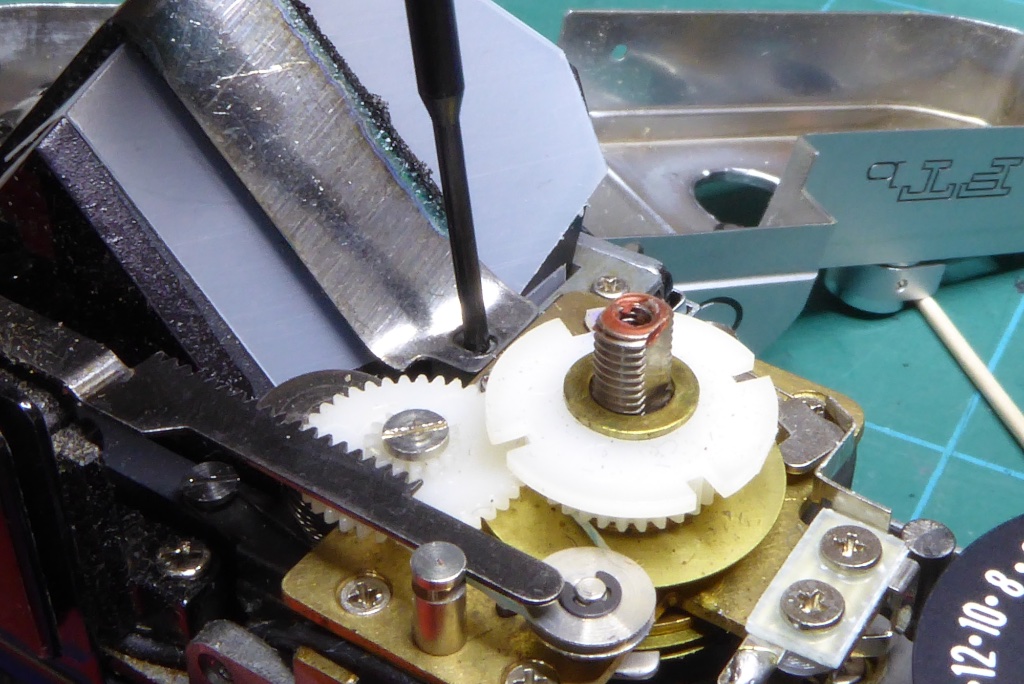
And now we can remove the prism retainer. There are two screws, one on either side. Simply unscrew these and remove the prism retainer. If the foam has not attacked the FTb prism and you are simply removing the foam this is as far as you need to go. Clean the retainer of any foam, remove the plastic prism cover and clean likewise. Both of these items can be cleaned with isopropyl alcohol. Clean any foam from the prism itself being careful not to damage the coating. A soft cotton wool ball moistened with isoprop will generally do.
Replace the foam with either replacement foam, or my preferred method, a good quality felt and replace.
If the prism is to be replaced you can now wriggle the prism free once the retainer is released. If removing the prism watch out for small plastic shims which are an oblong shape – these will need to be replaced later.
With the prism removed you can blow clean the top of the focus screen if you wish DO NOT USE Isoprop on the focus screen and be very careful of the meter needle and follower.
Note: You can see in this picture that some gears are plastic. The original FTb is all metal.
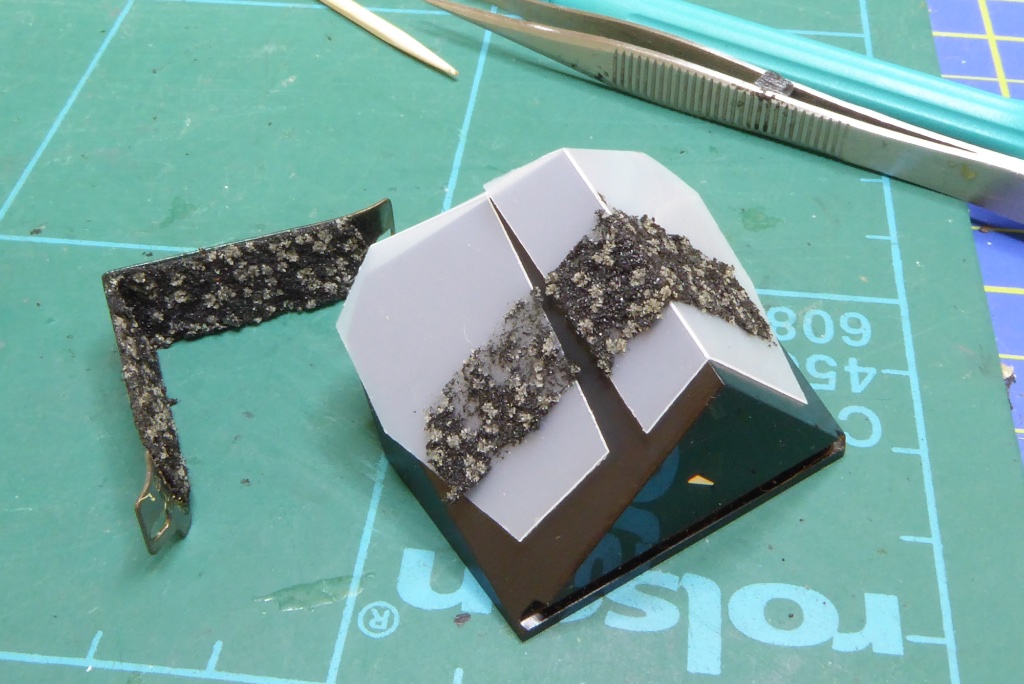
On this FTBn you can see the prism foam has degraded. The vertical lines shown in the viewfinder is where the foam has etched the FTb prism in a line formed by the gap in the prism plastic cover.
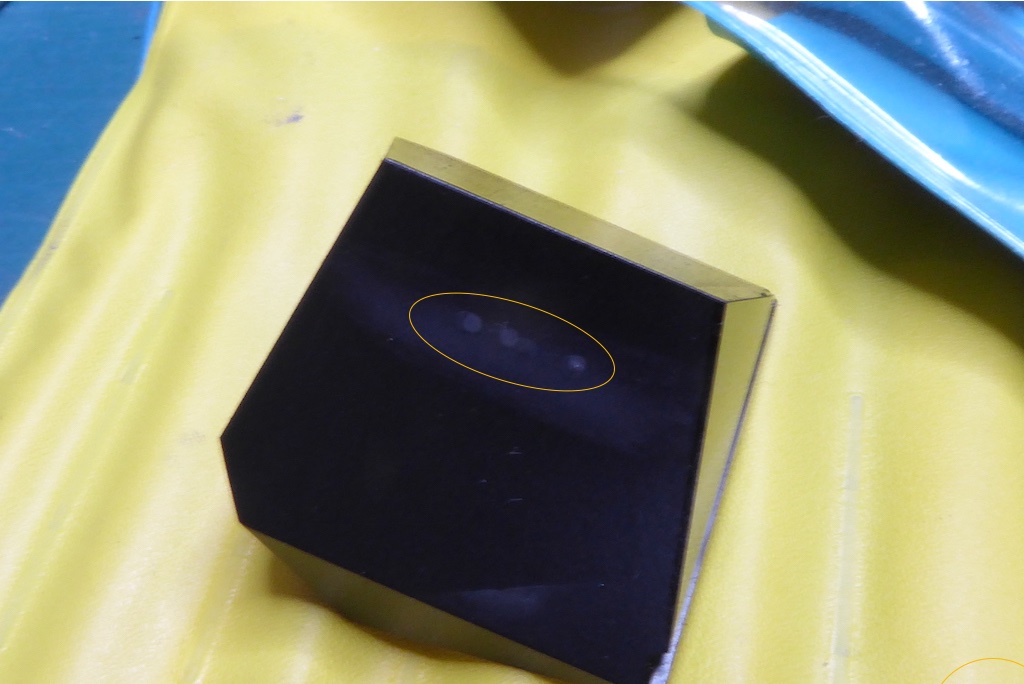
With the plastic cover removed you can see the damage caused by the decaying foam. Just a few small spots of acidic residue from the foam has ruined the FTb prism.
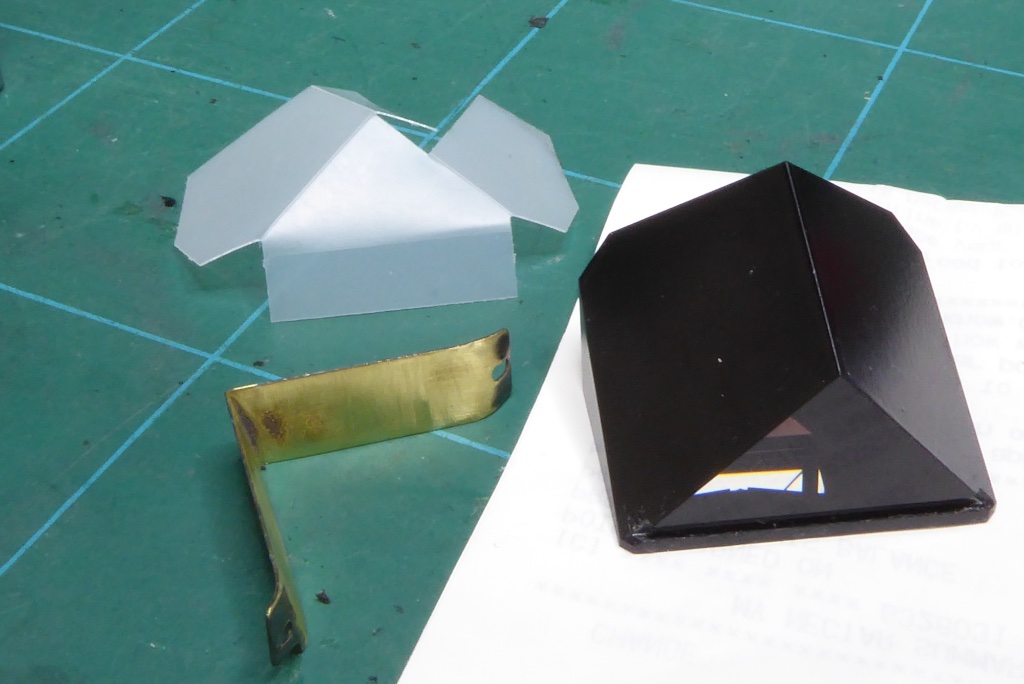
Here is the prism retainer and plastic cover cleaned up. The retainer will have some high quality felt applied to it. The replacement prism is from a Canon AE-1 which uses a slightly modified version of the FTb prism.
The AE-1 prism is compatible but normally had a resin plastic strip applied to its rear. This needs to be removed, its comes away quite easily. The Canon AE-1 itself has two possible prism types. The AE-1 Program has a prism with its corners clipped to allow for one of its viewfinder displays. Either will work fine in the Canon FTb or FTB-n
Reseat the prism, check that the viewfinder is ok (if the prism is not seated properly you will not get a good view) and then simply reverse back through this guide for reassembly.
Pay special attention to making sure that small washers are replaced, that the shutter release pusher pin is replaced and ensure that the shutter speed knob is correctly installed and aligned with the plastic spindle underneath.
Further Reading

Mel is one of the driving forces behind High 5 Cameras and writes all our articles.
Starting serious photography back in 1972. Over the years she got to shoot film with most of the major brands in 35mm and large format as both a studio photographer and content provider for websites in the early life of the web. These days she is rediscovering photography and has become the GOTO person for knowledge on camera repair advice.


This guide was very helpful; I did not know that the AE-1 series mirror worked as a replacement. Previously, I had tried an A-1 prism and an assortment of Pentax prisms, with no luck. Thanks to this, I now have a working FTb!
Glad we could help save your FTb – the FTb is a most beautiful camera to work with.
Please Buy us a CoffeeOur articles are a labour of love and we are passionate about keeping them alive for as long as possible. If you found this comment helpful why not buy us a coffee to say thank you and say hi. We love to hear how you get on. xx