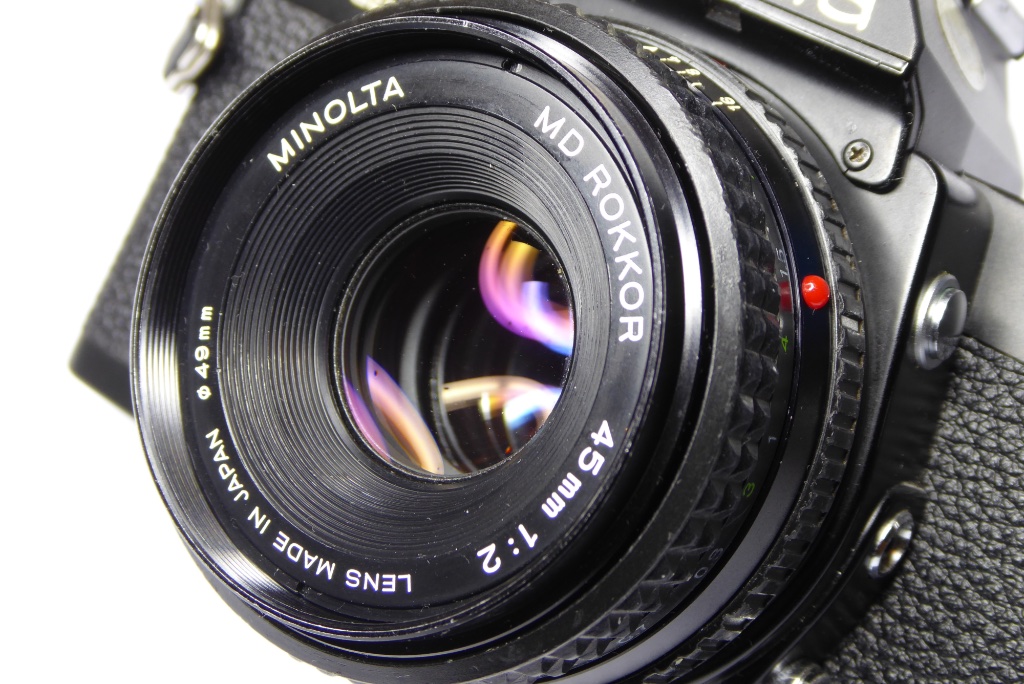
A step by step repair and servicing guide for the much loved Minolta MD Rokkor 45mm f2.
The MD Rokkor 45mm f2 lens was, believe it or not, a low cost budget lens that Minolta primarily fitted to the budget XG series of cameras. The lens has now become something of a hyped up item thanks to people adapting them for digital. In actual practice they are solid if unremarkable lens for most film users.
Some people find the 45mm focal length more useful than a standard 50mm and the lens is very compact being almost a pancake design but personally I am not a fan of this lens.
Unfortunately, like many MD series lenses the 45mm f2 can suffer haze issues caused by vaporising oil from its helicoils. Very often the focus feel is either over firm, very loose or gritty. These conditions are almost always a sure sign of lubricants vaporising over time. On the plus side its very rare to ever see an MD series lens with the dreaded oiled up aperture diaphragm.
Copyright 2022 High5Cameras,
Free to use, copy and distribute so long as no charge is made for use,
distribution or access and authorship and web address is freely acknowledged.
Most Minolta MD series lenses are very simple to service and there is a general guide for the 50mm versions here. Most MD’s are very tolerant and kind to beginners. This is not the case with the 45mm which can be very fussy with respect to its focusing helicoils.
You will need some small containers for screws. I use ice cube trays for my work and use a sharpie pen to scribble as to which screws are in which cell of the container.
The lens used for this guide was in very poor overall condition with a very stiff focus feel and extreme haze. In addition the rubber grip had vulcanised badly and no amount of chemicals or heat would ever have returned it to the correct size for the focus barrel. In the pictures you can se just how much dirt and general muck there was in the lens at the start. -this is quite typical for MD lenses sold online.
Read through the whole guide before starting so you know what you are doing and always be mindful of what you are doing when you start work. The most common beginner mistake is to press down on the lens and forget that the opposite side is exposed, this can lead to snapped off aperture levers or wrecked front optics. Keep the lens capped on the opposite side to the side you are working. Work slowly and carefully and dont rush. There are no Olympic sports involving the fastest lens rebuild and a rushed job will lead to mistakes.
Relax, have fun and take your time.
You will need the following tools and parts to carry out repair and servicing of the MD Rokkor 45mm f2
- JIS screwdrivers
- cocktail sticks
- Rubber Cones
- Isoprop
- Helimax XP
- Cotton Buds and Cotton balls
- Lens spanner
Minolta MD Rokkor 45mm f2 Repair Guide – Disassembly
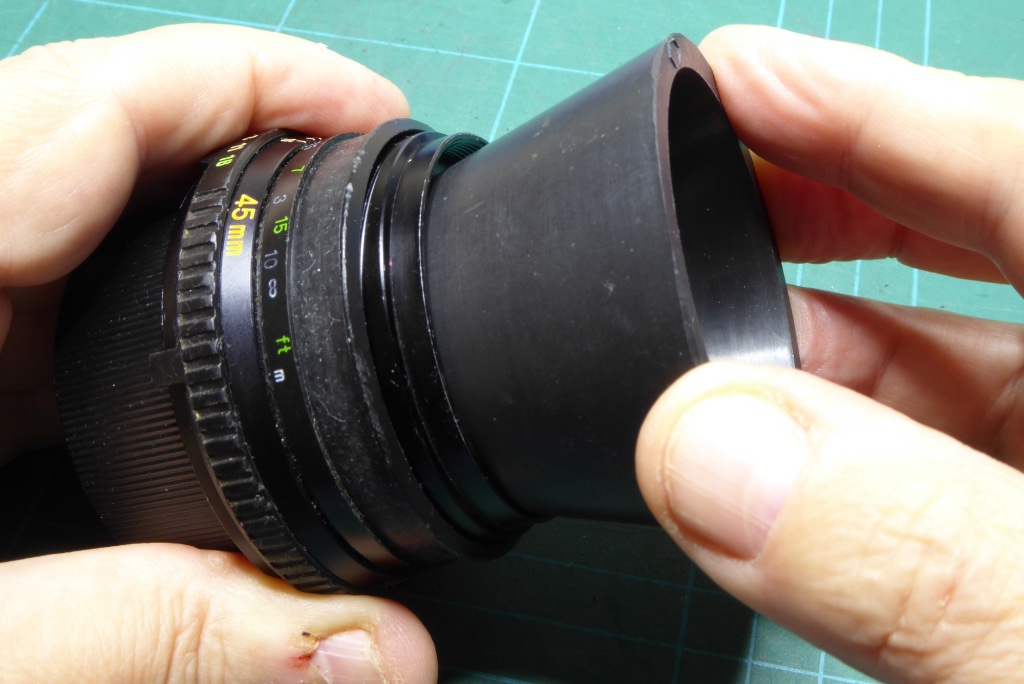
First step is to remove the beauty ring. On most short focal length MD series this is best done with a rubber cone.
The beauty ring does have spanner slots for a lens spanner but its best to avoid using a lens spanner if at all possible as the beauty ring is a relatively soft plastic which can be disfigured easily.
You can see the focus ring rubber grip is missing as the grip was so badly out of shape it would just fall off the lens. I’ll show you how to deal with that later.
As you work on the front of the lens remember to keep the back of the lens capped to avoid damage.
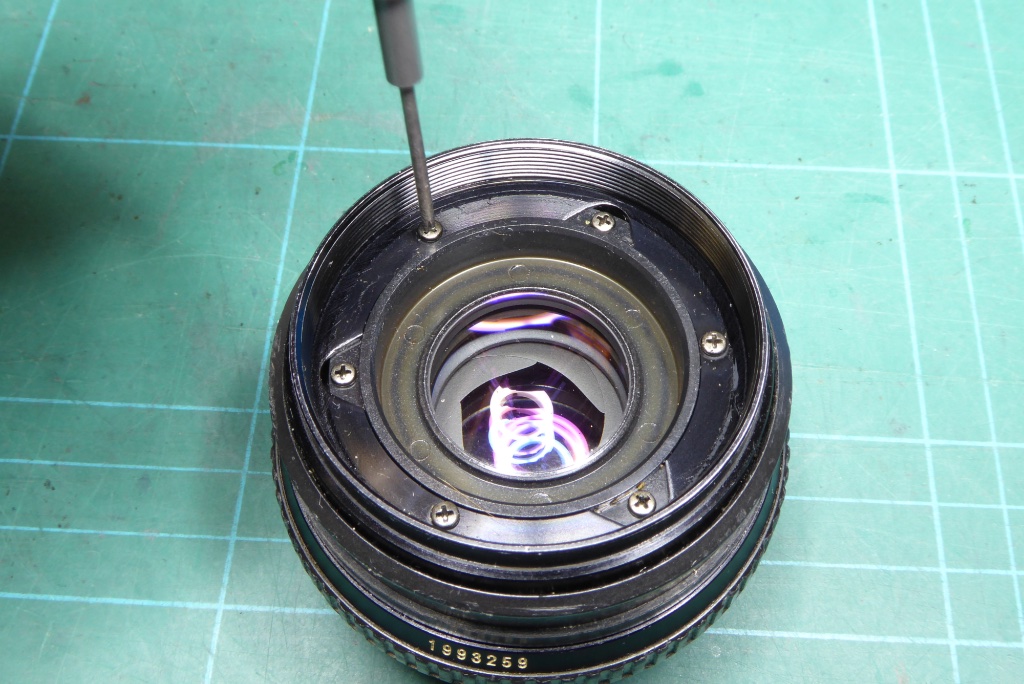
Remove the filter ring. This is secured with three small screws. Use a JIS driver here to avoid damage to the screws heads.
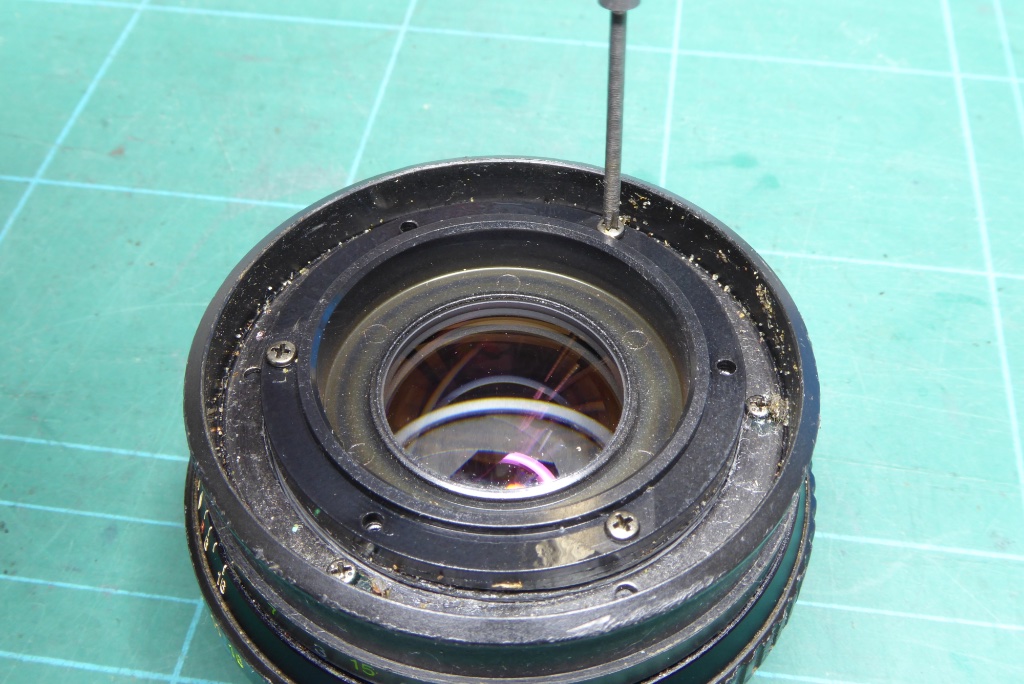
Now remove the three JIS screws that secure the front element group.
You can see the general poor state of the lens here with accumulated muck and dirt hiding behind the beauty ring.
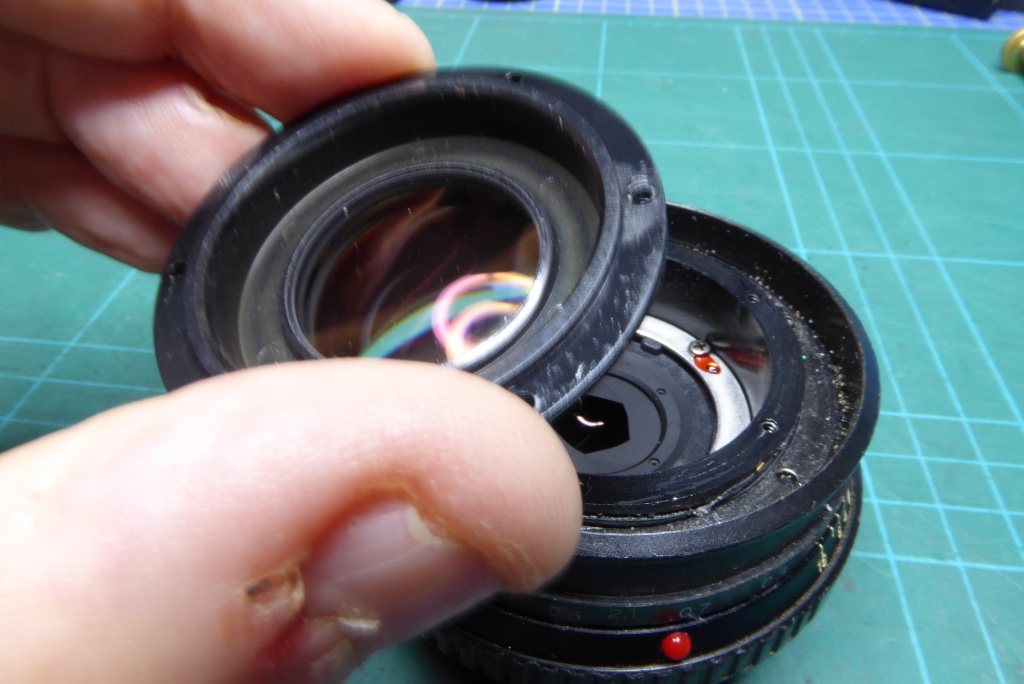
The front element group can now be lifted off. Store this somewhere safe. Don’t bother cleaning it just yet.
You may end up having to do a partial rebuild so leave cleaning the glass until everything else is ready.
Note: This lens can suffer very badly from oil vapour and you may find the front optical unit is stuck due to suction. Use a cocktail stick to create a small gap between the optical units surround and the lens body.
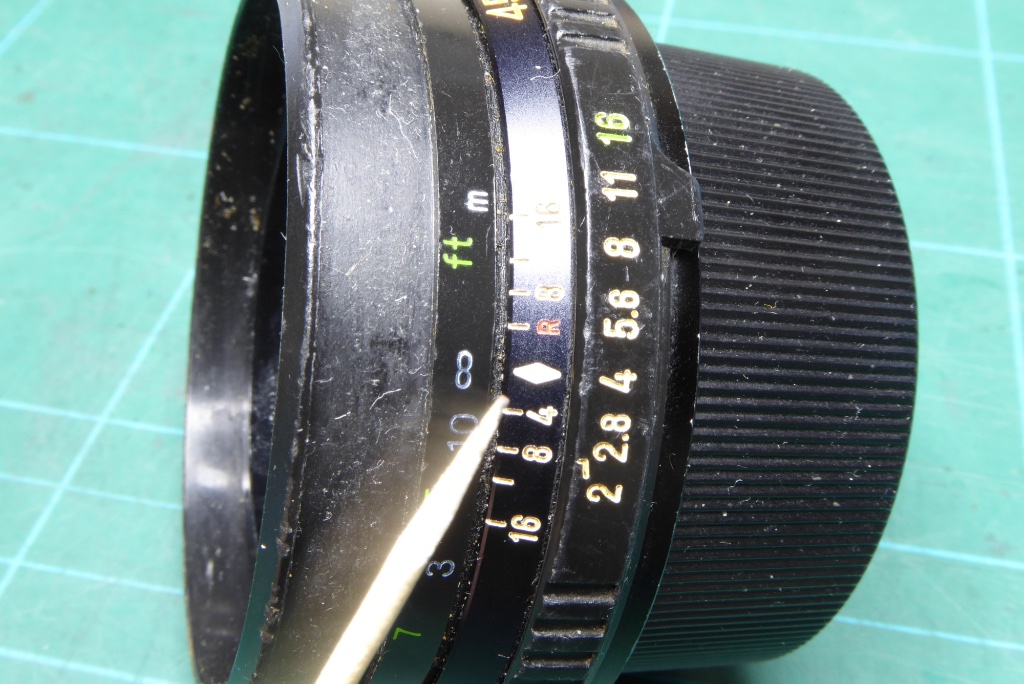
Set the focus ring to infinity. You need to make sure this stays there until you can get some measurements of the helicoils and also mark the helicoil positions.
On this lens getting the focus to stay in place was easy – the focus was very stiff – almost stuck in fact. On some copies the focus may be excessively loose.
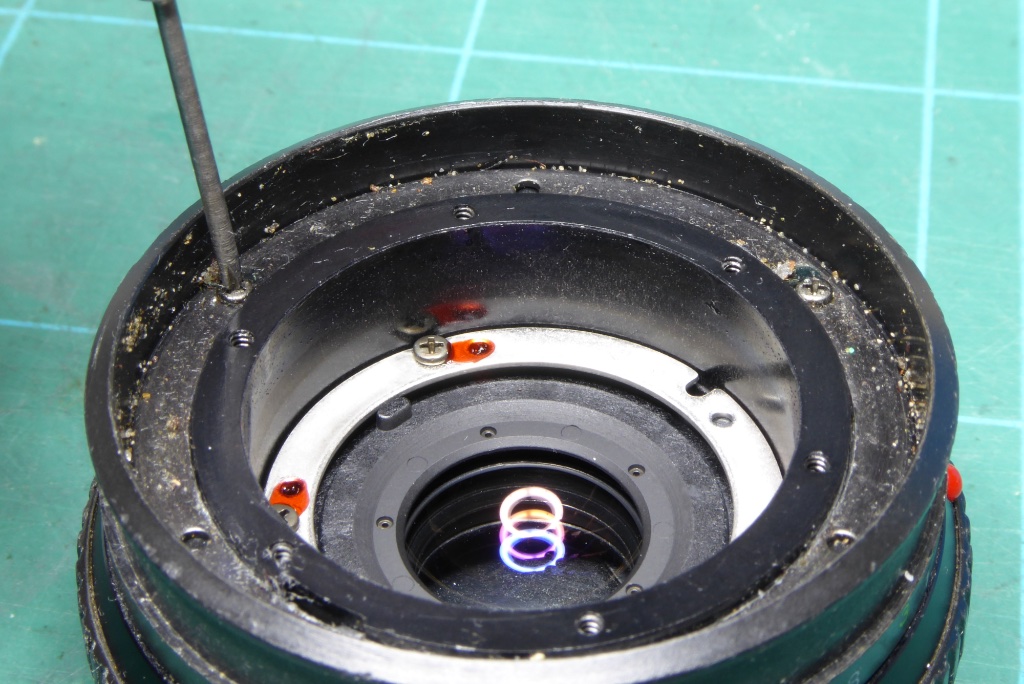
Remove the three screws around the edge of the focus barrel. The barrel will then simply lift off the lens. Before you do this double check the lens is still at infinity focus.
You will find the focus barrel is a two part piece. The main plastic barrel with its rubber grip and a metal insert. These can be separated easily for cleaning. The metal insert is often stuck down by accumulated dirt and oil.

With the focus barrel removed you need to measure the gap between the helicoils.
The outer helicoil has a lip running round it and I usually measure the gap using a selection of jewellers drivers. When the tip of the driver is a good fit into the gap thats a fix on how the helicoil needs setting on reassembly. It’s super critical to get this right with the 45mm f2. If you don’t theres an excellent chance that on reassembly you will need too much back focus on one of the helicoils and cause the diaphragm to jam.
The helicoil gaps are circa – OUTER=1.5mm – INNER=2.5mm
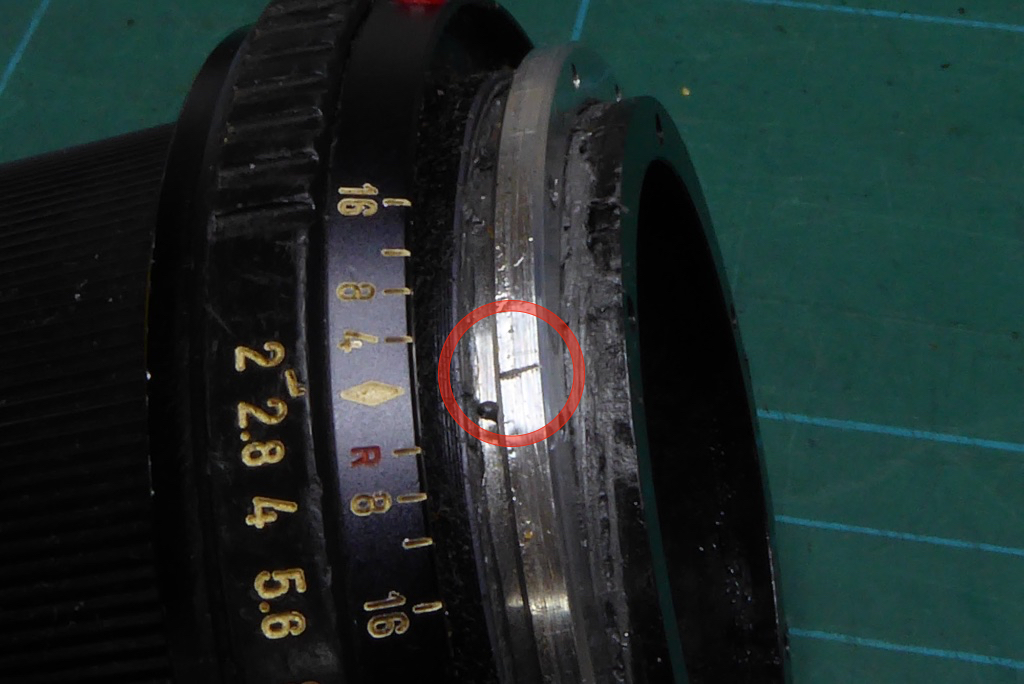
Next job is to mark the helicoils at their infinity focus point. I use a scriber to put a small scratch into the helicoil rings. Heres the outer helicoil marked with respect to the focus index mark.
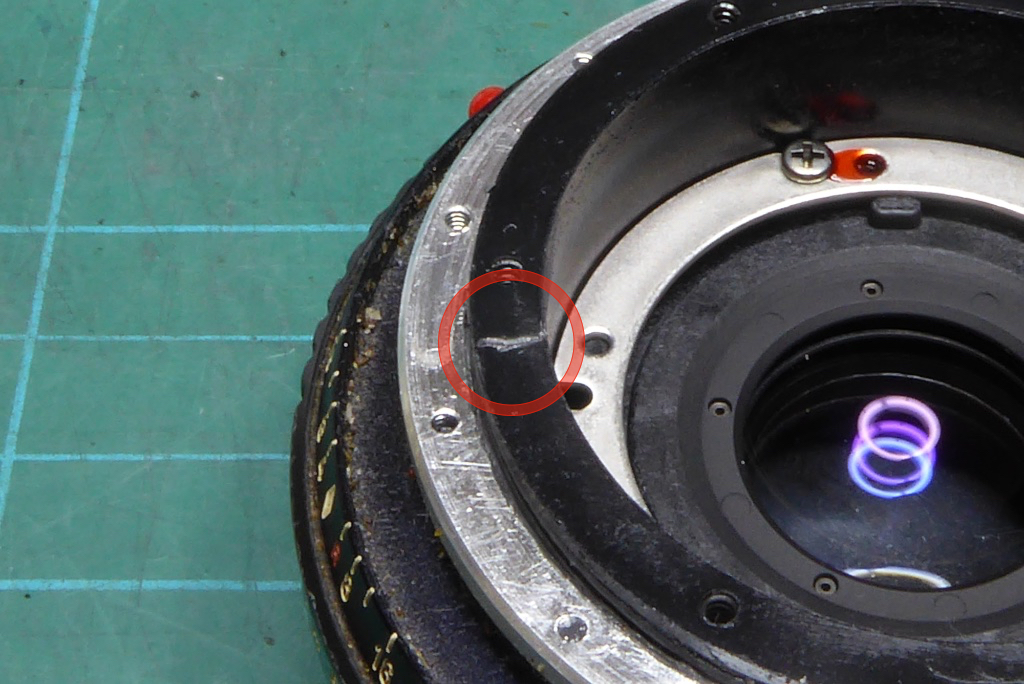
The inner helicoil is also marked for infinity with respect to the focus index mark.
It’s good practice to mark these and also mark the point at which the helicoils separate later on. On this lens so long as you obtained good measurements earlier of the helicoil distances and you have marked the alignment points you can skip marking the helicoil thread entry points.
The lens is quite simple and there will only be a very limited number of options where the helicoils align. Its relatively simple if you don’t get the correct entry point for the threads to see its wrong. You’ll see why later on.
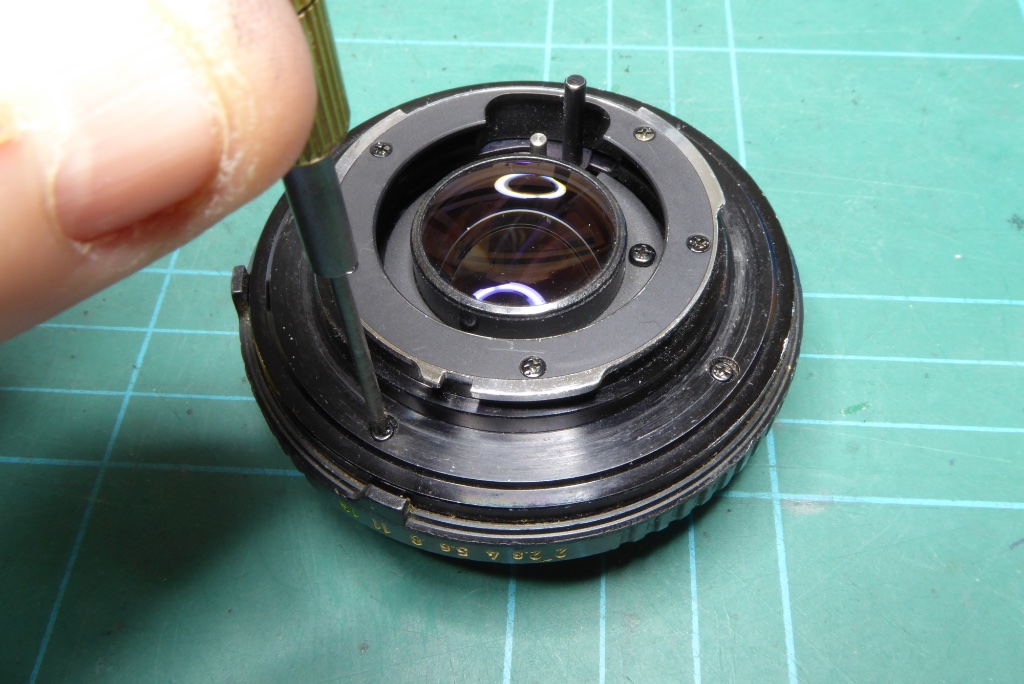
It’s now time to turn the lens over and start work on the rear of the lens.
Remove the 4x JIS screws on the mounting plate.
The lens mount will now simply pull free. Be careful not to remove the the aperture control ring. It has a small spring and ball bearing which can fly off and get lost.
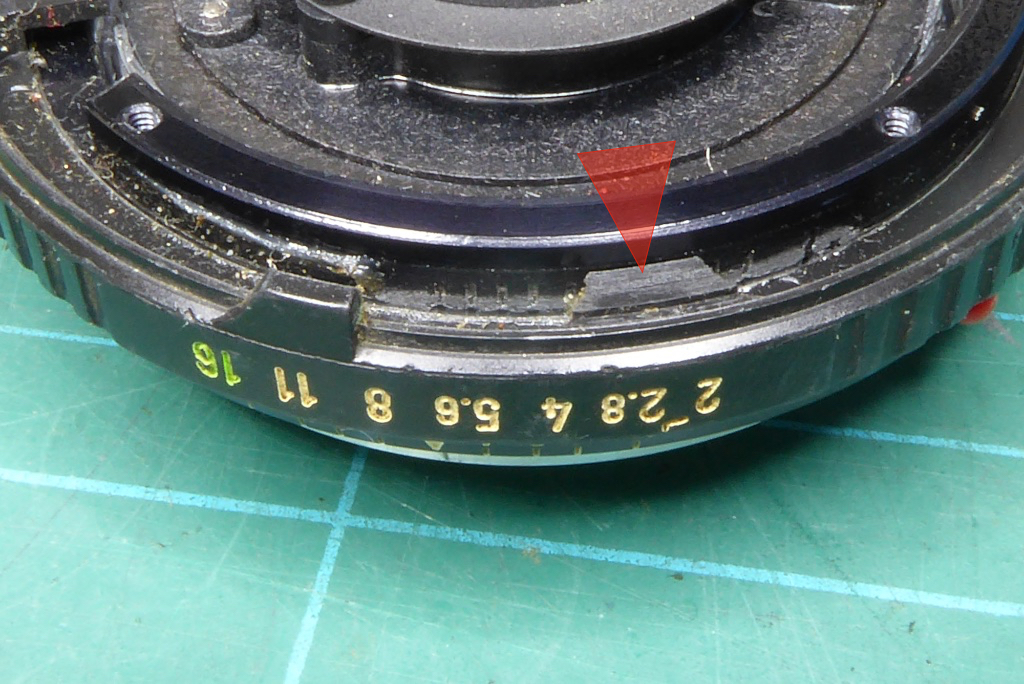
On the 45mm f2 MD Rokkor the ball bearing and spring are located on the top of the lens near the f stop index markings. This makes it quite easy to handle for reassembly.
You can see the small detents that the bearing clicks into just to the left of the arrow.
You can also see more dirt and mess inside the lens. This is fairly typical for most MDs.
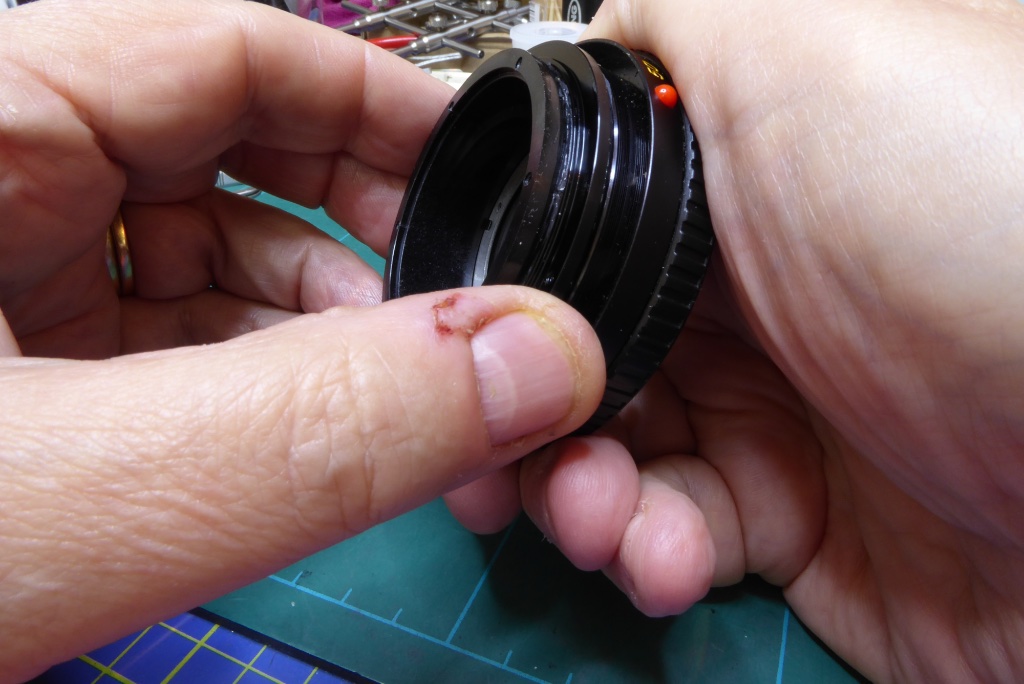
Cup the rear of the lens with its aperture in your hand and pull the body of the lens away to seperate the aperture ring. Immediately examine your hands and the lens to locate the bearing. It will sometimes fly off and its very tiny at 1.2mm and easily lost.
If you are nervous about this bit then use a large Tupperware box or a bucket to put your hands in while you separate the aperture ring.
Note this pic was from an earlier lens which looks a little different.
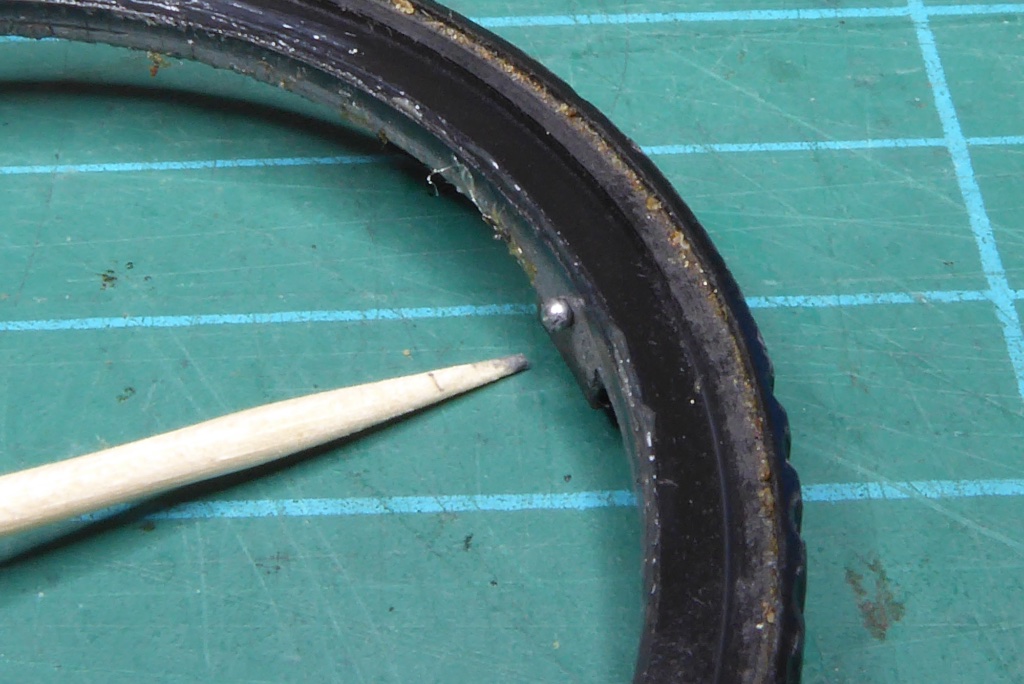
On this lens the oil contamination was so bad that the helicoil lubricant had turned into something like mud which stuck a lot of parts together. As a result the aperture ring ball bearing stayed with the ring. You can get an idea how small this is (1.2mm) here it is against a toothpick.
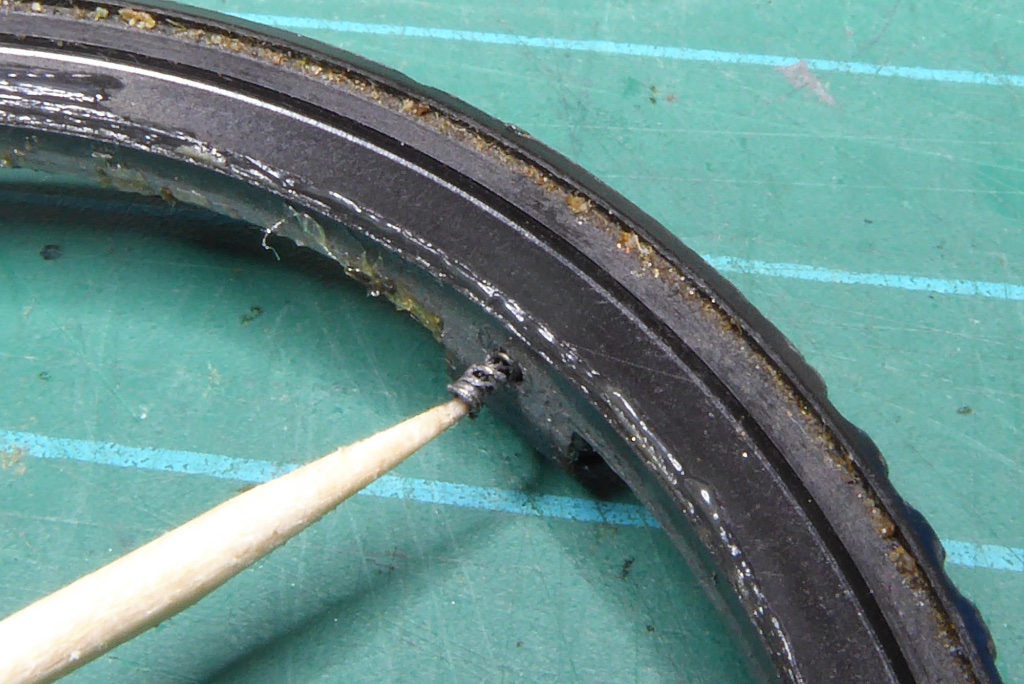
And here is the tiny spring which forces the bearing into the aperture click stop detents.
I tease this out with a cocktail stick – the bearing and spring are stored in an old film container until needed during reaasembly.
It’s safer to remove the spring to reduce any risk of loss while cleaning the lens parts.
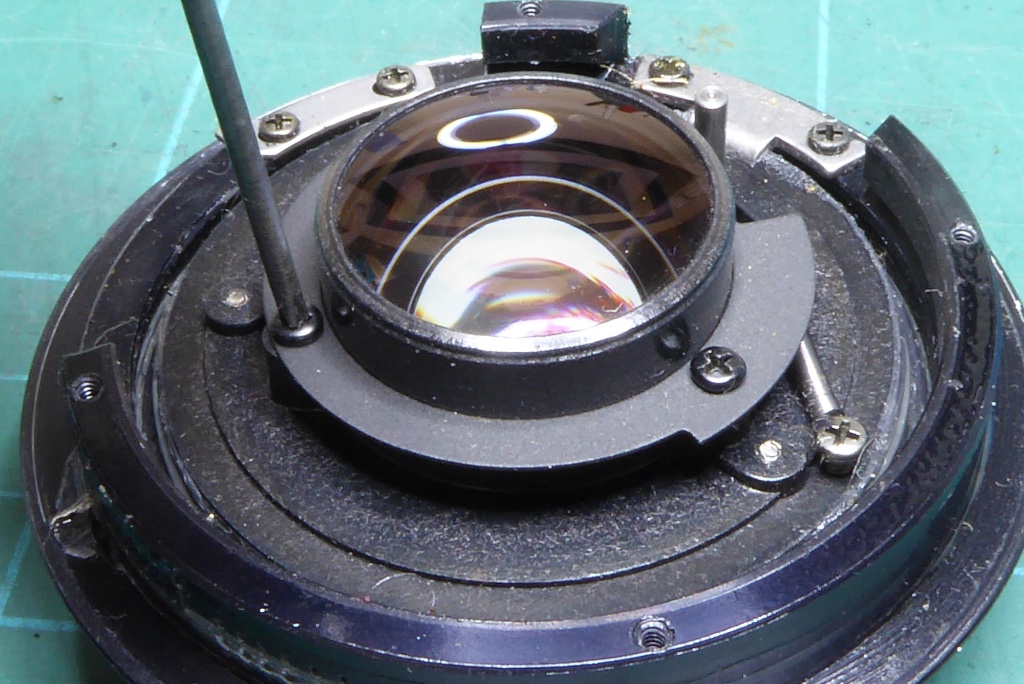
We can now remove the rear optical unit. On most MDs you would take this out earlier but the 45mm is slightly different. It is wiser to leave it in place until the aperture ring has been dealt with.
Remove the three JIS screws that retain the plate surrounding the rear optical unit.
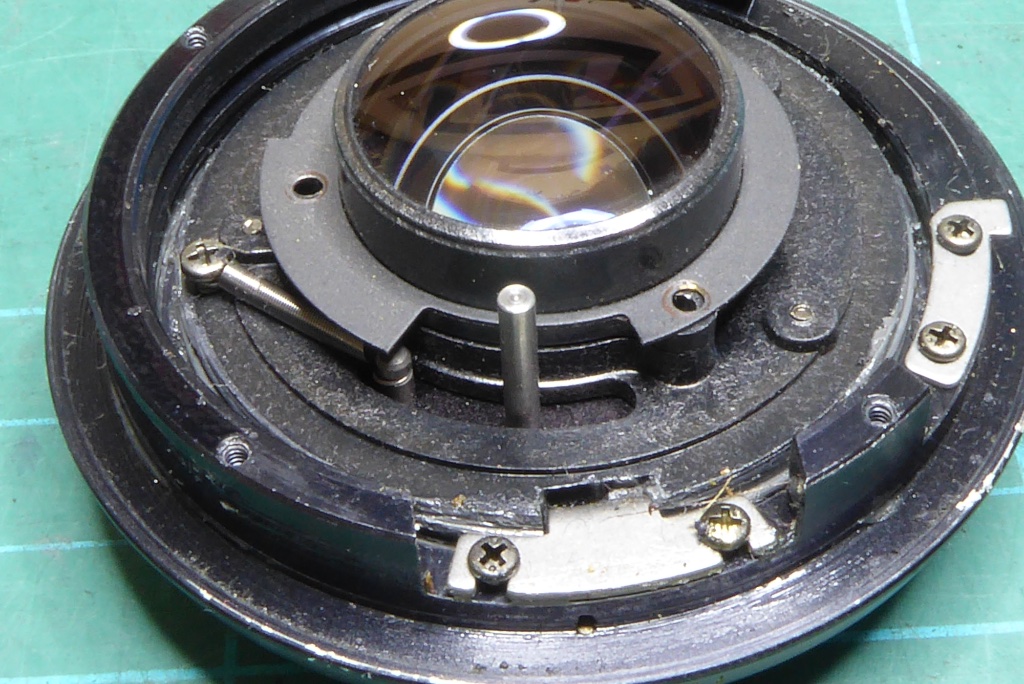
Note how the plate has a cut out for the aperture control lever.
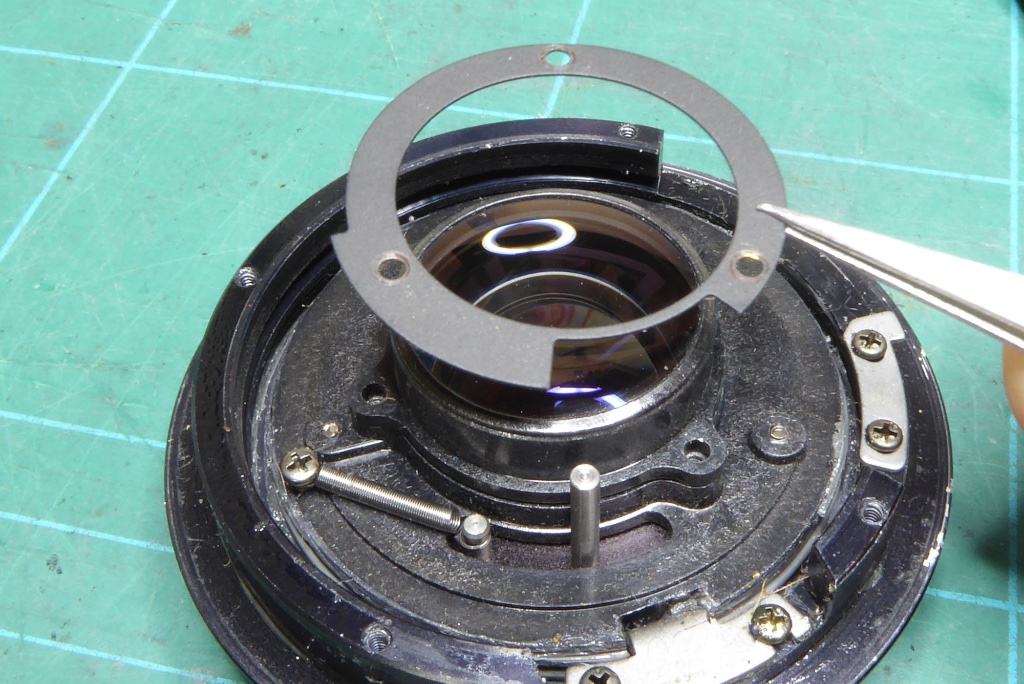
Remove the plate.
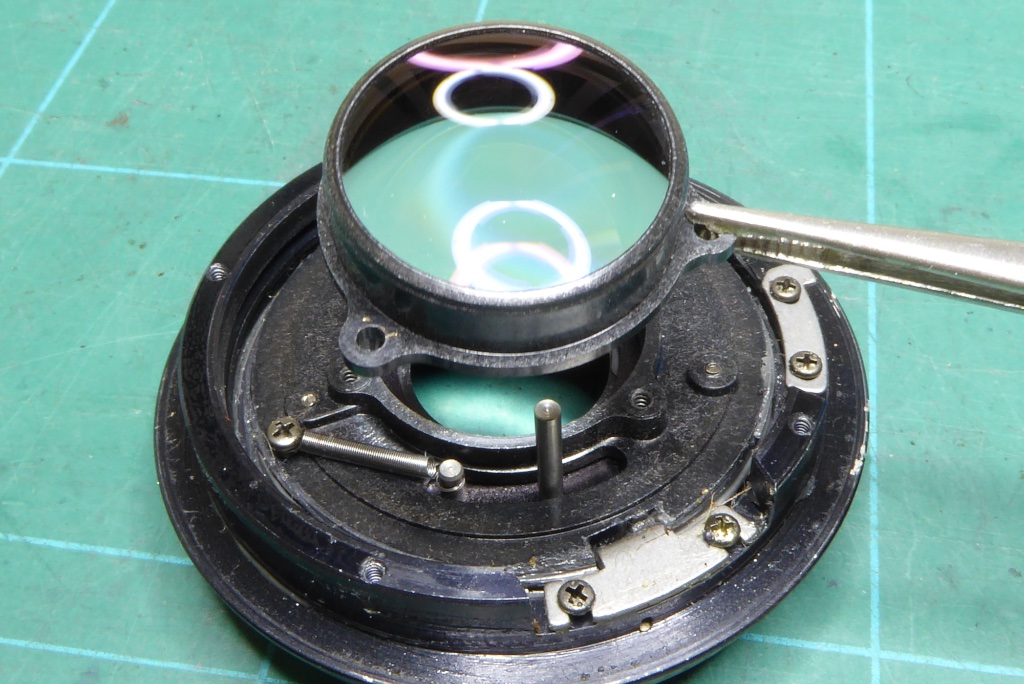
The rear optical unit can now be removed. Store this safely.
Do not clean it yet – it’s best to leave the optical surfaces to last to reduce the amount of cleaning they are subjected to.
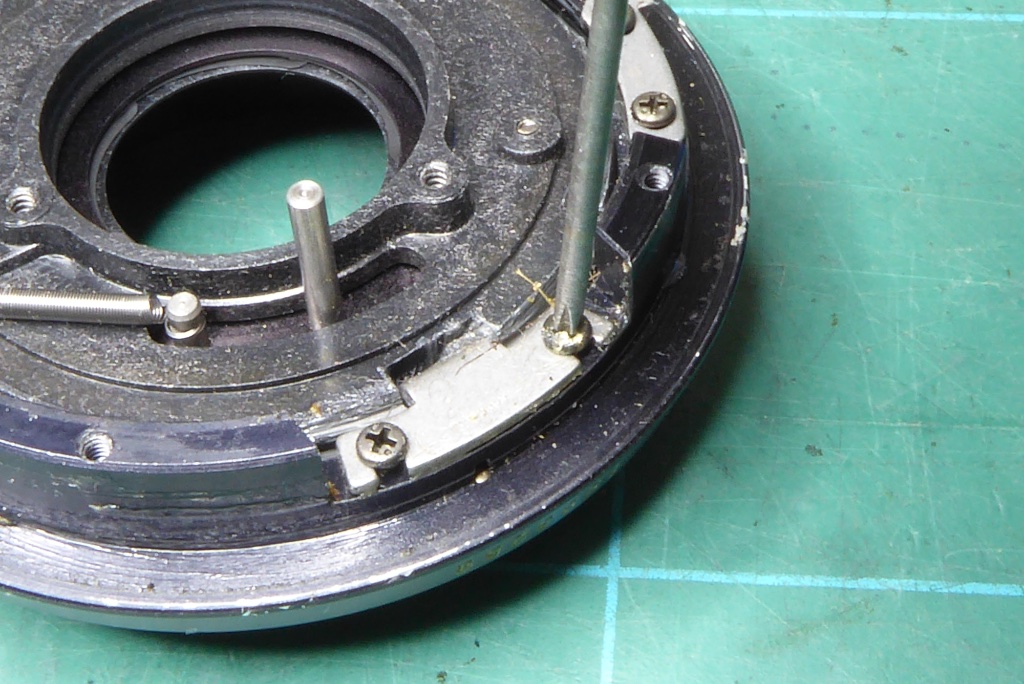
The focus lock tab can now be removed. If you are going to hit trouble with an MD lens this is where it will be. These screws were often glued into place by the factory.
You absolutely need the correct sized JUS screwdriver for these or you will round the heads off.
If the lock tab screws don’t shift easily use a soldering iron to heat the screw head. Once the screw head is hot the glue should give way. Be careful while doing this as the lens is mostly plastic which will melt.
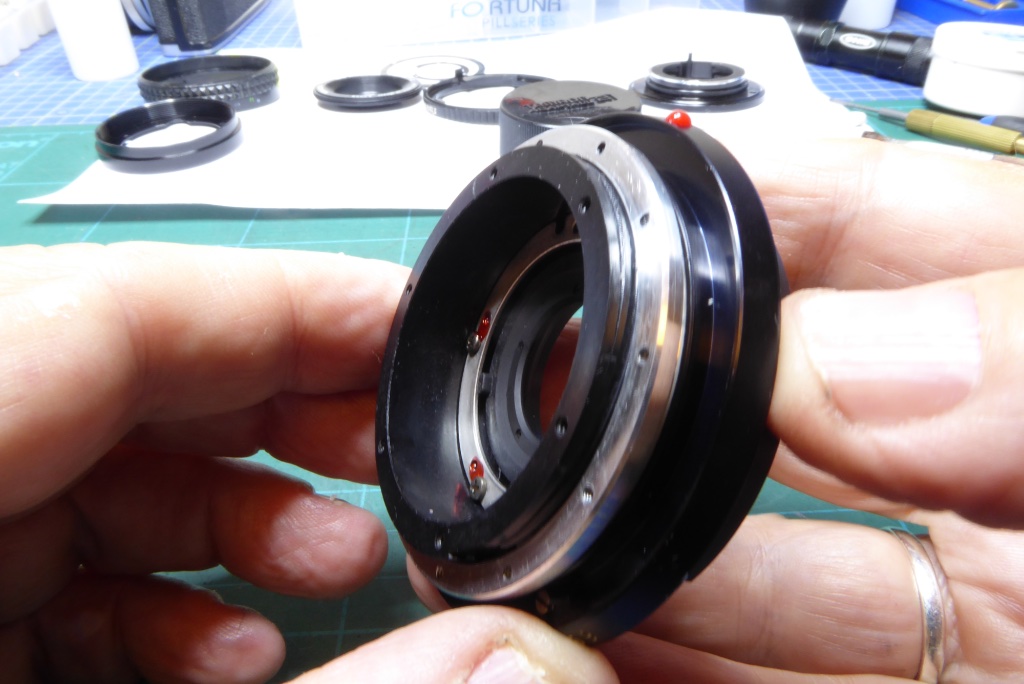
With no lock tab securing the helicoils you can now simply unscrew the inner and outer helicoils from the lens body.
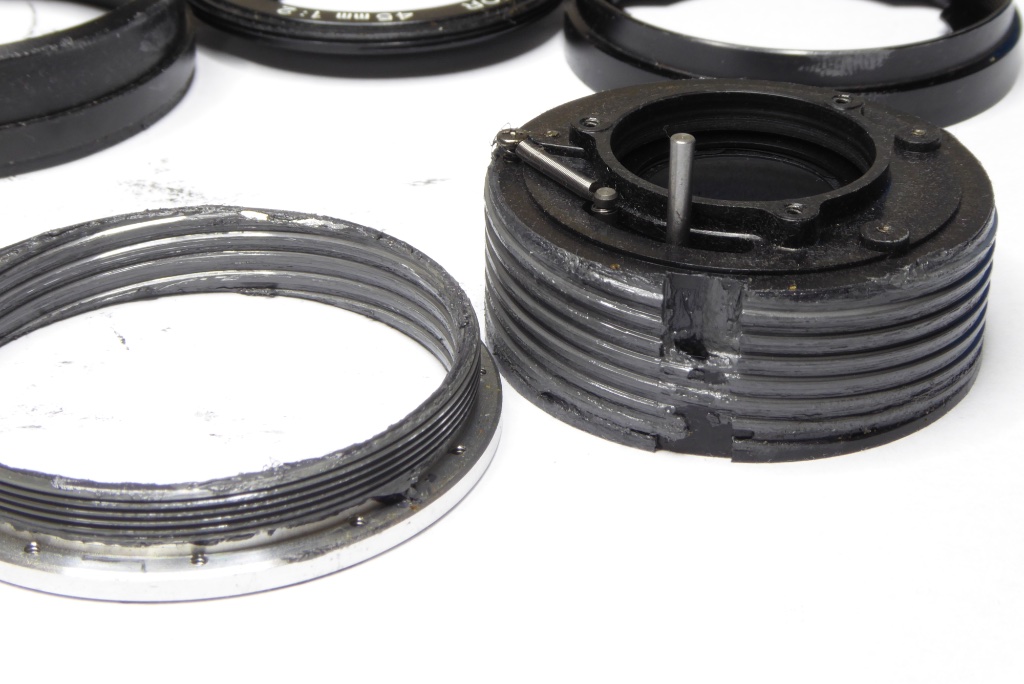
Here is the outer helicoil (silver) and the inner (black) helicoil separated.
The inner helicoil contains the diaphragm mechanism so needs to be handled with extreme care during cleaning.
On this lens the lubricant had turned into something like tar and it was an awful job to get it clean.
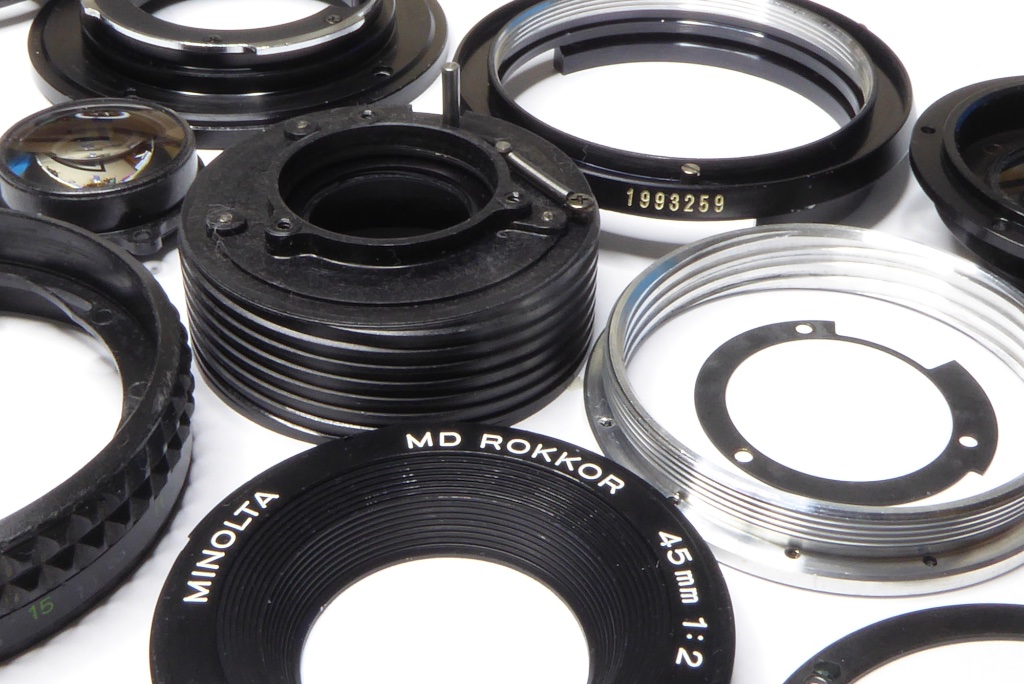
With the lens almost completely stripped you can now clean all of the lens body work.
Note that the rear element group, diaphragm and inner helicoil are all one piece. You are advised not to take this to pieces.
To clean the inner helicoil with it’s built its diaphragm I use cotton wool balls to take off the worst of the mess on the threads and then use a cotton wool ball dampened with Isoprop to slowly work away the rest of the mess. Once its dry I use a a soft old tooth brush to clean away any remains. You need to be very careful then mess does not get into the diaphragm mechanism so work very slowly and methodically with this piece.
The diaphragm of the MD series almost never gums up so it is rare you would ever need to take this part and I don’t recommend stripping it down for fun.
The rest of the lens body parts can be cleaned with Isoprop or hot water and a mild detergent. When I service a lens EVERYTHING gets cleaned. For final finishing I flush all parts BUT NOT THE INNER HELICOIL AND DIAPHRAGM under cold water and then blow dry.
Be very careful when cleaning the lens mount part as it contains springs and levers. I use Isoprop and a soft toothbrush for this.
The helicoils and lens body thread for the outer helicoil are then chased out with cocktail sticks to ensure that all thread surfaces are free of dirt and contaminants. Finally make sure the helicoils are running smoothly without lubricants to assess if any threads are damaged. Very often people have seen You Tube videos and poured lighter fuel in the lens to get the focus moving. This is a fast fix but creates long term issues with excessive thread wear and as a result you may need extreme measures like a lapping compound to polish out any defects in the threads.
Repairing the rubber grip on the 45mm f2 MD Rokkor
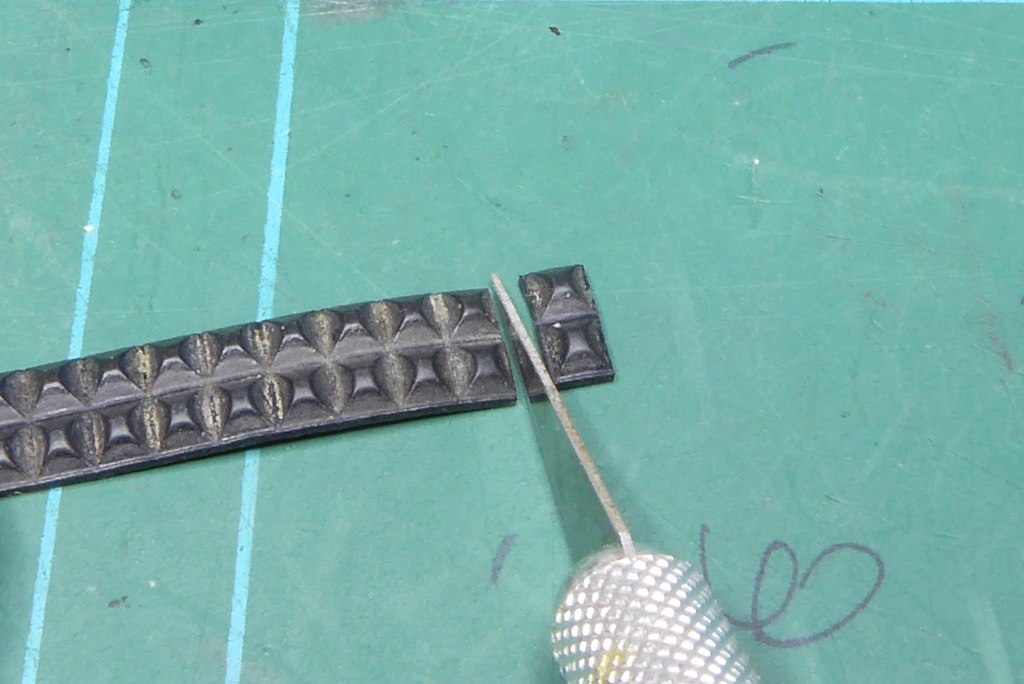
On this lens the rubber grip was in a terrible shape. It was so loose that if you tipped the lens nose down the grip would simply fall off.
Sometimes it is possible to reattach a slightly loose grip with double sided tape or use boiling water to shrink the grip. Some people swear by a soak in Naptha. These fixes will work if a grip is slightly loose but in this case there was no magic solution to shrink the grip by around 1/4 inch. Plus the grip had flattened out in its width so would not easily fit the focus barrel cut out for it.
The radical fix was to cut three of the diamond patterns out to reduce the grips circumference. I went slowly cutting one section at a time until the fit was suitably tight.
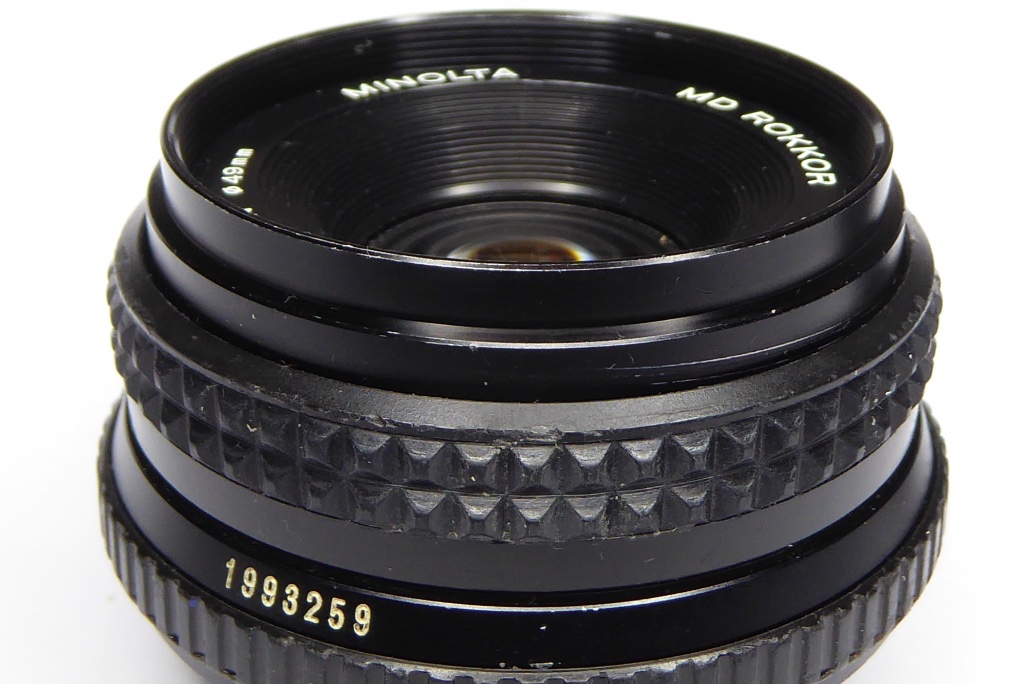
Once the fit was ok the barrel and rubber grip were cleaned and I used Evo-Stick Serious Glue to reapply the grip stretching it into place. Normally I would use a contact adhesive but I wanted time to make sure I could stretch the rubber into place and securely clamp it.
After the glue had set fully the grip was cleaned with a nice gritty toothpaste and soft toothbrush. Toothpaste can do wonders for rubber. The grittiness in it removes dirt and the oxidised layer and the menthol oil helps to rejuvenate the rubber.
The join was placed on the base of the lens to make it inconspicuous but in truth unless you knew the join was there and where to look you’d never see it after this repair.
Minolta MD Rokkor 45mm f2 Repair Guide – Reassembly
When reassembling do not over-tighten any screws. This lens can be awkward and you may end up disassembling. The name of the game is lightly tighten stuff down. Test the lens and if all is well go back and retighten screws after you are sure all is working well.
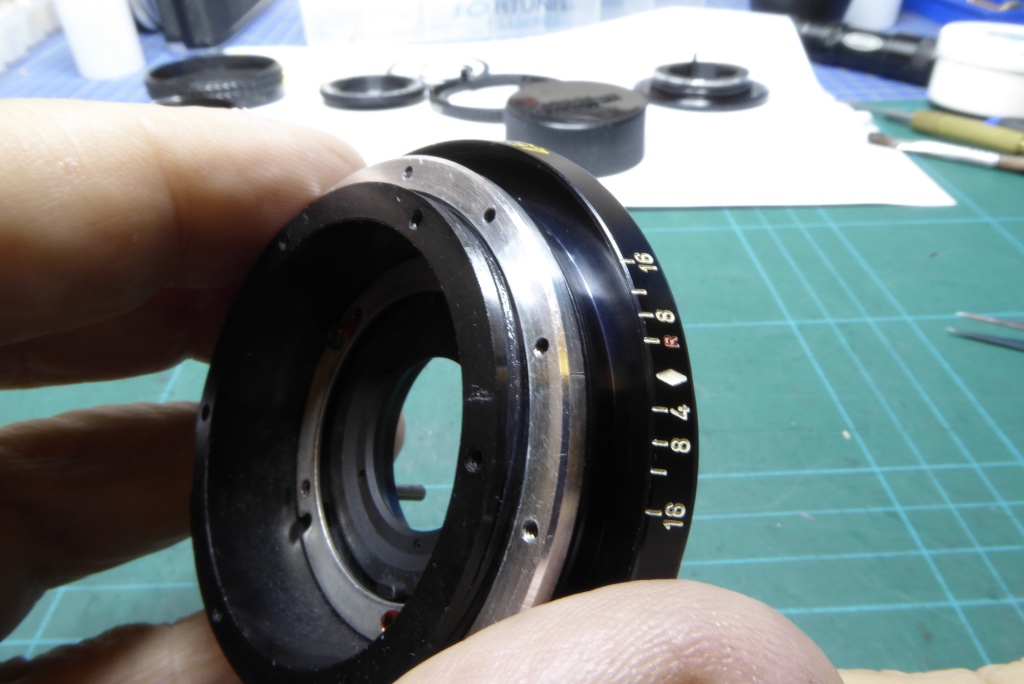
First lubricate the helicoils. I usually use Helimax XP for Minolta MD series as it provides a perfect damping while retaining a good feel. It’s also able to work at both high and low temperatures and resists migration.
The outer metal helicoil needs only a light coating while the inner helicoils needs a slightly thicker dose. Getting the feel right is a bit of witchcraft and comes with experience so you will need to experiment to get the feel right.
The name of the game is to get the helicoils at the same distances from each other and the body as you measured earlier and also aligned with the marks you made PLUS…
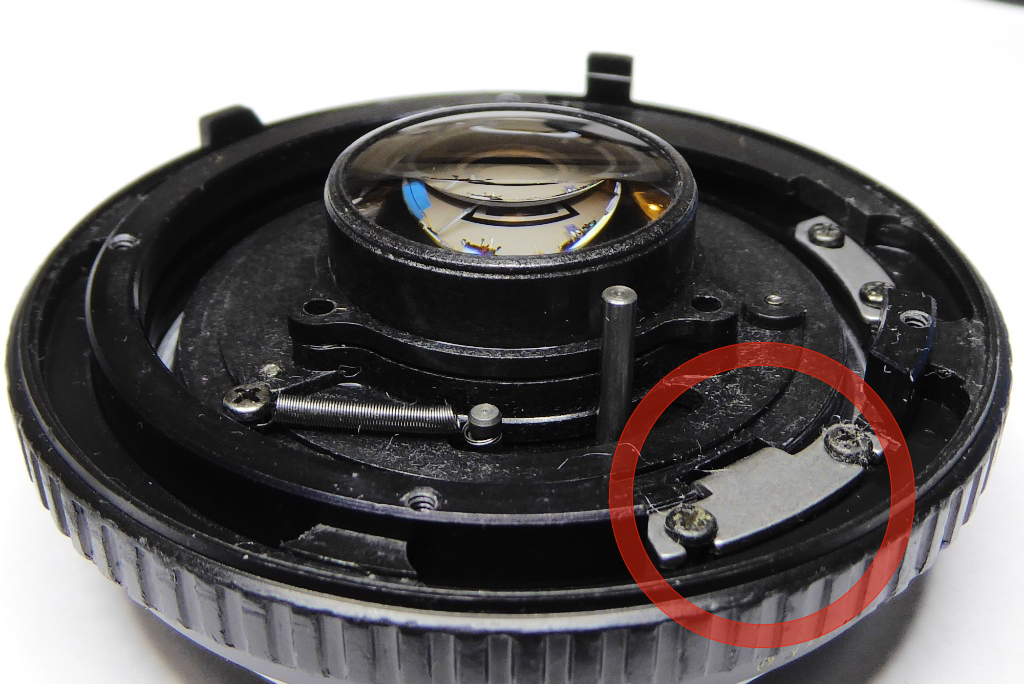
…making sure that with the distances set correctly and aligned with the marks you made before disassembly the focus tab fitting is in the right position.
The inner helicoil has to align with the focus tab position with the measurements and the marks.
Note: In this picture the assembly had progressed a bit and the aperture ring and rear optical block has been installed.
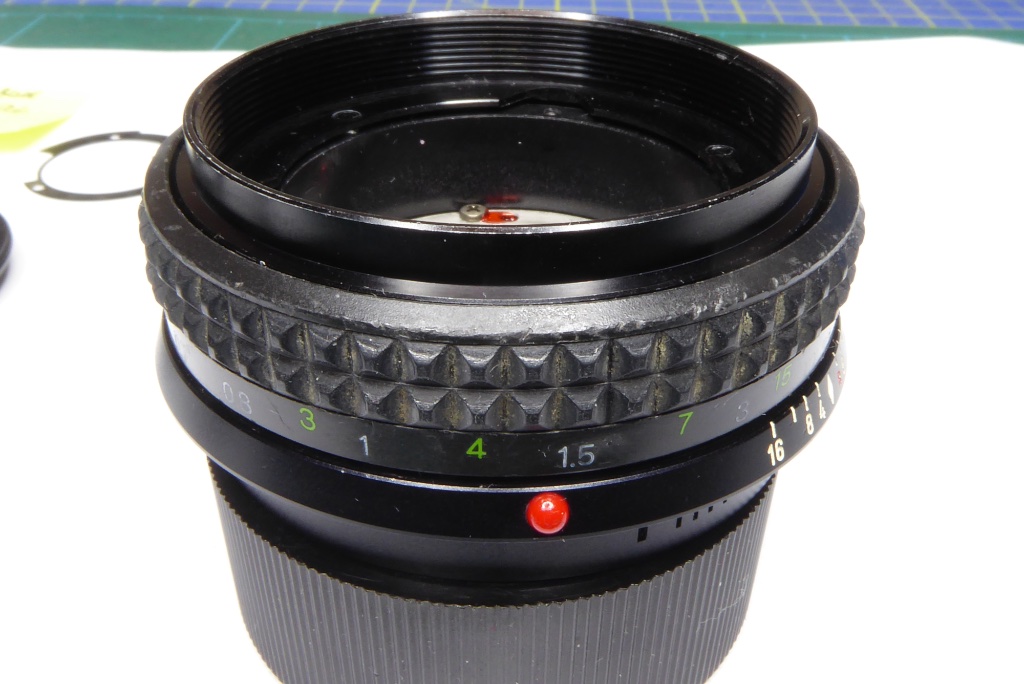
A quick test of whether things are close with regards to the helicoils is to drop the focus barrel on to the lens at this point and place the filter ring on top. If its set right the filter ring outer edge will sit just below the top of the focus ring.
Once the front optics unit is installed the edge of the filter ring will be almost level with the edge of the focus barrel when the lens is at infinity.
Note: In this picture the aperture ring is back in place – this is just to show the relationship between the filter ring and the focus barrel.
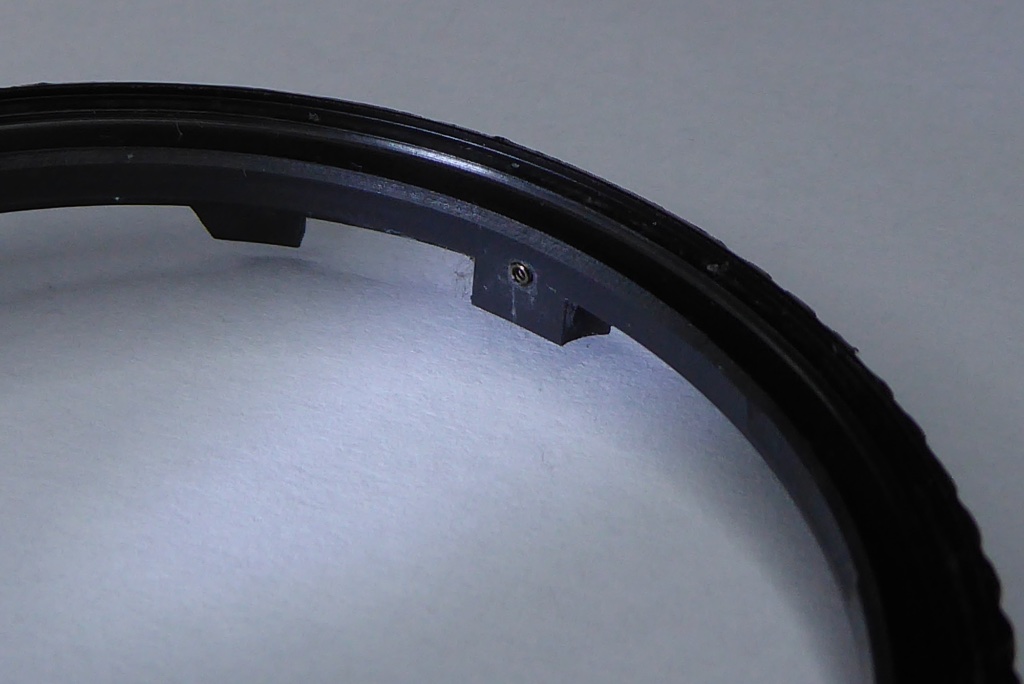
Replace the small spring back into the aperture ring if it was removed earlier.
Apply a small blob of lithium grease (Helimax XP will do) onto the top of the spring and apply the ball bearing. The grease will hold the bearing in place. Apply a small smear of grease to the detents on the lens body. This will give the aperture ring a smooth feel.
Before doing this establish how the aperture ring fits to the body. Different Rokkors and MD have differing fits. The 45mm is relatively easy as the bearing and the index marks are in more or less the same place at the top of the lens but some Minolta lenses will only allow the aperture ring to mount in one location – on the 45mm f2 Rokkor the best orientation is with the aperture ring set around the f5.6 mark.

This is the tough bit, especially for a beginner. You need to get the ball bearing trapped into position. Apply the aperture ring at a slight angle to the body to trap the ball bearing and then push the rest of the aperture ring down and into place. You may need a small amount of pressure to do this but go careful. The aperture ring is plastic and can break if you apply too much force.
Once in place test the aperture ring by rotating it to make sure it is clicking nicely in place.
Use a bucket or large Tupperware box to do this part in to minimise the risk of losing the tiny bearing.
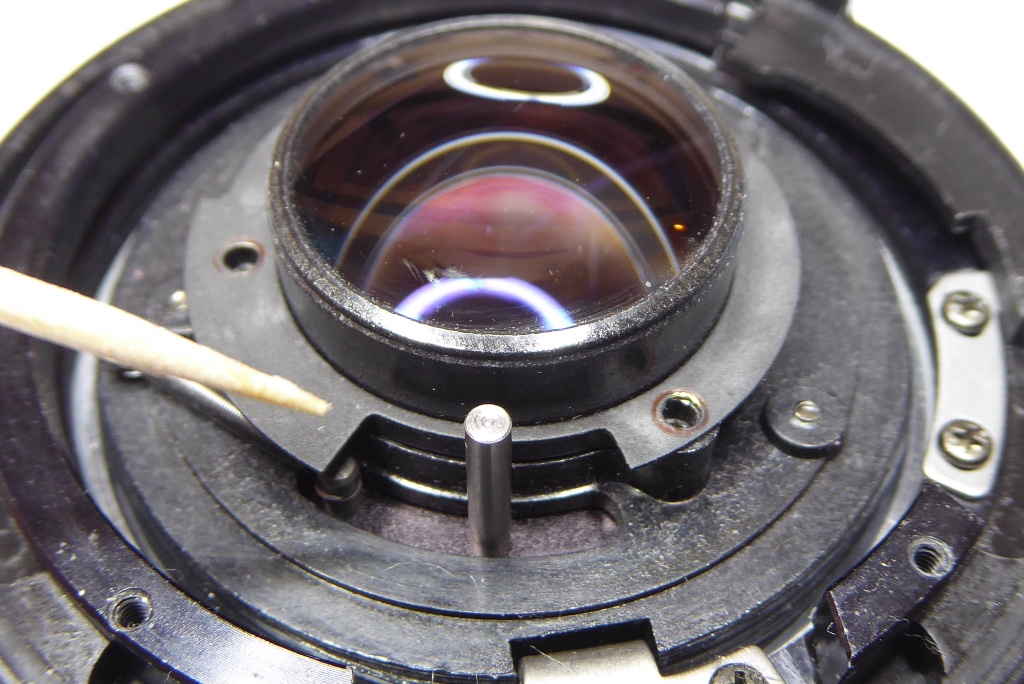
Give the rear element a clean. Normally I use just breath and a lint free cloth but if the lens is particularly hazed from oil I use a dilute Isoprop solution applied with a lint free cloth and then breath and the lint free cloth.
Replace the rear optical unit and its surround taking care to make sure the cut out in the surround is aligned with the aperture lever.
Take care as you work that the aperture ring stays in place. If it comes off you risk losing the small bearing.
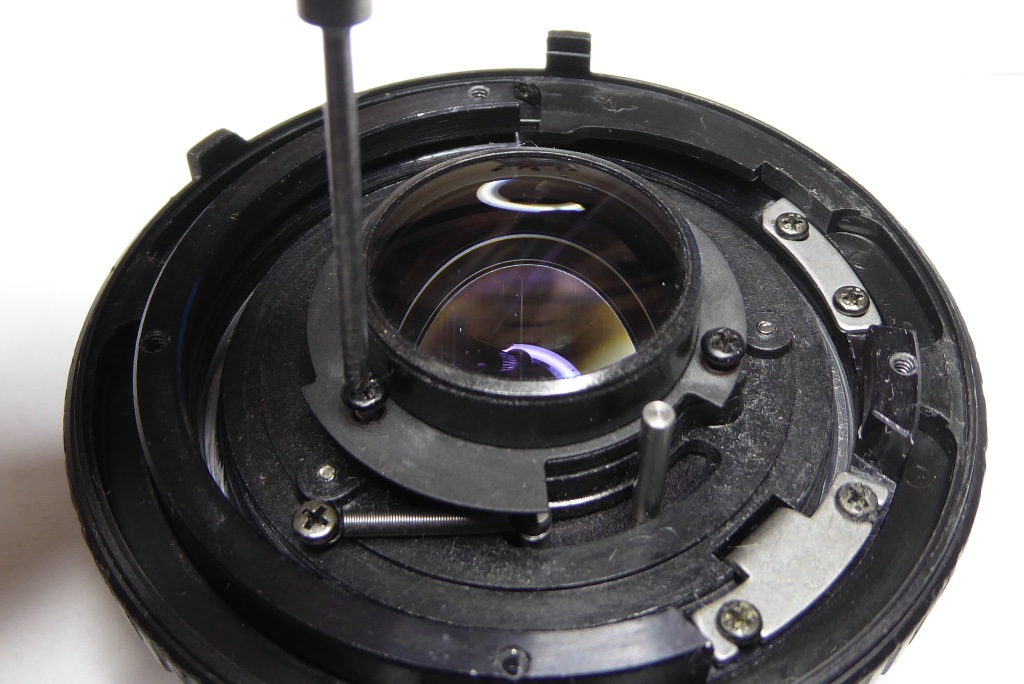
Replace the rear optical unit screws.
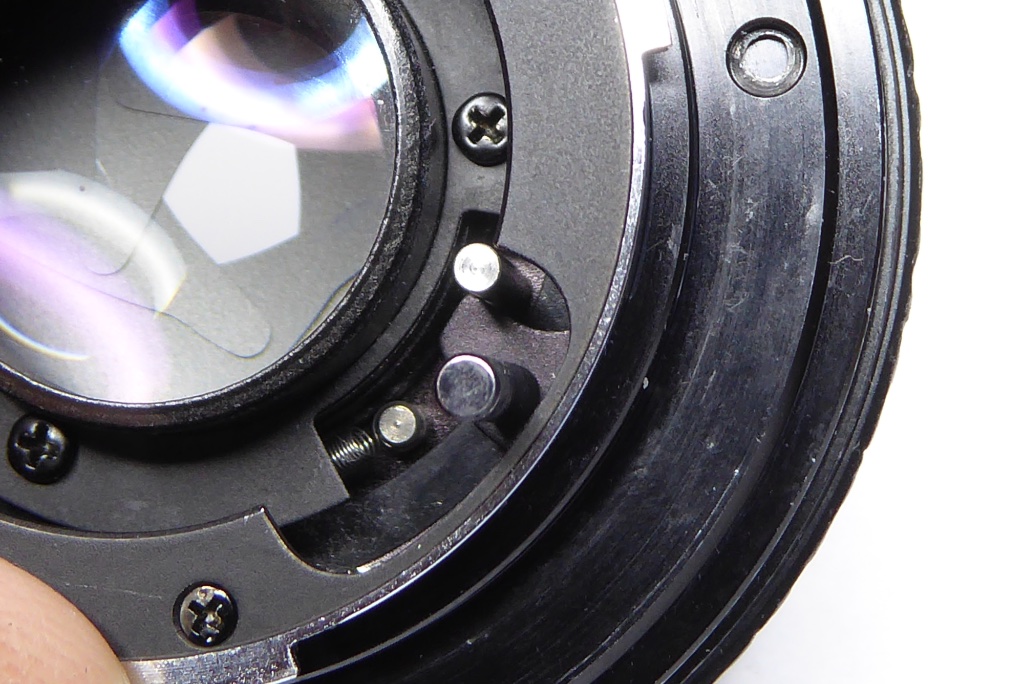
Replace the lens mount making sure that the cut out in the lens mount aperture lever ‘captures’ the aperture lever on the diaphragm assembly.
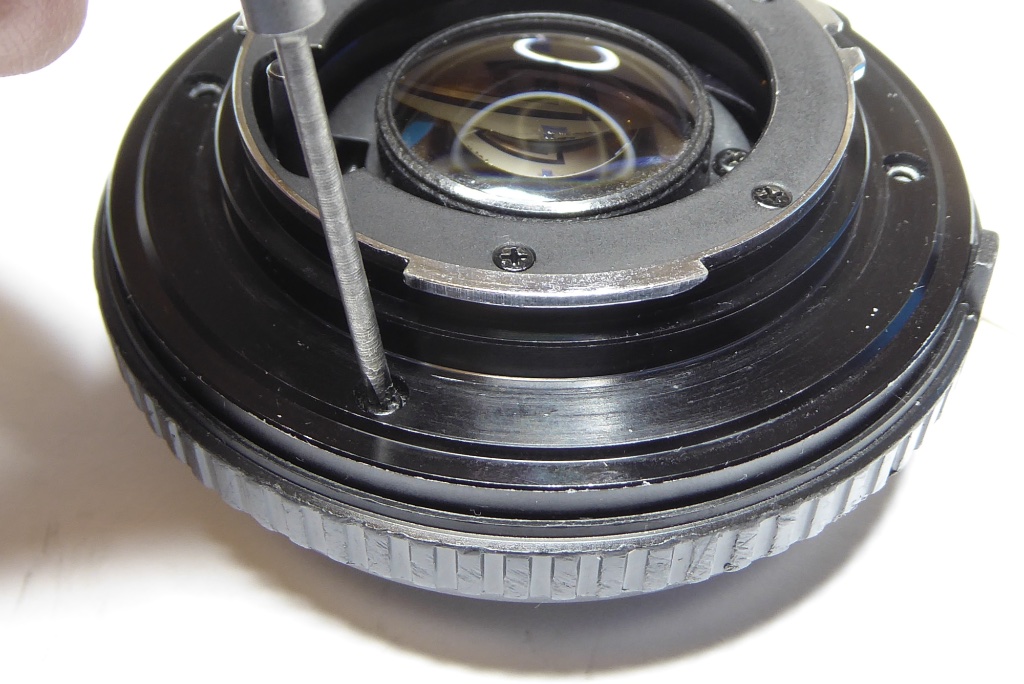
Set the aperture ring to f16 and rotate the lens mount until the diaphragm closes down and the the screw holes align with the threads on the lens body.
Replace the lens mount screws and check diaphragm is operating normally across the range of the aperture ring. At f2 the aperture blades should just clear the edge of the diaphragm. Check aperture blades are moving move with each click stop on the aperture ring.
Once happy put the rear lens cap on and turn the lens over. It’s time to assemble the front elements of the lens.
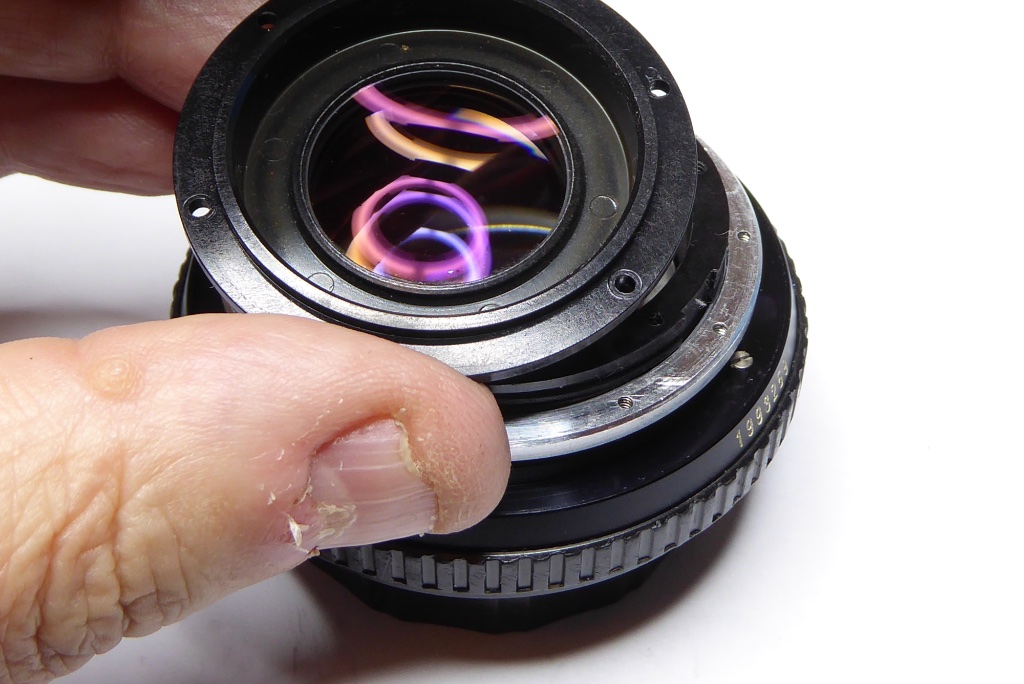
Replace the front optical unit after suitable cleaning. I use a mild Isoprop solution and then breath with a microfibre cloth and a final blow out with a rocket blower.
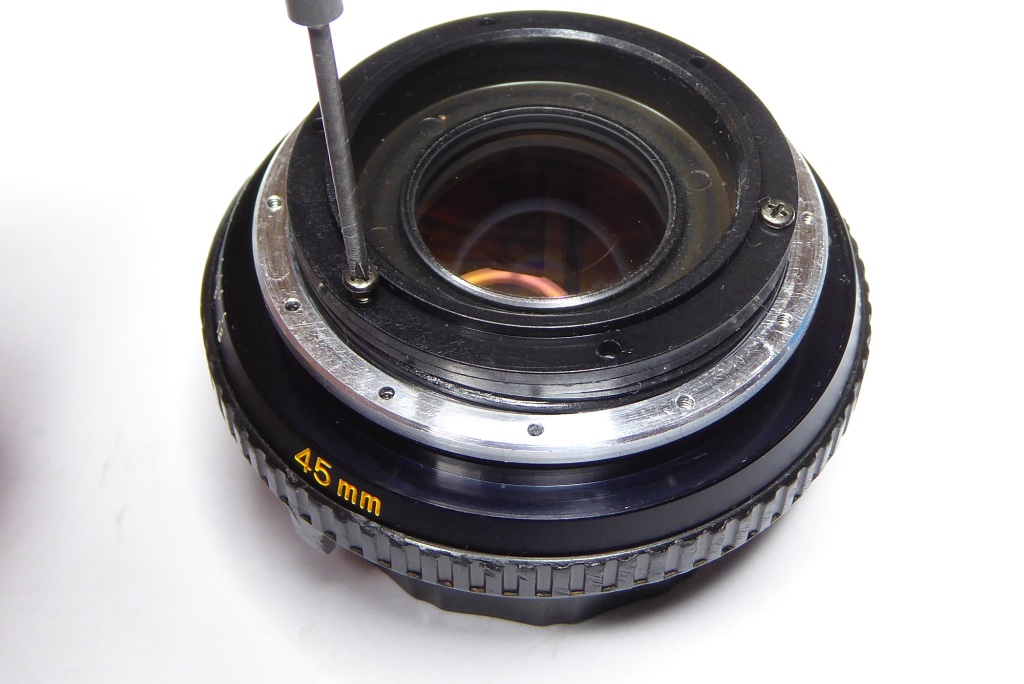
Replace the three screws that retain the front optical unit.
Normally I use a collimator to set the lens at infinity but as these are hard to come by the alternate method is to mount the lens on a known good camera. Use the silver ring showing on the lens to focus.
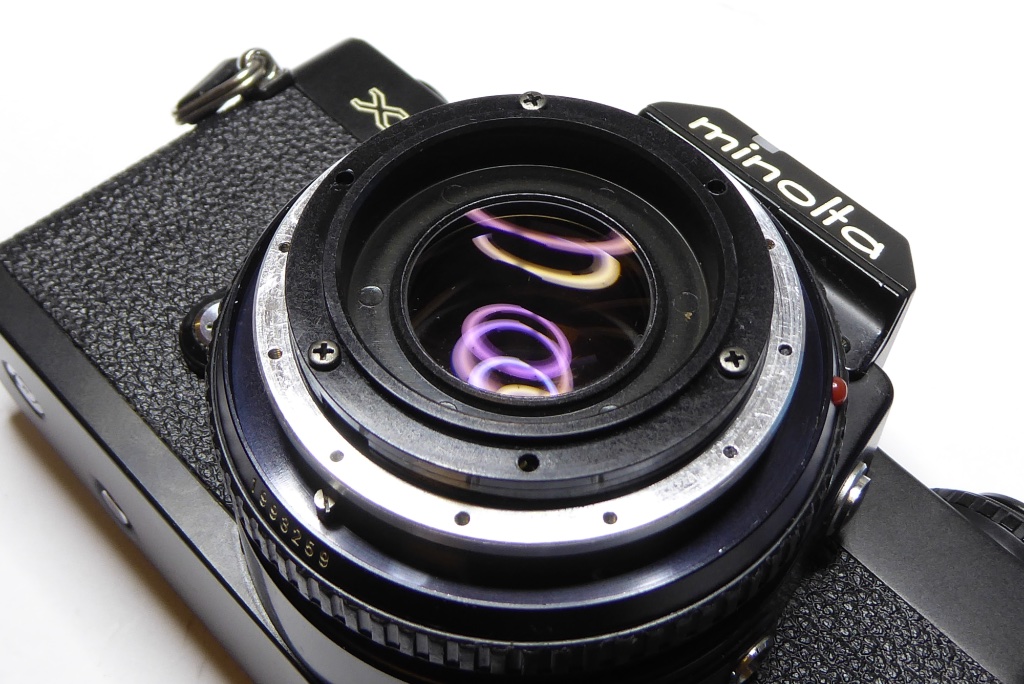
Focus on a distant object. I use some radio towers which are around 8 miles away. If all is well the lens should come to focus easily.
Once the lens is focused at infinity check that the aperture is working correctly both for automatic stop down with the camera and by manually turning the aperture ring. The 45mm F2 is unforgiving and if the focus is set too far back it will jam the aperture. It has a very narrow range over which it will come to infinity focus without causing aperture jams which is why its critical to get the distances on the helicoils as close as possible.
DO NOT MESS ABOUT BY WINDING THE FOCUS OUT!
You can cause the inner helicoil to disengage from its lock tab.
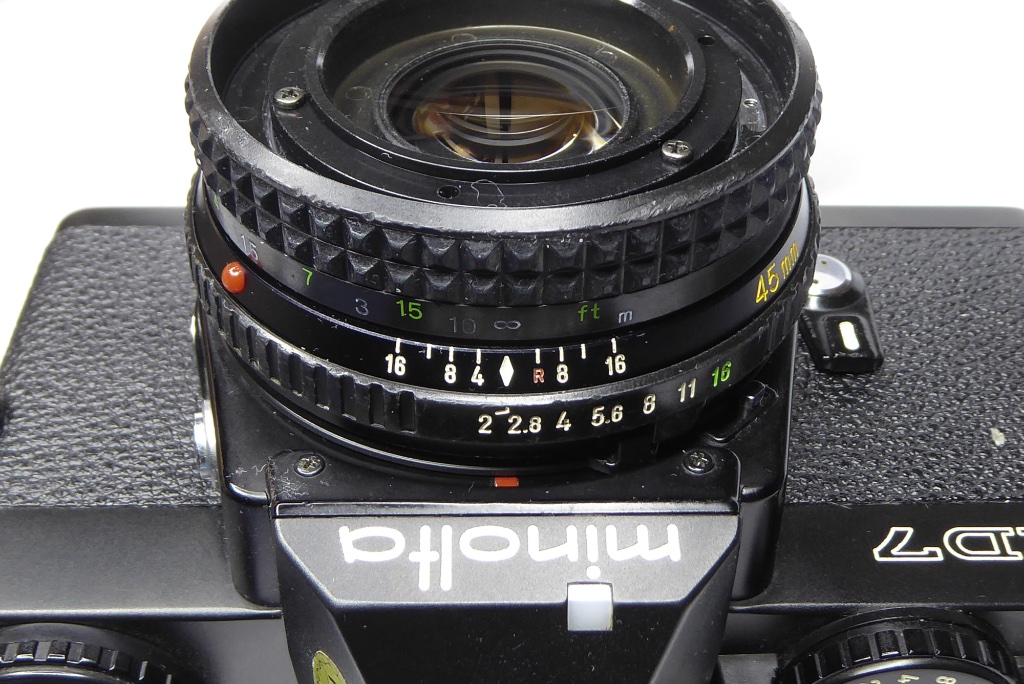
With the lens at infinity replace the focus barrel so that the infinity mark is aligned with the lens index mark.
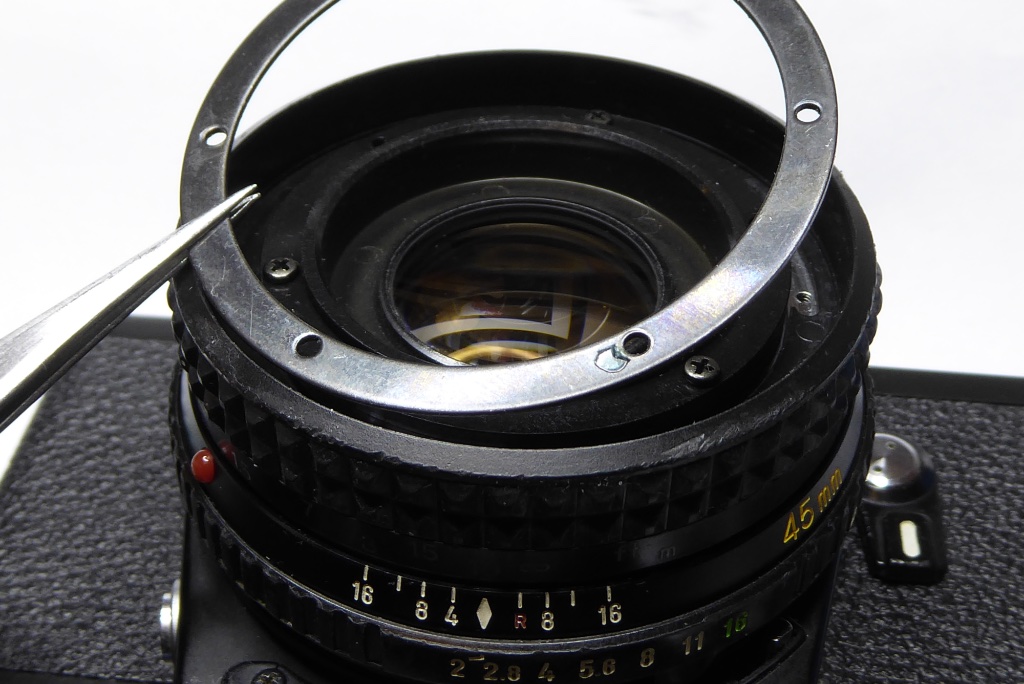
Replace the focus barrel retaining ring. Make sure it lines up with the threaded holes beneath.
Refit the screws but do not over-tighten. They will shear quite easily. Tighten no more than the pressure you can apply but having the screw driver handle between thumb and forefinger.
Check lens is fully working. Check that focus throw runs smoothly from infinity to minimum distance and that the lens is focused at infinity. Check the aperture is working correctly.
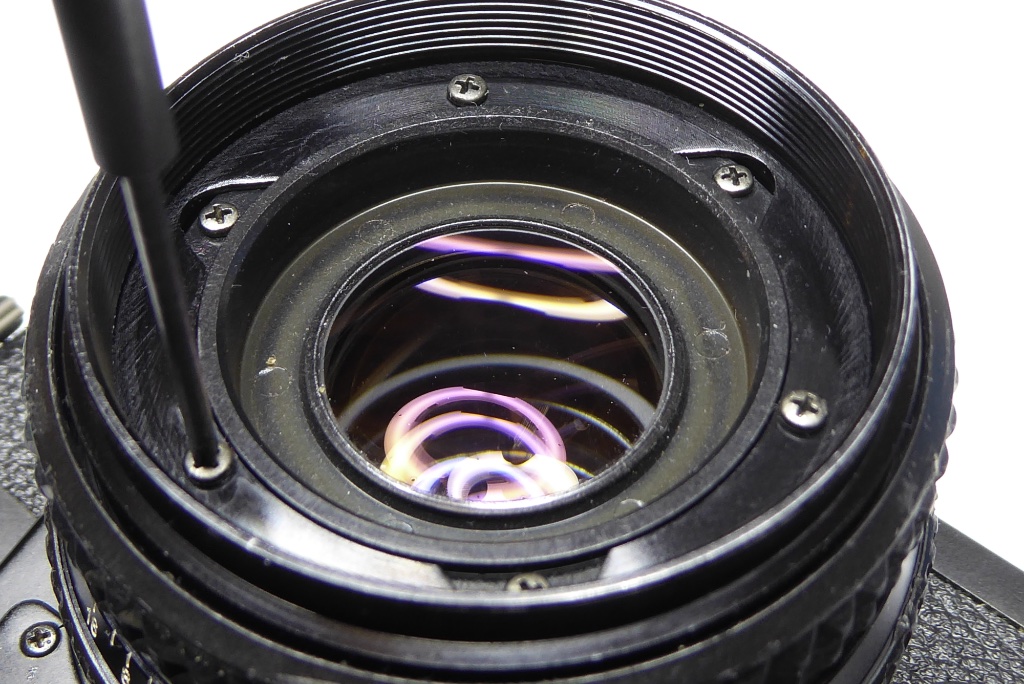
Replace the filter ring and secure with its retaining screws.
Minolta used differing filter rings – some have cuts out that go over the front optical unit retaining screws. Some have holes and some have tabs that stick out with holes in them.

Replace the beauty ring.

If all has gone well then give yourself a well deserved cup of tea some hearty self congratulation and enjoy the lens.
The lens used in this guide will be sold in our online store in due course.
This Nikon 50mm Repair Guide article can always be improved. If you have any questions and or comments we would love to hear them below. Mel.
Further Reading

Mel is one of the driving forces behind High 5 Cameras and writes all our articles.
Starting serious photography back in 1972. Over the years she got to shoot film with most of the major brands in 35mm and large format as both a studio photographer and content provider for websites in the early life of the web. These days she is rediscovering photography and has become the GOTO person for knowledge on camera repair advice.


