A film camera batteries dilemma….
For lovers of old cameras, one of the biggest headaches is finding batteries for powering the electronics. Many classic 35mm SLRs were designed to use the very long lasting Mercury type batteries. Mercury type batteries had some very attractive properties for camera manufacturers needing a stable power supply for sensitive electronics like light meters. Mercury cells could provide a very stable output over a long period of time, years even. This had benefits to the manufacturer in terms of accuracy and to the end user by reducing battery replacements. However, Mercury has a huge downside – it is environmentally toxic and as a result Mercury cells were banned quite some time ago in most countries. This isn’t greenie rhetoric and if you want to see just how hazardous Mercury is in the environment just do a bit of reading or watch the film ‘Minamata’.
For those of us with a love for old cameras though this does pose a problem and it’s one of the most common dilemmas for the tyro film photographer using classic gear from the 1960s and 1970s. The original Mercury cells output at 1.35 Volts and most modern button batteries output at 1.5 Volts – its all down to the chemistry of the battery.
Each battery type discharges in a specific way and provides a specific power in volts. Cameras and light meters usually need a very stable supply at very close to the original battery specification voltage.

You can see from the chart a rough approximation of how the batteries discharge over time. The chart is based on hours of continual use. You can see from the chart that Zinc Air batteries closely approximate the power output of a Mercury type – albeit with less run time.
Most cameras designed after the mid 70s used more conventional 1.5 Volt batteries and I have owned quite a few. These include the Pentax K series and the Minolta X series. It’s worth mentioning that if you have one of these it’s ALWAYS best to use Silver Oxide types. These may be more expensive but are longer lasting with more predictable discharge curves. Why worry? – Well a failing battery is going to give you wrong readings on your meter and result in under exposed pictures and with more complex cameras like the Minolta X series failing film camera batteries may cause odd problems to arise, hung up shutters and apparent fail conditions which may be erratic.
How do you tell the difference between Alkaline and Silver Oxide? It’s all in the naming of them – the prefix to the battery number will tell you if its Silver Oxide or Alkaline.
L = Alkaline
SR = Silver Oxide
LR = Alkaline
SG = Silver Oxide
AG = Alkaline
Where Silver Oxide cells score over their Alkaline counterpart is in their ability to maintain a more stable voltage. This characteristic makes them better for reliable metering.
Be wary as many online sellers will be selling common alkaline types as Silver Oxide and sellers are often ignorant of the differences. Besides cheap film camera batteries are almost never a good investment as they will not last long and can leak.
For cameras that need the 1.35 Volt Mercury types in this section I’ll outline the options you have:-
OPTION 1 – JUNK THE ONBOARD METER and buy yourself a modern external meter. OK its not what you want to hear but the fact is that old cameras very frequently have dying light cells anyway. The light metering cells themselves decay with time and as the electronics age their accuracy degrades as well. But, if like me you just want the damn camera to work as intended and like the convenience of a built-in meter let’s look at some other options…
OPTION 2 – USE THE SUNNY 16 RULE and learn to gauge exposure by looking at the light. It’s tricky to be sure and takes some practice. With black and white film which has a good exposure latitude you can pull it off with experience but it’s tough without any guide if the lighting is tricky.
OPTION 3 – EXPOSURE COMPENSATION. Load the camera with 1.5 Volt batteries and compare with a known good camera. Usually you will be 1.5 to 2 stops adrift so either tweak the exposure compensation knob if the camera has one or remember that whatever the meter is telling you over exposure by at least 1.5 stops. It’s a headache as many meters do not run in a linear fashion and as a result the 1.5 Volts will be causing the meter to be inaccurate at the extreme ends of its range.
OPTION 4 – HAVE THE METER RECALIBRATED by a professional to use a currently available 1.5 cell. This is not as easy as it sounds as the meters in many old cameras had specific needs and their electronics were designed with an exact 1.35 Volts in mind. The meters do not work in a simple linear fashion so adjustment may be difficult, impossible or provide under or over values at the extreme ends of the range.
OPTION 5 – THE DIODE MODIFICATION. Many cameras can be adapted using a simple diode modification that will drop the battery voltage down from 1.5 Volts to 1.35 Volts. Its an easy modification but will require a known good camera to compare results with as the meter will need recalibrating and just like OPTION 2 may mean the meter reads under or over at the extreme ends of the scale. For myself I don’t like bodging in parts to classic cameras and prefer to keep them 100% authentic.
Wow – it’s a counsel of despair here.  All the options seem difficult, less than wonderful or expensive.  Any chance of help here in this article?
Read on...
OPTION 6 – THE WEINCELL. These are Zinc Air types with the same case style as the original Mercury type so are a direct replacement. The battery is sized exactly the same as the original Mercury type. Zinc Air types do start to discharge immediately on removal of the safety tape and will continue to discharge whether the camera is used or not. Typically a Weincell (link is to a PX625 equivalent as an example) will last around 3 months. They come at a cost of around £6-£8 per battery – it’s a good and easy option but comes at a price.
OPTION 7 – MR-9 BATTERY ADAPTOR. The MR-9 is a small adaptor that contains a diode and some circuitry to adjust modern Alkaline or Silver Oxide 1.5 VOLT film camera batteries down to 1.35 Volts and come in a range of styles to fit most cameras. It’s very much the de-luxe solution and expensive at around £30 per convertor. A headache if you happen to need two of these in any older camera like a Nikon F with a metered head where it may well be cheaper to get a professional technician to adjust the meter. The upside is you can load the camera with relatively cheap modern batteries. The down side is they are expensive.
Ow! Its expensive, sadly having an addiction to old cameras is expensive but you’ll be happy to know there is a cheap, safe and easy solution which brings us to…..
OPTION 8 – 675 HEARING AID BATTERIES are an excellent substitute battery type for Mercury types. Like the Weincell batteries these are Zinc Air based so will discharge as soon as the safety tape is removed. They are however cheap and typically sold in multi packs. The price per battery is often less than £1 if you shop around. Of course like a Weincell they will only last 2-3 months at most but they are inexpensive.
To use one of these, simply wrap some non conductive material around its edge. This will be a good fit for the camera. Or go upmarket and buy an adaptor that will give the battery a good fit. Unlike the MR-9 Adaptor these are simply machined metal to give the battery a snug fit in your camera. If you go this route try and find adaptors made from stainless steel as the brass type can corrode due to the outgassing of the Zinc Air batteries. As a precaution I always remove Zinc-Air batteries when a camera is no longer in use.

Let’s look at some cameras that were designed to use the older battery types. Plus, what film camera batteries solutions work…
OLYMPUS OM-1

Early 1970s design which was designed to use Mercury batteries.
I owned a pair back then and don’t recall ever having changed batteries on them in 5 years of use. That’s how long Mercury cells lasted! The best solution here is the 675 hearing aid battery with an adaptor.
It is possible to have these recalibrated with good results but I preferred to leave mine 100% original. Fitted with 675 hearing aid batteries and an adaptor they work well and provide accurate and consistent metering.
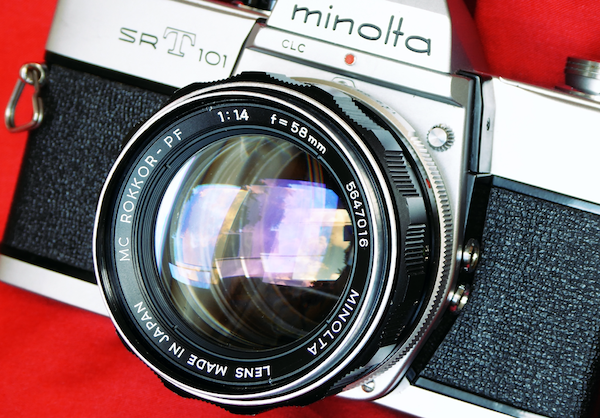
Minolta SR and SRT Series

Two camera series from the 60s and 70s which were both designed with Mercury in mind. The best solution here is the 675 hearing aid battery with an adaptor. From practical experience, hearing-aid batteries last 3 months, longer if air holes are covered with tape when not in use. Both of these camera types will have accurate metering when the 675 batteries are in use. Adjustment of the meters to use 1.5 Volt Alkaline or Silver Oxide types is tricky without professional equipment. The diode modification often seen on web forums will cause the meter to read less accurately at extreme ends. I haven’t tried an MR-9 Adaptor but would think this would lead to the same problems as the diode modification.
Circuitry in these is very primitive and are more dependent than other types on a stable/accurate voltage from the battery.
Nikon F (Photomic) – FTN Metering Head

With the Nikon F the meter is carried in the prism head of the camera. Originally designed for 2x Mercury cells the FTN head is often reported to use a bridge circuit which will work with a pair of 1.5 Volt batteries. I found that not to be the case with mine which consistently read at least a stop over.
Thankfully the metering in these can be adjusted but it’s a job for a professional. Mine was modified to work with 1.5 Volt Silver Oxide cells using adaptors. I chose this because constantly removing the metering head to insert new batteries was a nuisance. The metered head on these has the batteries inserted from below requiring the head to be removed from the camera each time – back when they were made Mercury Cells lasted geologic timescales and it would not have been a problem but removing the head every time I want to shoot was.
My conclusions based on experience…
I found the 675 Hearing Aid batteries with an adaptor ( OPTION 8) to be perfectly well suited for my needs. I seldom leave film in a camera for any length of time. I’m and am happy to accept a short operating life from the film camera batteries which are cheap as chips. With the exception of the Nikon F, all cameras I currently use to work perfectly well with this solution. Even the Nikon was happy to work with 675 batteries. This was only modified because constantly messing with the prism and meter head was annoying. Plus it always put the cameras internals at risk each time.
My recommendation – raid your grandad’s cupboard for some hearing aid batteries and get yourself an adaptor.

Thank you all so much for visiting our site and for the great feedback. This site is also a labour of love and we are passionate about keeping it alive for as long as possible. If you found this site/page helpful why not buy us a coffee to say thank you and say hi. We love to hear how you get on with our tutorials and articles. Mel xx

Mel is one of the driving forces behind High 5 Cameras and writes all our articles.
Starting serious photography back in 1972. Over the years she got to shoot film with most of the major brands in 35mm and large format as both a studio photographer and content provider for websites in the early life of the web. These days she is rediscovering photography and has become the GOTO person for knowledge on camera repair advice.